

Cloudflare is a Content Delivery Network (CDN) that can help improve the performance and security of your Magento 2 store. By caching content and distributing it across a global network of servers, Cloudflare can help reduce page load times and improve website availability.
If you want to set up Cloudflare for Magento 2, this guide is for you. I’ll cover everything from creating a Cloudflare account to configuring DNS and SSL settings, enabling caching and performance features, and configuring firewall and security settings.
Benefits of Using Cloudflare for Magento 2
Magento is a heavy resource consumption site since, in the big ecommerce industry, the trivial factor is site speed, performance, traffic, and security.
Cloudflare can help in many factors and ease the store problems to run your business effectively. There are some extra other beneficiary features that matter the most along with your hosting architecture.
Cloudflare uses 360+ data centers in its network. This means that static content from your website, such as images, can be cached on servers around the globe. Rather than loading files from your primary hosting account, you can spread your traffic load across Cloudflare’s network.
There are a few key benefits of using Cloudflare for Magento 2.
1. Improved Performance
Cloudflare provides an additional layer of speed performance by caching static content such as images and videos. Cloudflare automatically minifies the HTML, JavaScript, and CSS, reducing source code size and optimizing the browser cache in loading the content speedily.
2. Enhanced Security
Cloudflare offers a range of security features, such as DDoS protection, SSL/TLS encryption, and malware removal to protect websites.
The best part is that it offers a web application firewall (WAF) that helps block many attacks, such as bad traffic, PCI compliance, injection attempts, brute force attack, and bots designed to commit checkout fraud.
3. DNS Load Balancing
Cloudflare can help handle the load balancing of your Magento site with the DNS service, allowing traffic to be spread across servers and data centers. With DNS in mind, Cloudflare also uses technology to avoid DNS Spoofing and Man-in-the-middle attacks.
Don’t let slow loading times or security threats hold back your online business.
Set up Cloudflare for Magento 2 and enjoy faster, safer browsing experiences for your customers.
Requirements for Cloudflare and Magento 2
To set up Cloudflare for Magento 2, you need to first setup the following things:
- Cloudflare Account
- Authorized Domain
- Magento Store
To use Cloudflare, you need to own a domain (example.com). If you do not own a domain name and plan to use Cloudflare for your authoritative DNS, I highly recommend purchasing your domain name with Domain Register.
However, using Cloudflare Registrar simplifies your setup process by automatically using Cloudflare for authoritative DNS.
– Source: Cloudflare
Set up Cloudflare Account and Domain
To use Cloudflare with Magento 2, you first need to set up a Cloudflare account and add your domain to the account. This process involves a few simple steps, which I will outline below.
1: Create Cloudflare Account
Go to Cloudflare, and sign up for a free account. And if you’re an existing user, sign in to your account.
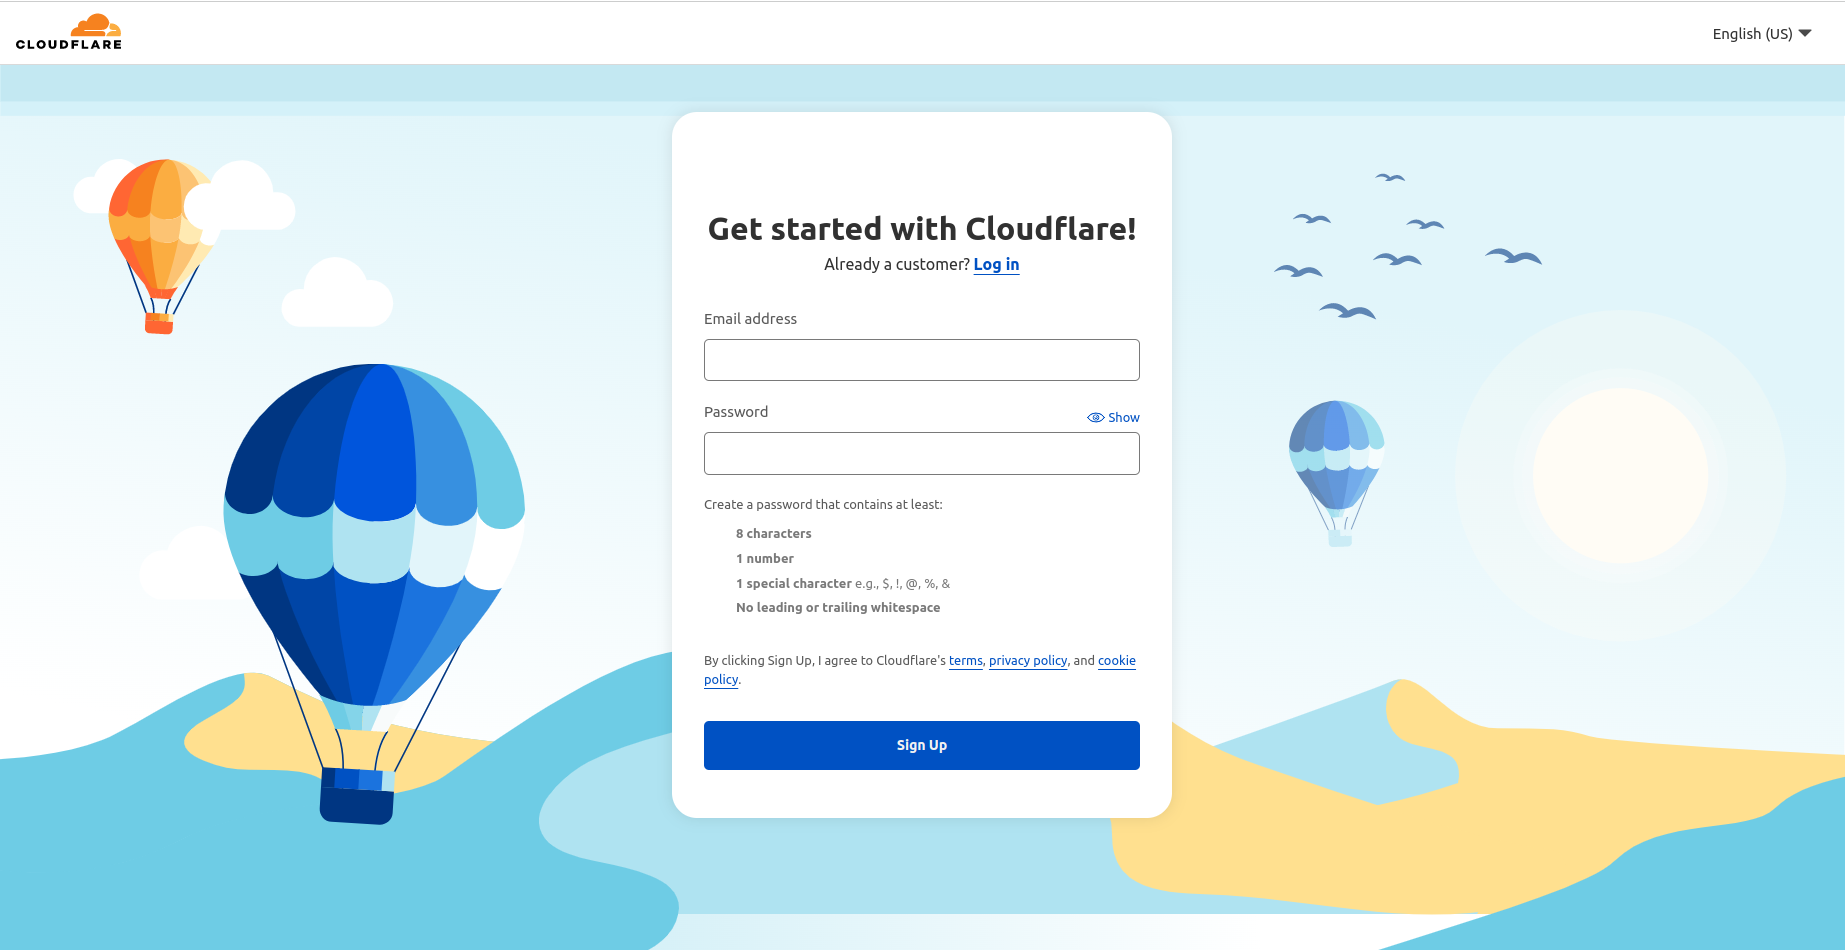
– Source: Cloudflare
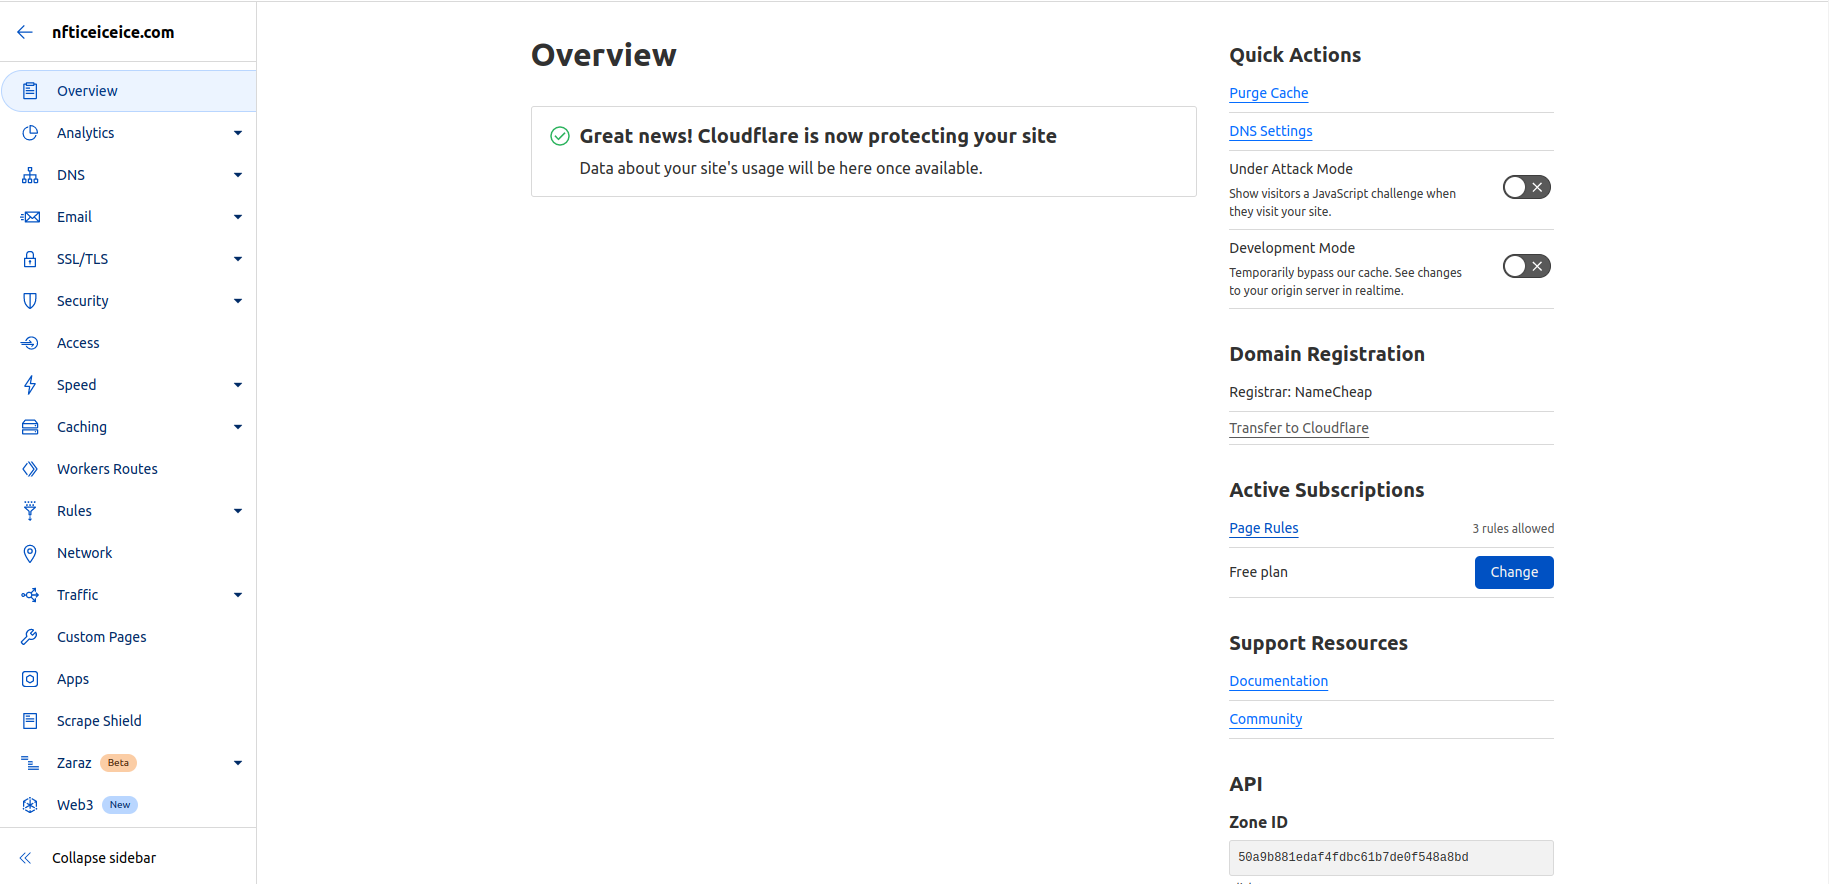
Once you sign in to your Cloudflare account, you will see a dashboard like this.
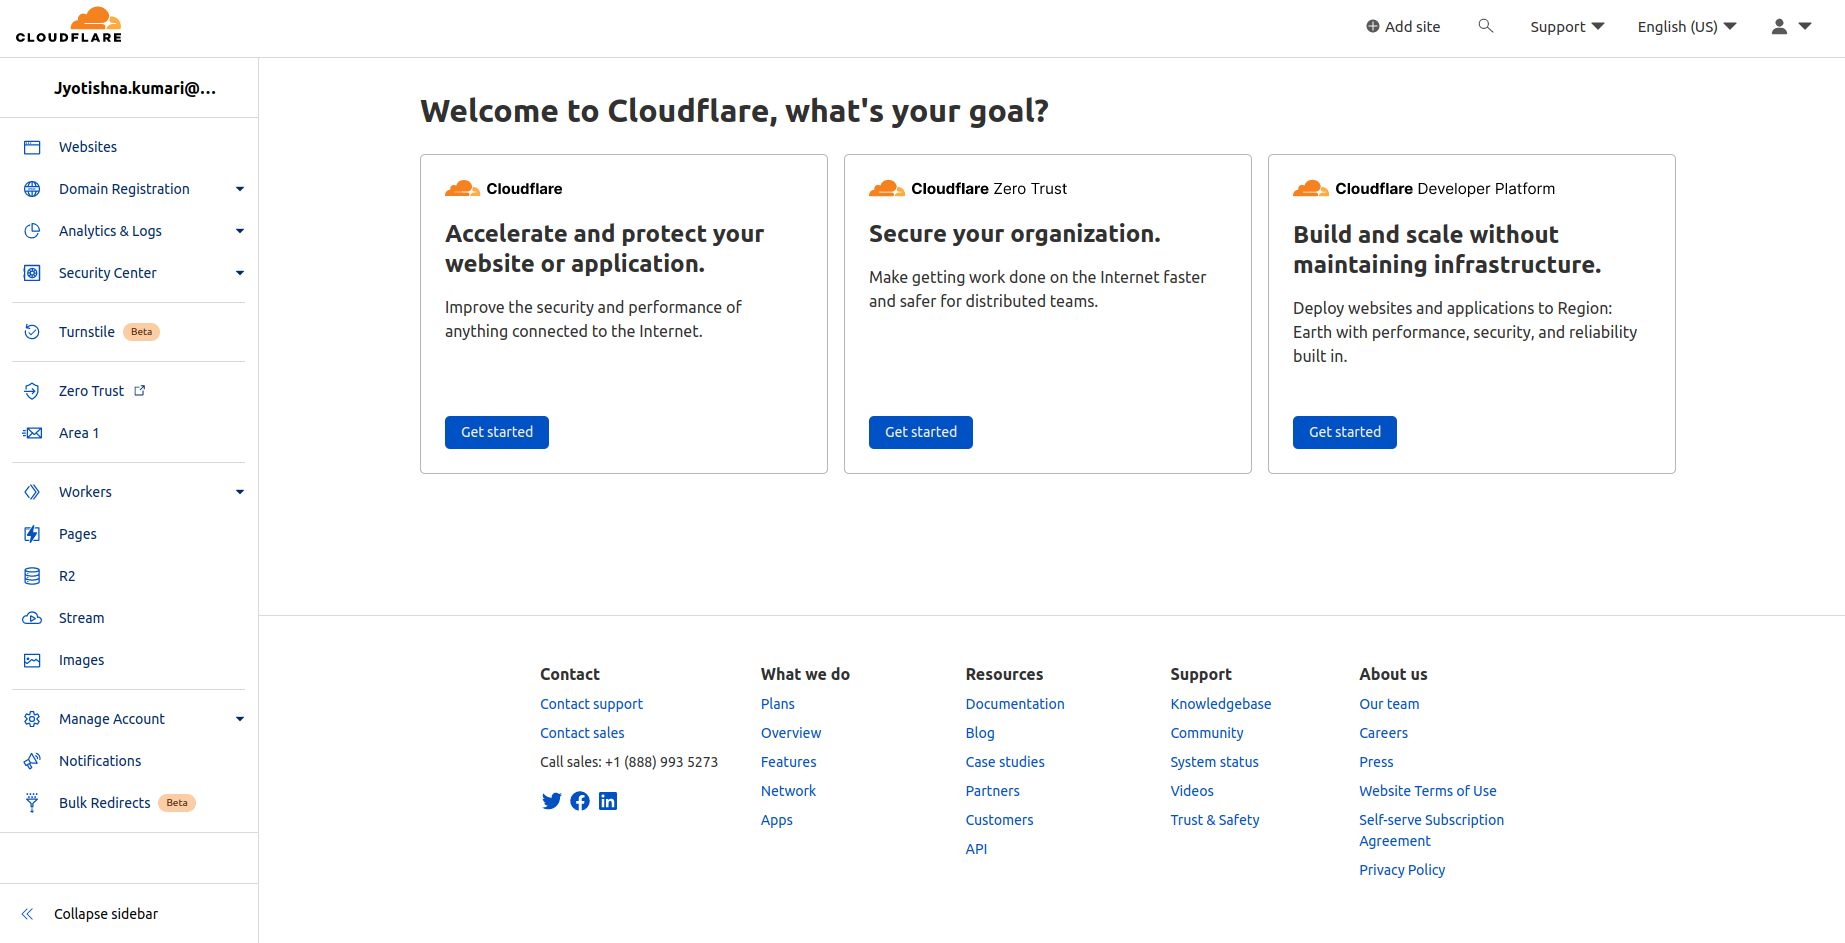
– Source: Cloudflare
2: Add Your Domain
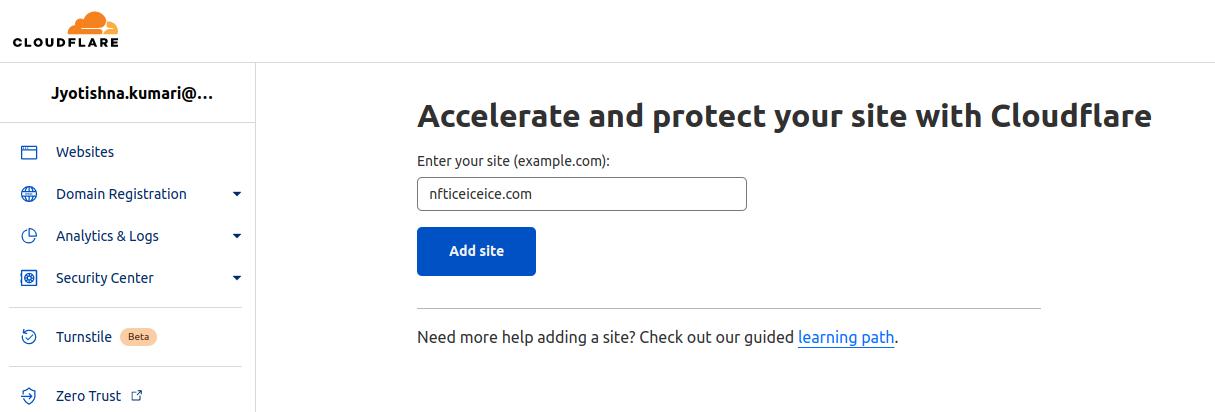
Next, add the domain name to the site field, and click the Add Site button in the top navigation bar.
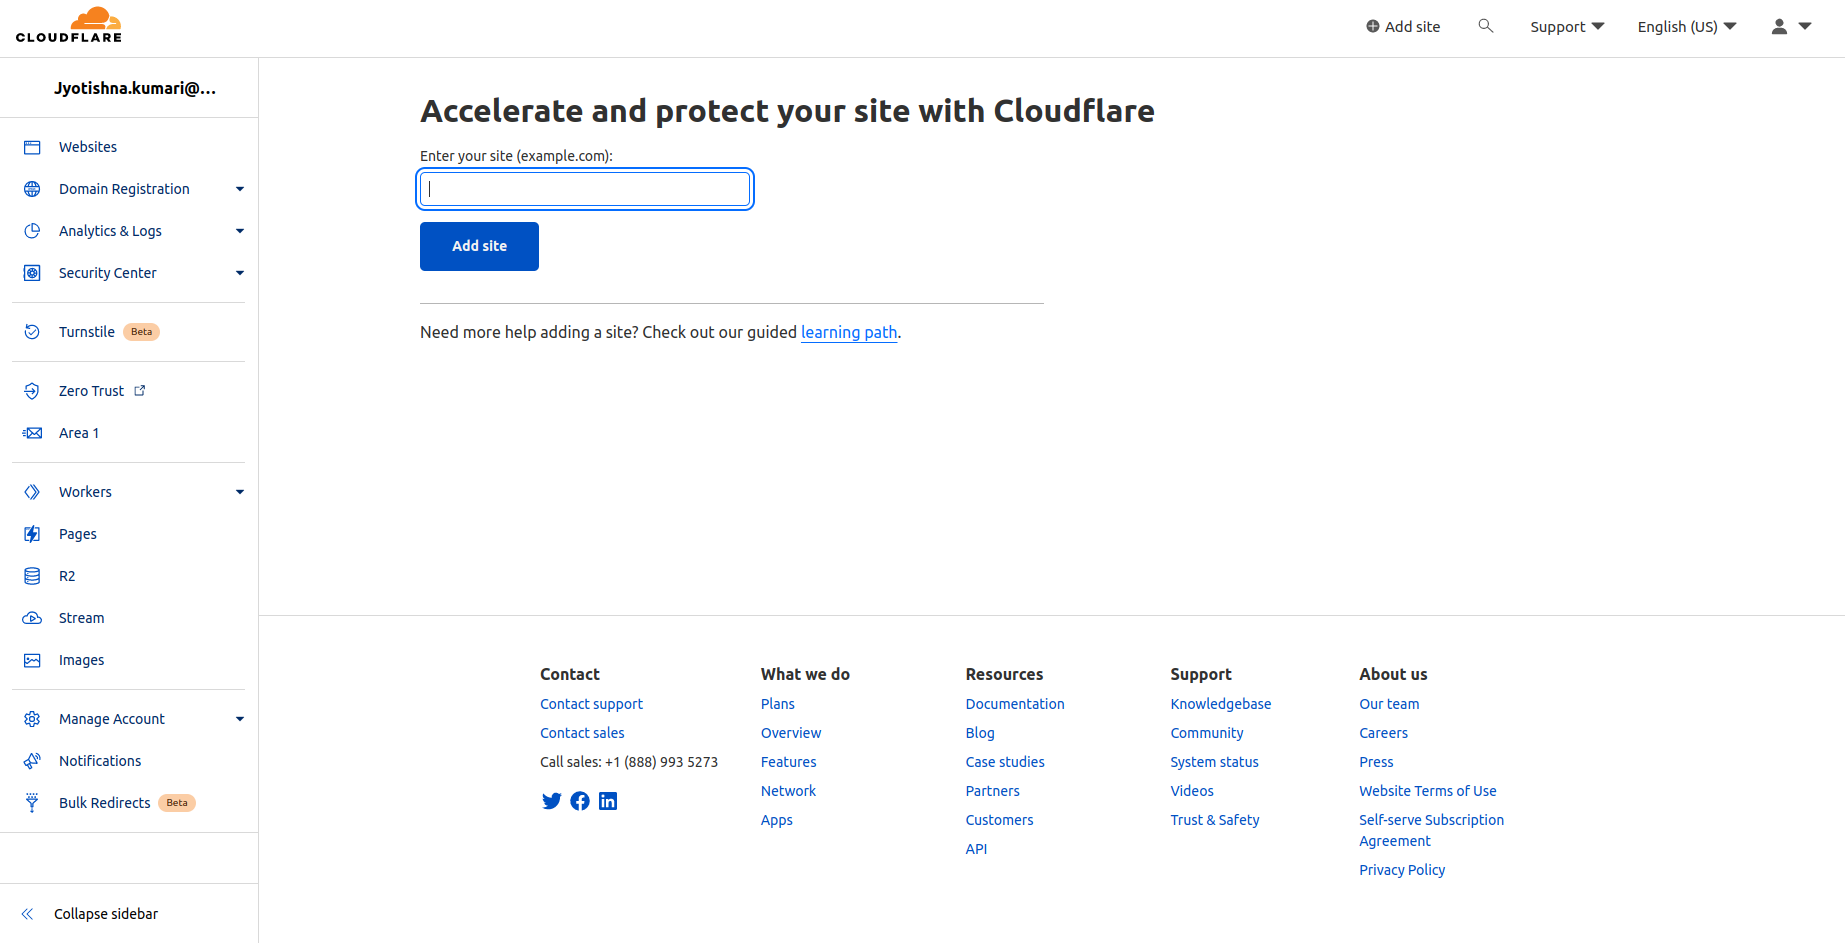
– Source: Cloudflare
Enter your website’s root domain (like I entered nfticeiceice.com), and then continue.
💡Tip: If Cloudflare cannot identify your domain as registered, make sure you are using an existing top-level domain (.com, .net, .biz, or others).
– Source: Cloudflare
Click on the Add Site button to proceed.
3: Select Plan Level
You’ll be asked to choose a plan level. You can choose the Free plan for now, as it offers all the features most Magento stores need.
💡Tip: You can see the Cloudflare pricing plans and features here.
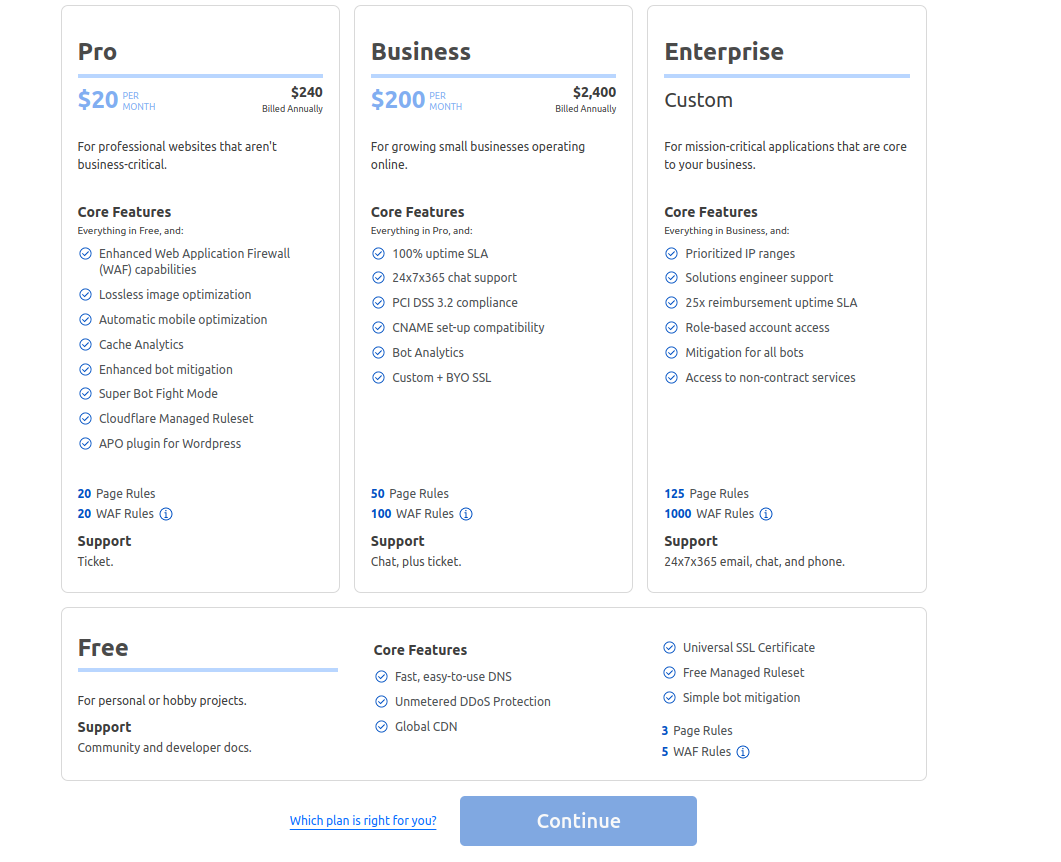
– Source: Cloudflare
However, there are also some limitations in the Free version, such as:
Any services of the free and paid versions cannot be the same. It doesn’t include Image Optimization with Polish, Mobile Optimization, Header Rewrites, DNS Firewall, and more.
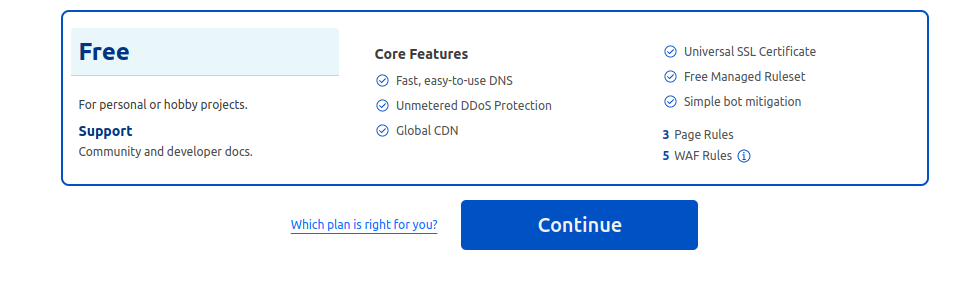
Click on the Continue button.
4: Review DNS Records
Once you select your plan, Cloudflare will automatically scan for your DNS records. This is important to review the DNS Records since this scan is not guaranteed to find all existing DNS records.
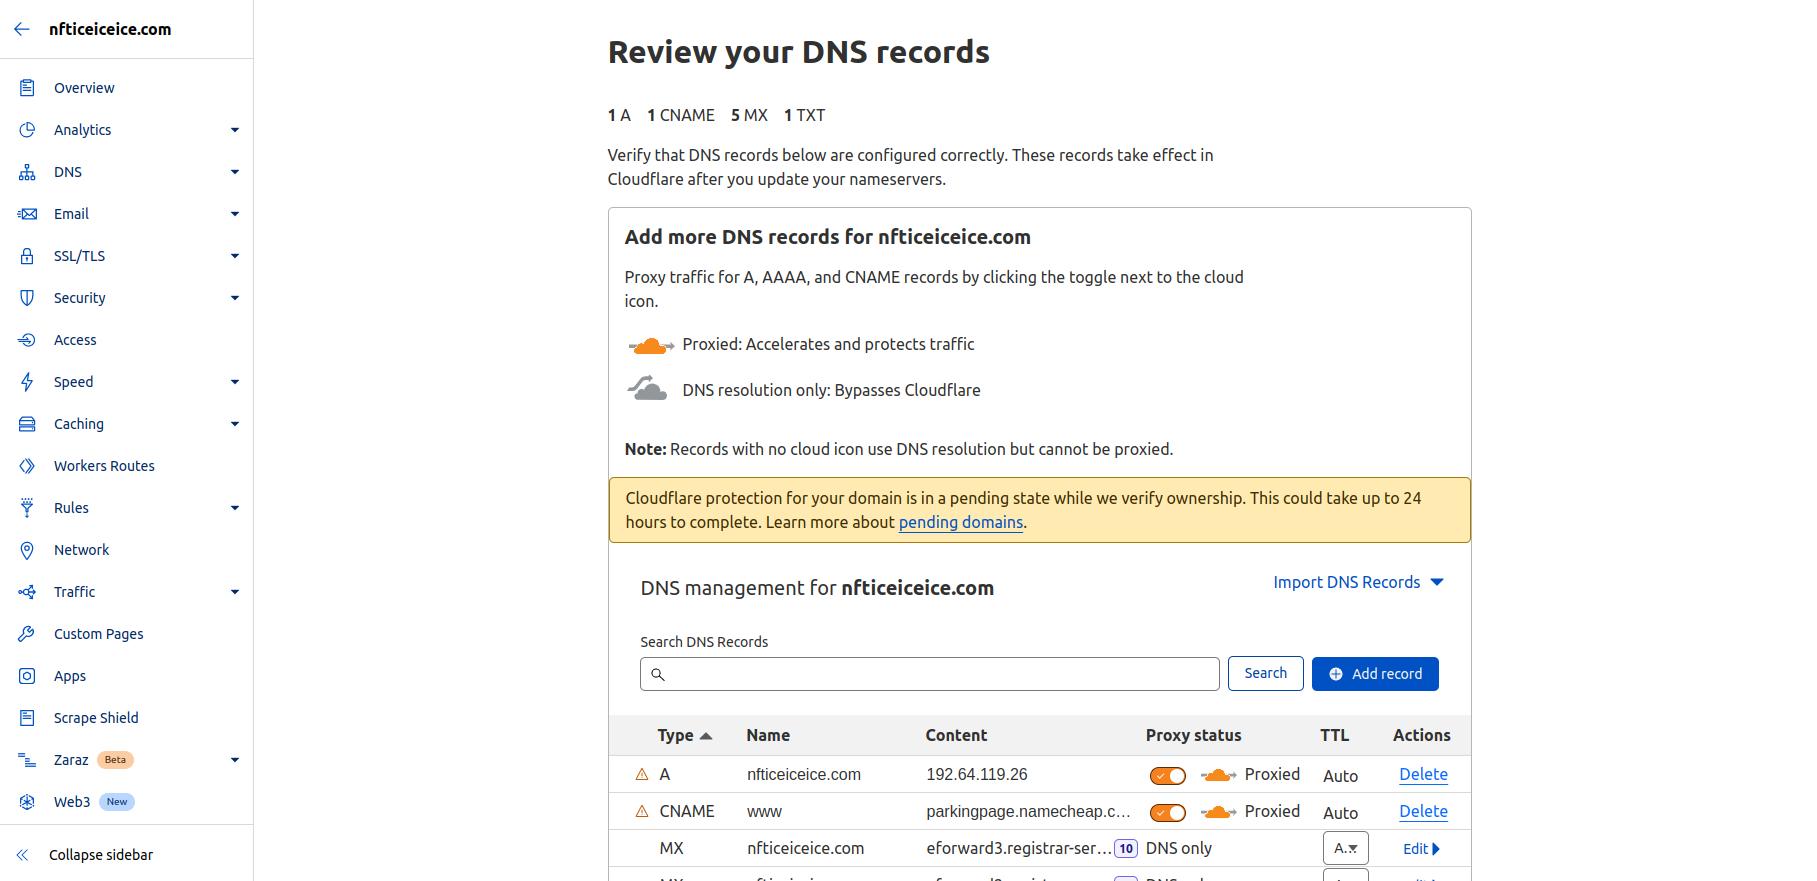
– Source: Cloudflare
If you find any missing records, manually add those records.
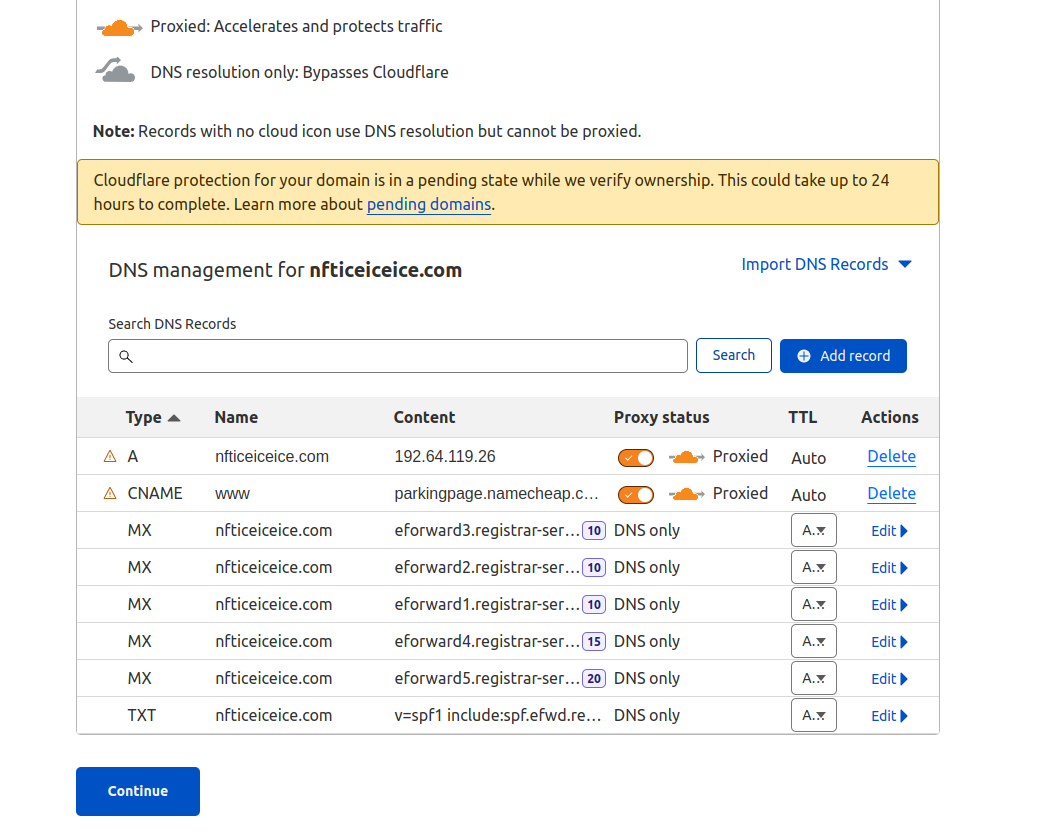
– Source: Cloudflare
Then, click on the Continue button.
Update Domain NameServer for Cloudflare
Cloudflare offers a new set of nameservers to replace your existing Nameservers.
Once you switch to Cloudflare’s nameservers, Cloudflare can direct traffic to your website and filter out:
- Malicious traffic: It will filter the malicious actors behind they can reach and send the regular traffic to your website.
- Delivery of content: Deliver the static content from the closest server in its huge global network.
💡Tip: A Nameserver is a domain server responsible for pointing domain names to IP addresses and vice versa. Through this, you connect the domain name to connect the website hosting.
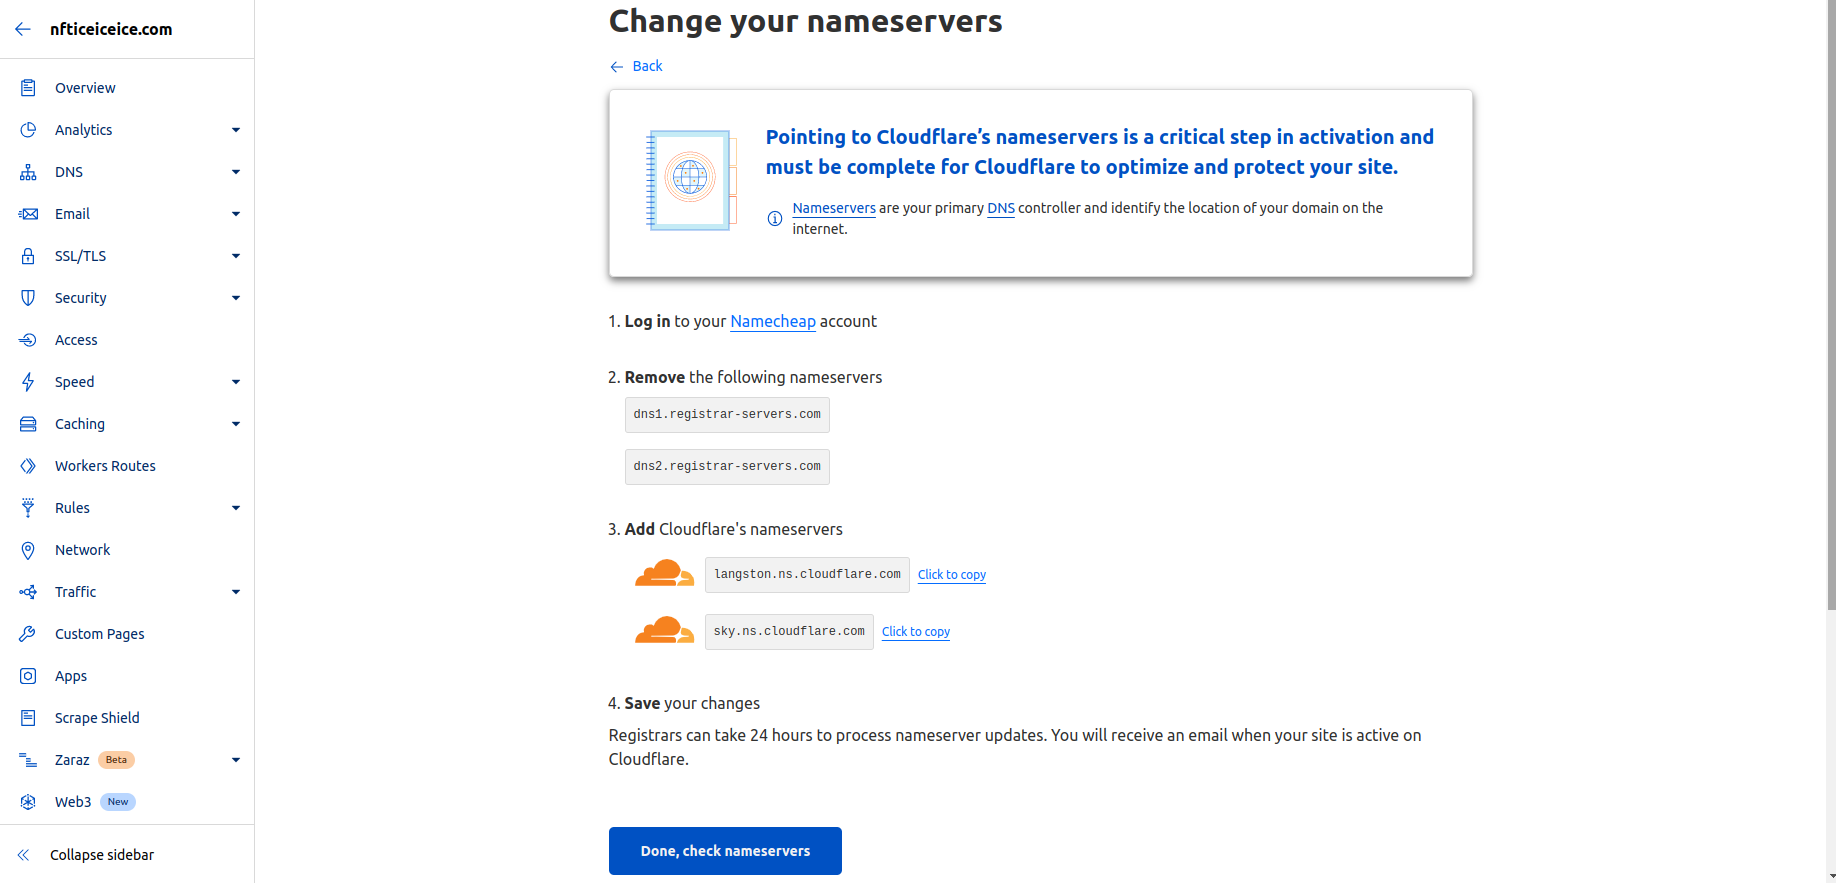
– Source: Cloudflare
Now next step is to change the nameservers of your domain name where it is registered. For example, Namecheap, GoDaddy, Bluehost, etc.
I follow Namecheap since my nameserver is registered with it. Log in to the Namecheap Account, go to the Domain List, and select your domain.
Here’s how the domain name was configured before connecting it to Cloudflare.
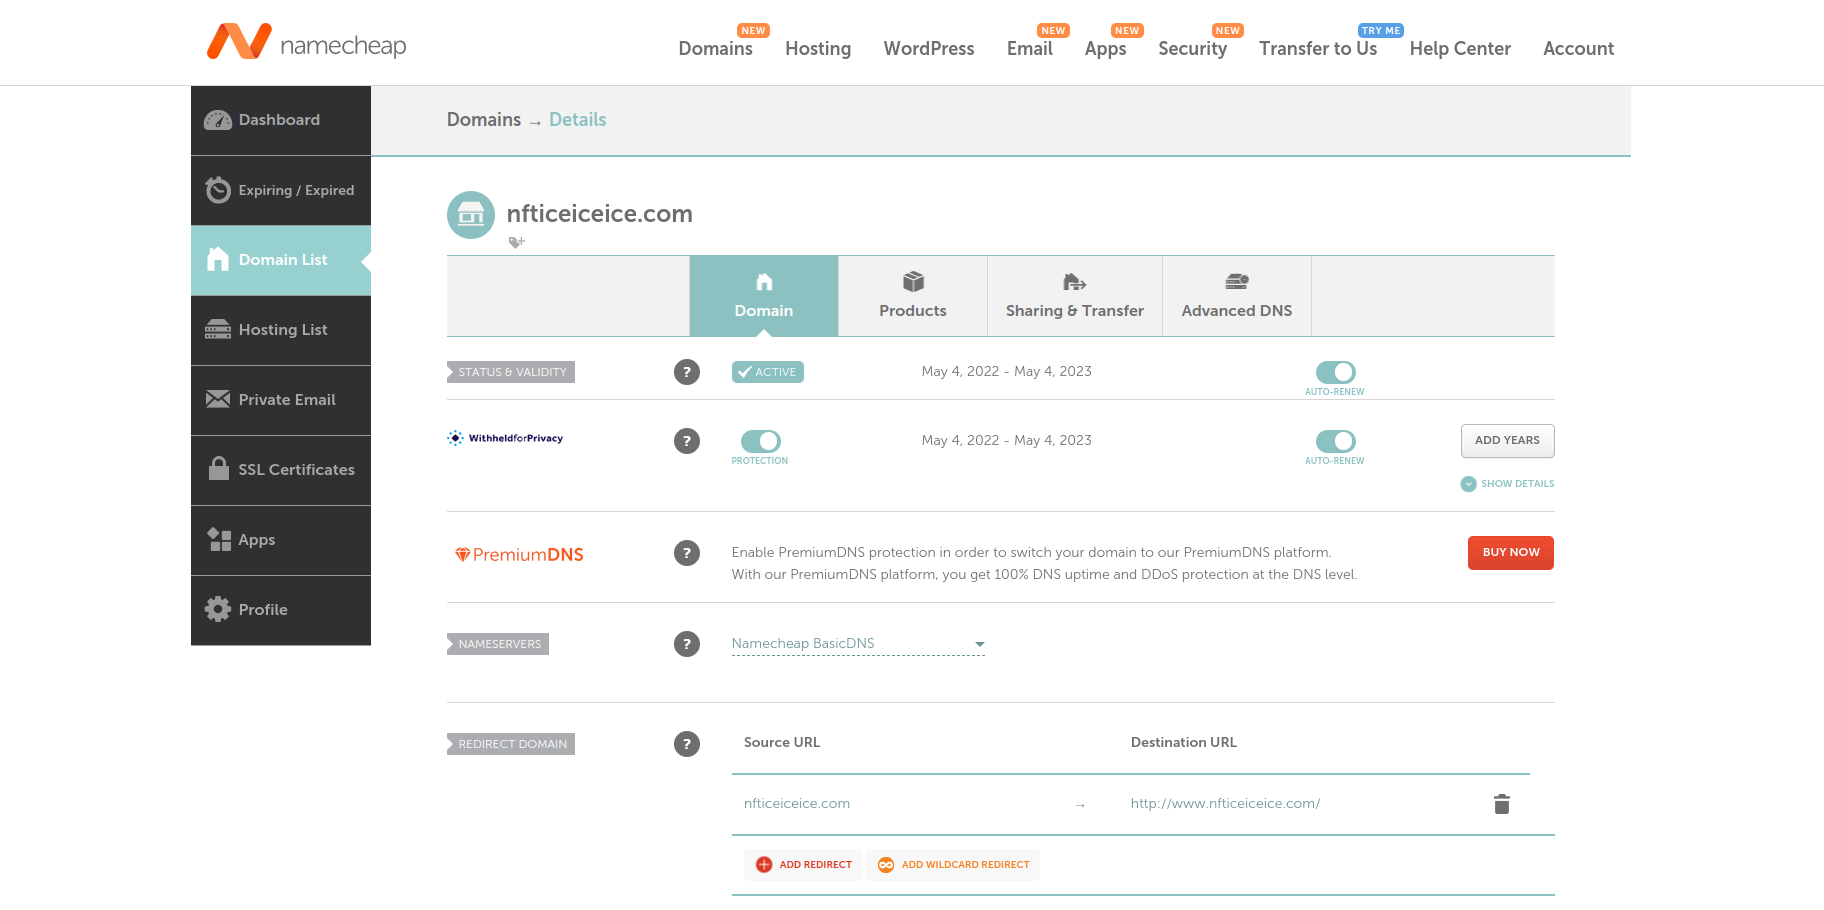
– Source: Namecheap
Navigate to the NameServer section and select Custom DNS from the list to configure your domain.
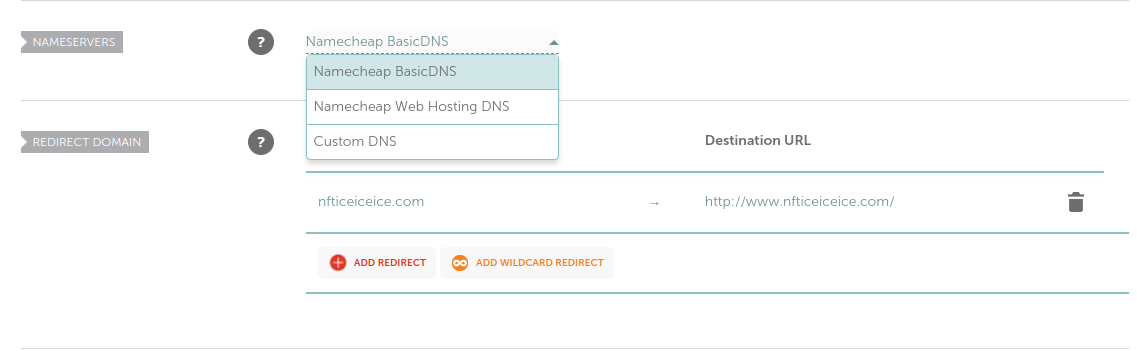
– Source: Namecheap
Enter the nameserver you get from the Cloudflare account in the previous step. And here’s what it looks like after updating my nameservers to point toward Cloudflare.
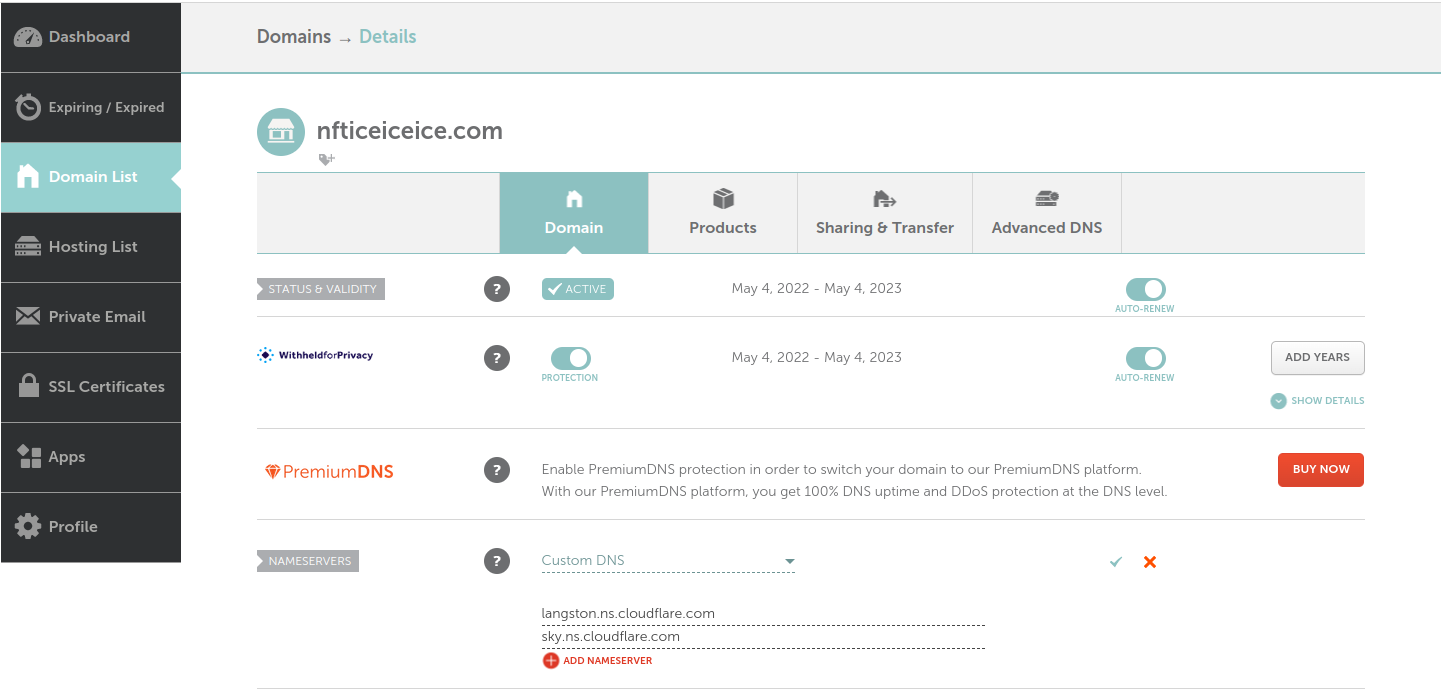
– Source: Namecheap
Click to save the Nameservers.
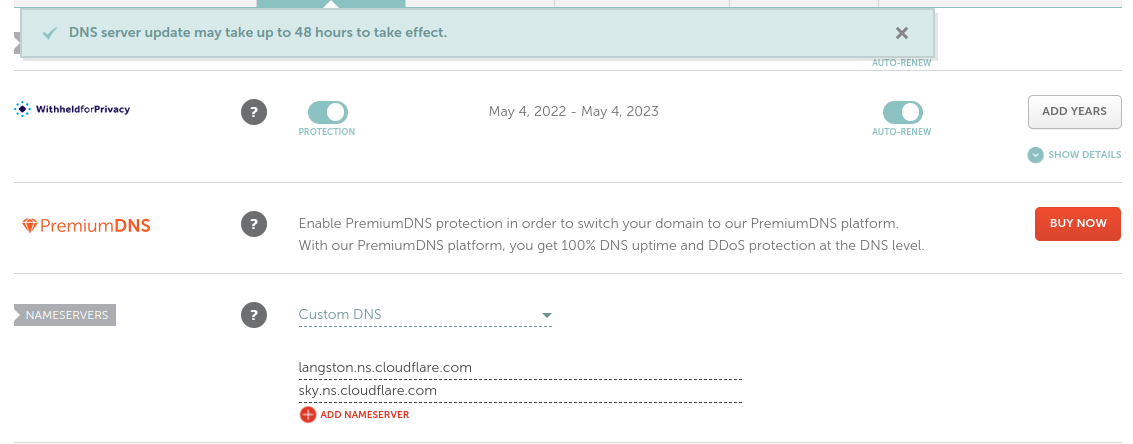
💡Tip: Nameservers can take up to 24 hours to update, so you might need to wait a bit for Cloudflare to update.
Once you’ve changed your domain’s nameservers, go back to the Cloudflare account, check the Nameservers and click on the Done button.
Configure Other Basic Settings for Magento 2
You can configure some other basic settings for how Cloudflare functions, such as improving security and performance. Click on the Get Started button.
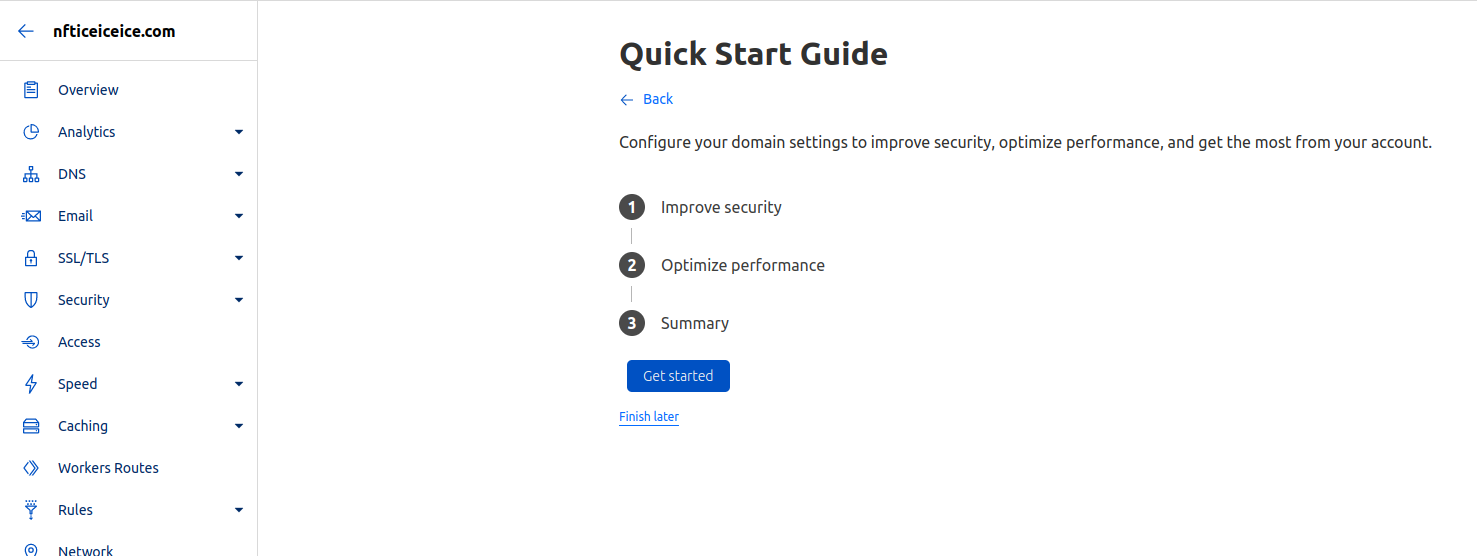
– Source: Cloudflare
Enhanced Security
For enhanced security, if you want to configure HTTPS Rewrite as this is important to redirect all the HTTP URLs. This helps secure traffic at your site and also helps your site get the green padlock in visitors’ browsers.
Toggle the Automatic HTTPS Rewrites button to enable it.
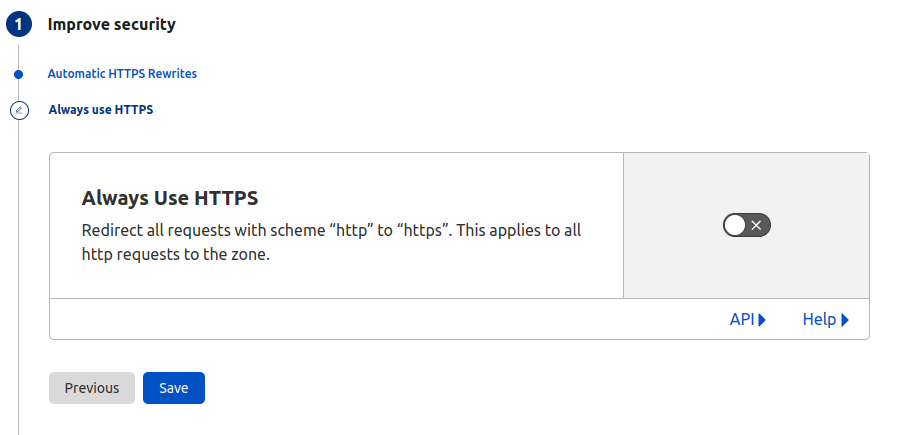
– Source: Cloudflare
Toggle the Always Use HTTPS button to enable it and click on the Save button.

– Source: Cloudflare
Optimize Performance
Magento 2 performance is a trivial task, but Cloudflare can help to shrink the size of your code and improve performance. Enable Auto Minify and check on JavaScript, CSS, and HTML to reduce the size of the source code of your website. And then click on the Save button.
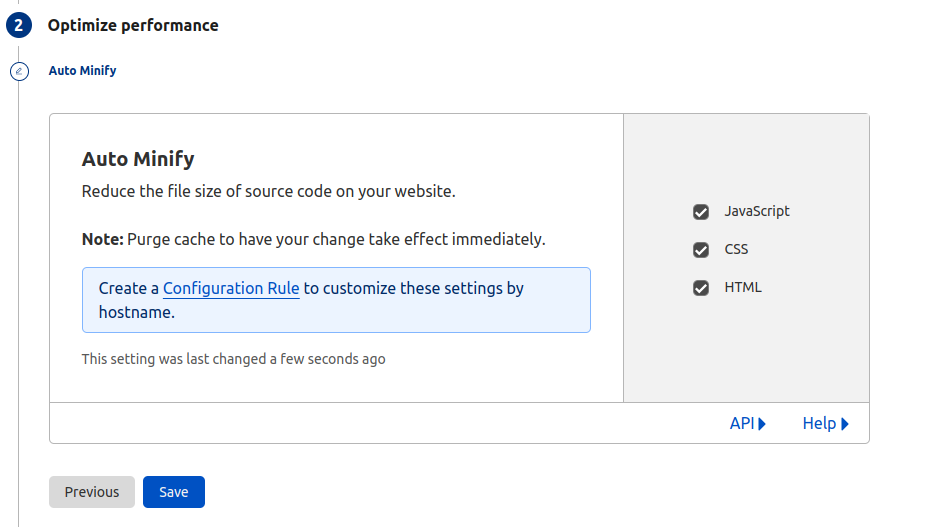
– Source: Cloudflare
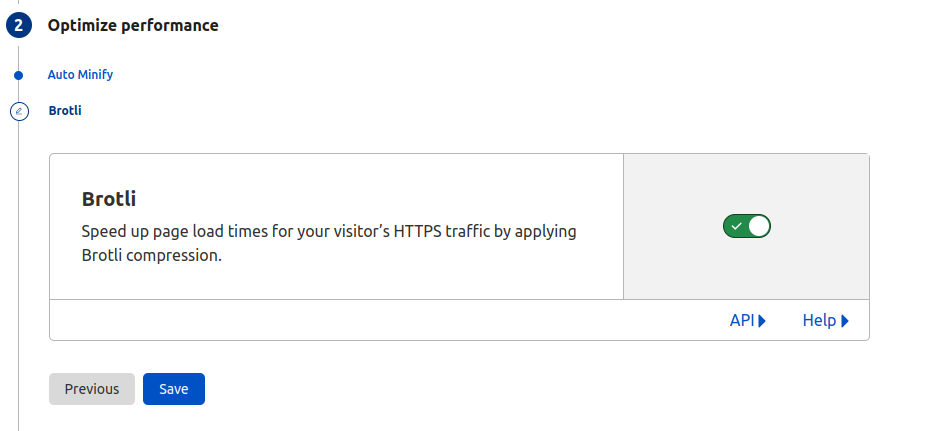
In the next step, you can configure Brotli, a server-level compression alternative to Gzip. I recommend enabling it. Toggle to enable it and click on the Save button.
– Source: Cloudflare
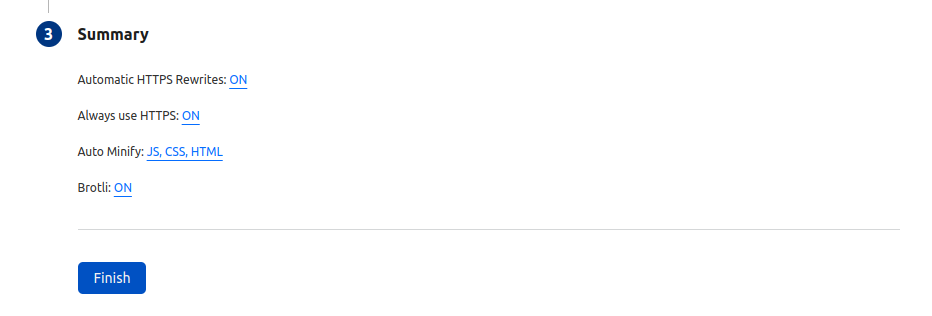
In the end, you can see the Summary of your Cloudflare configurations. Click on the Finish button to move to the next step.
– Source: Cloudflare
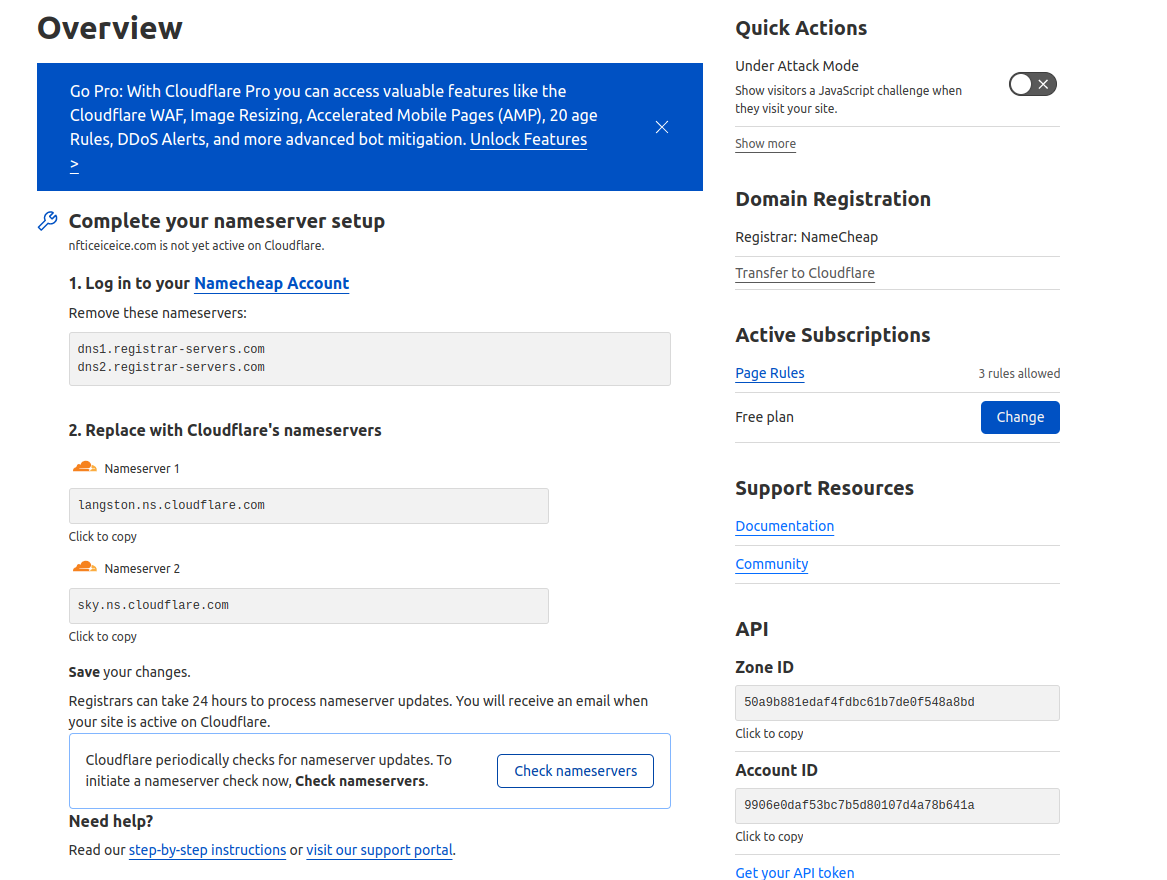
– Source: Cloudflare
Nameservers can take up to 24 hours to update, so it’s totally normal to see this message for a few hours, even if you did everything correctly.
Wait 30 minutes to an hour, then click on the Re-check Now button to see if the nameservers have updated.
Once they do, you should see a success message like this.
– Source: Cloudflare
And that’s it! You just set up Cloudflare for Magento 2.
Test Cloudflare and Magento 2 Integration
Follow the below steps to check Cloudflare CDN is working properly on your Magento 2 store.
- Open your Magento 2 website on a web browser;
- Right-click on the site and click on Inspect;
- Now, click on the Network tab on an Inspect console;
- Click on any JS or CSS file from the left corner;
- If your cf-cache-status shows HIT, your CDN is working fine.

Integrate Cloudflare Enterprise via Cloudways
Integrating Cloudflare Enterprise Add-on with your existing and new websites can help you to increase speed performance and security aspects.
Let’s understand the process for Cloudflare to the existing websites, which means yours are using a custom domain. For example, example.com but hosted on Cloudways.
To integrate Cloudflare on Magento 2 with non-Cloudflare domains, you need to verify the ownership of your domain and point it to the Cloudflare Enterprise Network using A records.
Log in to your Cloudways Account using your credentials.
- From the top menu bar, open Applications;
- Choose an Application that will be used for Cloudflare;
- Under Application Management, select Cloudflare.
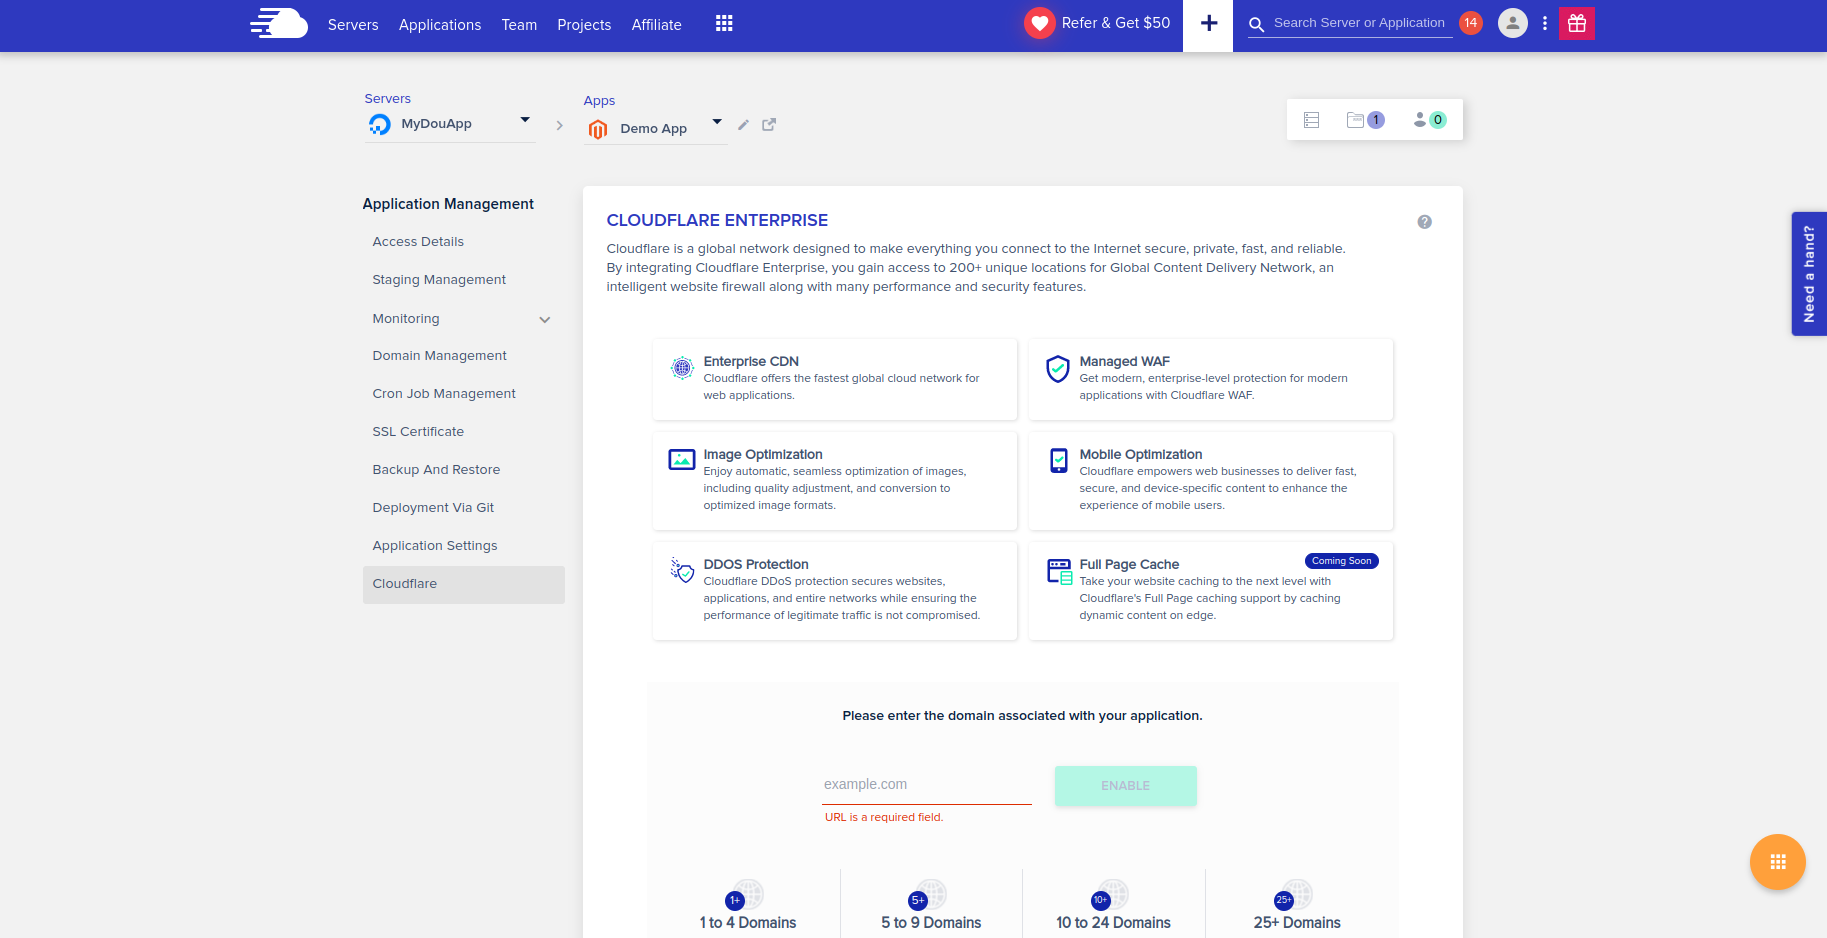
– Source: Cloudways-Platform
- Enter your Domain Name.
💡Tip: Cloudflare Enterprise supports root domains and subdomains. You can enter a root domain (example.com) or a subdomain (support.example.com).
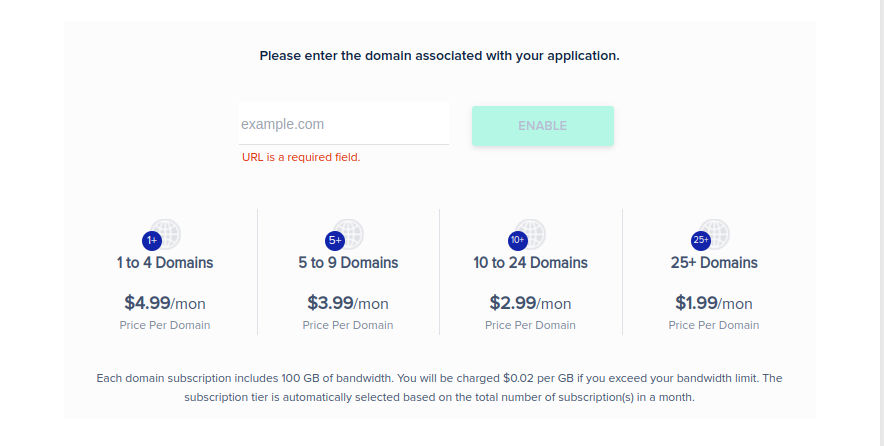
– Source: Cloudways Platform
5. Click Enable. It will take a few minutes to complete.
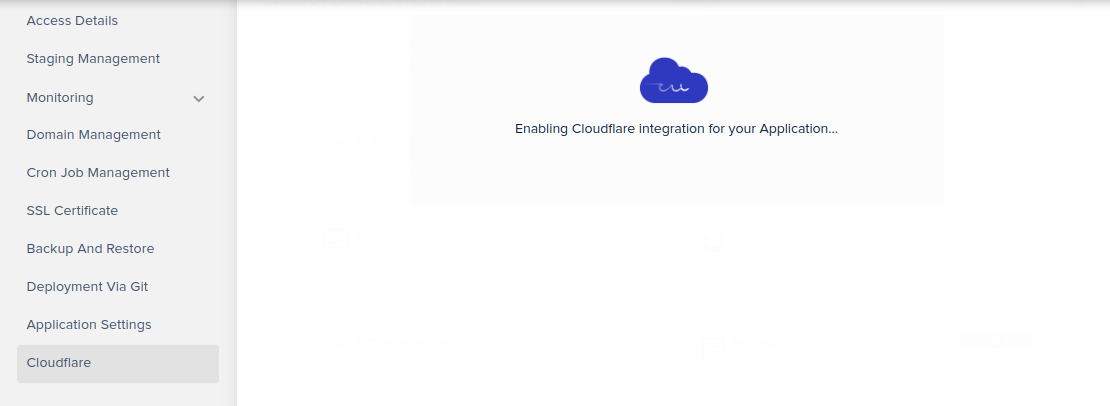
– Source: Cloudways Platform
- You will be prompted with TXT records to verify the domain ownership by adding one or two TXT records in your DNS registrar panel.
Copy the TXT Record 1 and TXT Record 2 for the safer side if you lose.
– Source: Cloudways Platform
💡Tip: I’m using Namecheap for demonstration purposes. The process of domain verification is different for DNS managers.
- Log in to your Namecheap Account, go to the Domain List, and select the domain hosted on the Cloudways Platform.
- Select the Advanced DNS tab to add the first TXT record in the HOST RECORDS section.
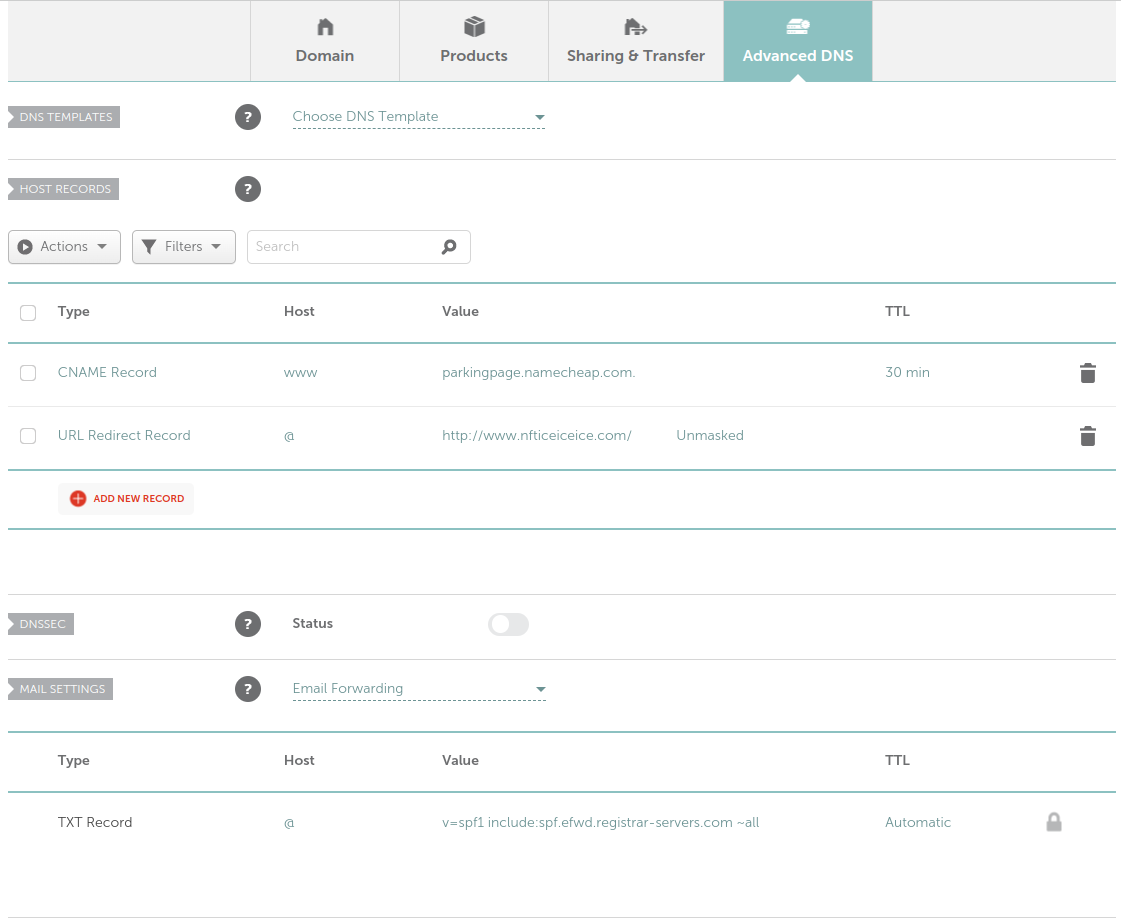
– Source: Namehceap
Go back to the Cloudways Platform. Add new TXT record as:
- Type: TXT
- Name/Host: _cf-custom-hostname (as shown on the Cloudways Platform)
- Hostname/Value/Target: UUID value (as shown on the Cloudways Platform)
- TTL: Automatic/Default or select of your choice
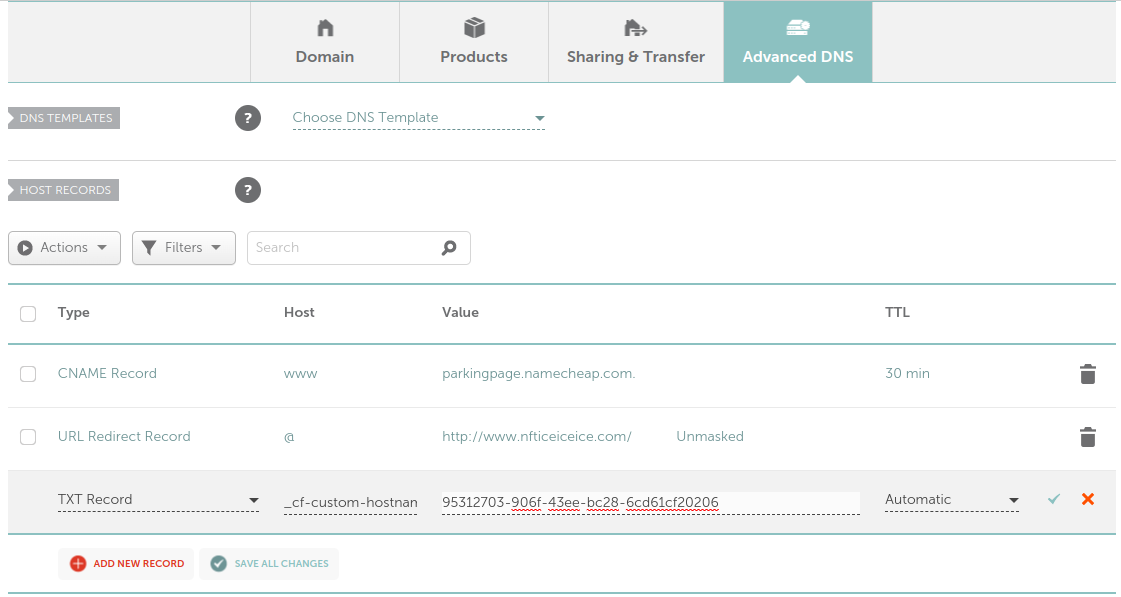
– Source: Namecheap
- Go back to the Cloudways Platform. If a second TXT record is also available, add the second TXT record in the same manner. Copy the TXT Record 2 (Name/Host and Value).
Add the second TXT Record as:
- Type: TXT
- Name/Host: @ (as shown on the Cloudways Platform)
- Hostname/Value/Target: UUID value (as shown on the Cloudways Platform)
- TTL: Automatic/Default or select of your choice
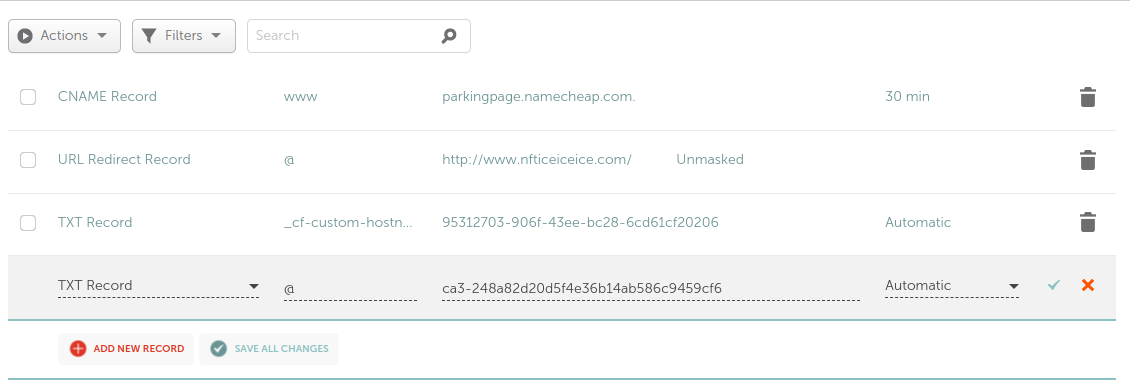
– Source: Namecheap
💡Tip: Once you have added the DNS records, it may take up to 24 hours for your DNS changes to propagate and be effective.
- Switch back to the Cloudways Platform, and click Next.
– Source: Cloudways Platform
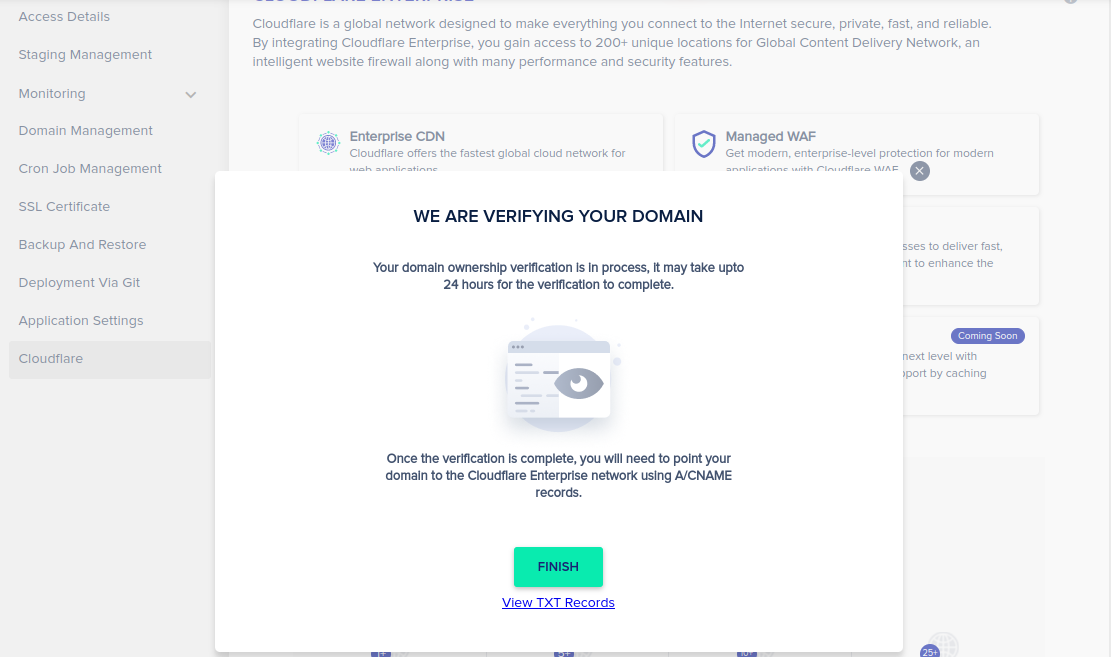
- Click on the Finish button.
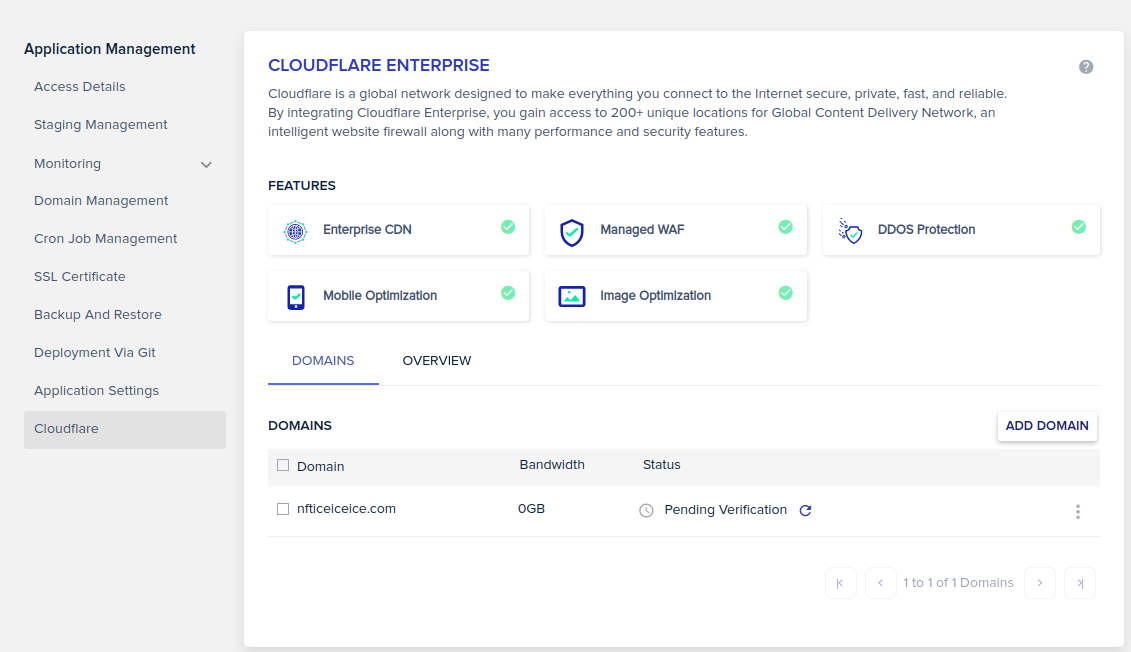
– Source: Cloudways Platform
You will notice the current status as Pending Verification, which means Cloudways is still verifying the ownership of your domain.
The time required to verify ownership is dependent on the DNS propagation. We will notify you via email once the domain ownership is verified, and the status will also change to Domain not Live. After receiving the email, you can click the Refresh button if the status doesn’t change.
- Once the domain ownership is verified, you need to point your domain to a new IP address using two A Records. Click View A Records to view more information.
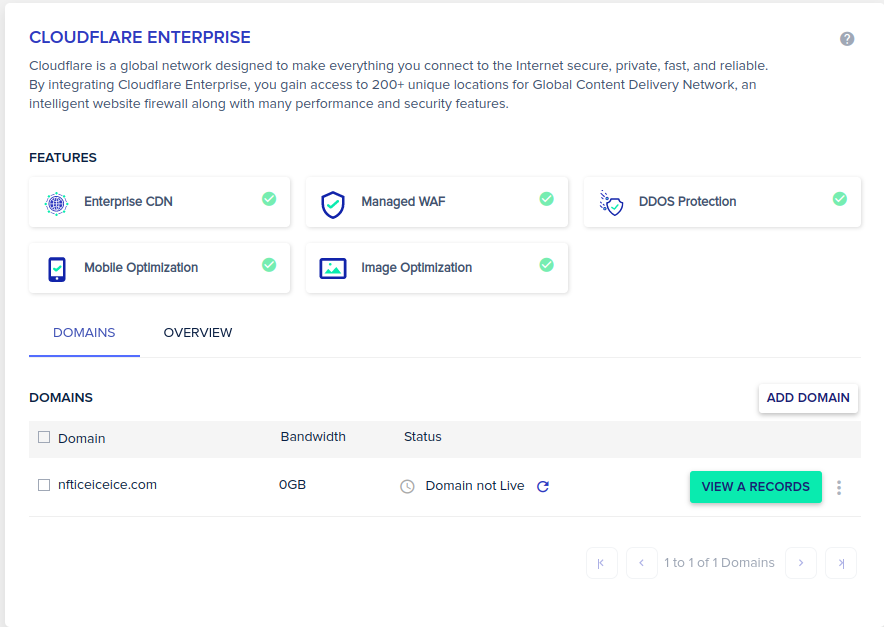
– Source: Cloudways Platform
- Copy the A Record (Name/Host and Value) with both IP addresses.
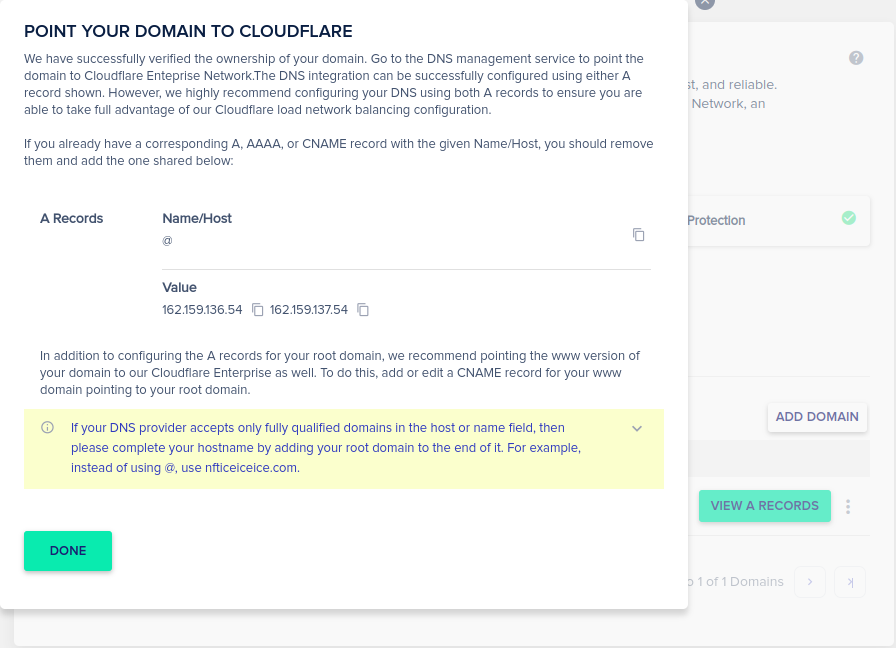
– Source: Cloudways Platform
- Go back to your DNS registrar panel (e.g., Namecheap) and add the two A records. Learn how to point to A Records.
💡Tip: To avoid conflicts, remove any existing A and CNAME records for your domain pointing to your Cloudways server IP address before adding the A records.
Add the Records as follows:
A Record #1
- Type: A
- Name/Host: @ (as shown on the Cloudways Platform)
If your domain registrar does not accept @ as name/host, use the root domain or leave it blank. In the case of the subdomain, specify that subdomain as name/host.
- Hostname/Value/Target: First IP address (as shown on the Cloudways Platform)
- TTL: Automatic/Default or select of your choice
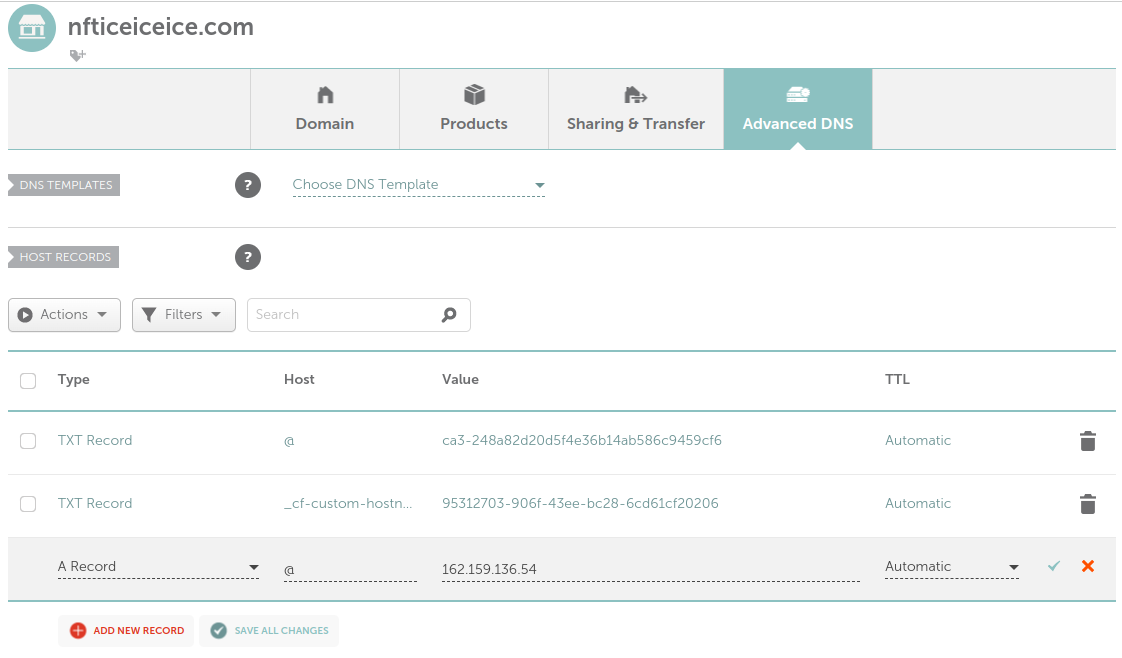
– Source: Namecheap
A Record #2
- Type: A
- Name/Host: @ (as shown on the Cloudways Platform)
If your domain registrar does not accept @ as name/host, use the root domain or leave it blank. In the case of the subdomain, specify that subdomain as name/host.
- Hostname/Value/Target: Second IP address (as shown on the Cloudways Platform)
- TTL: Automatic/Default or select of your choice
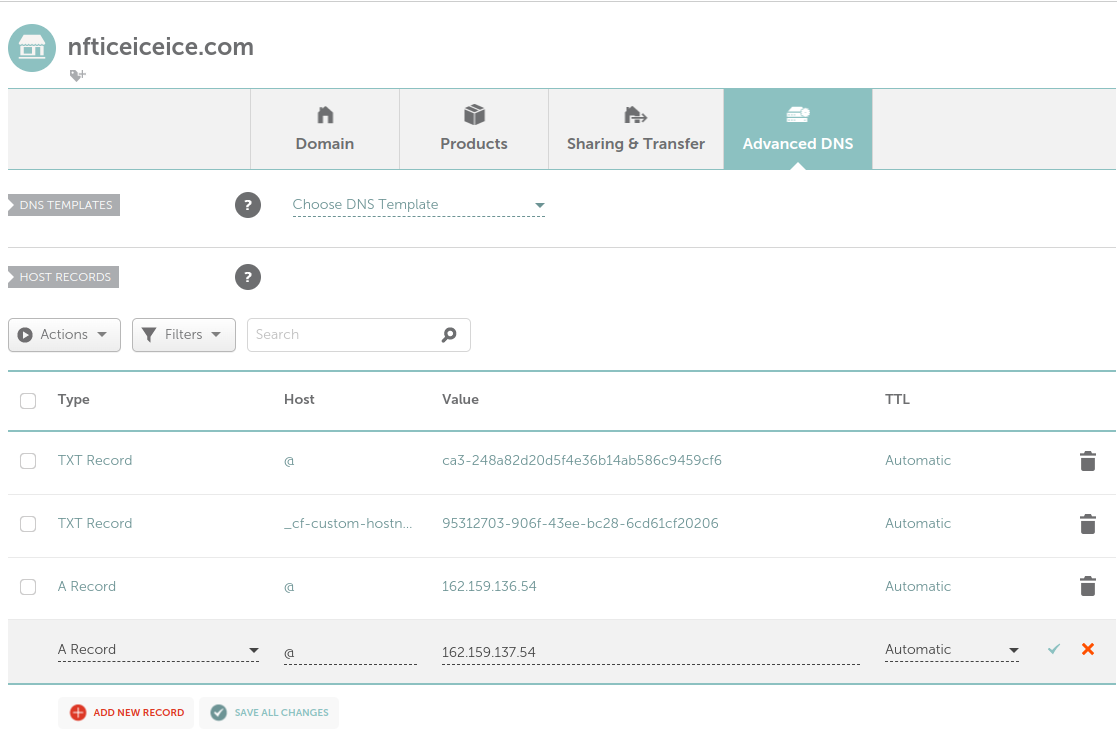
– Source: Namecheap
- After configuring A records for your root domain, we recommend pointing the www version of your website to Cloudflare Enterprise Network.
- To do so, simply add or edit a CNAME record for your www domain pointing to your root domain.
- Type: CNAME
- Name/Host: www
- Hostname/Value/Target: example.com
- TTL: Automatic/Default or select your choice
💡Tip: Don’t forget to replace example.com with your domain name.
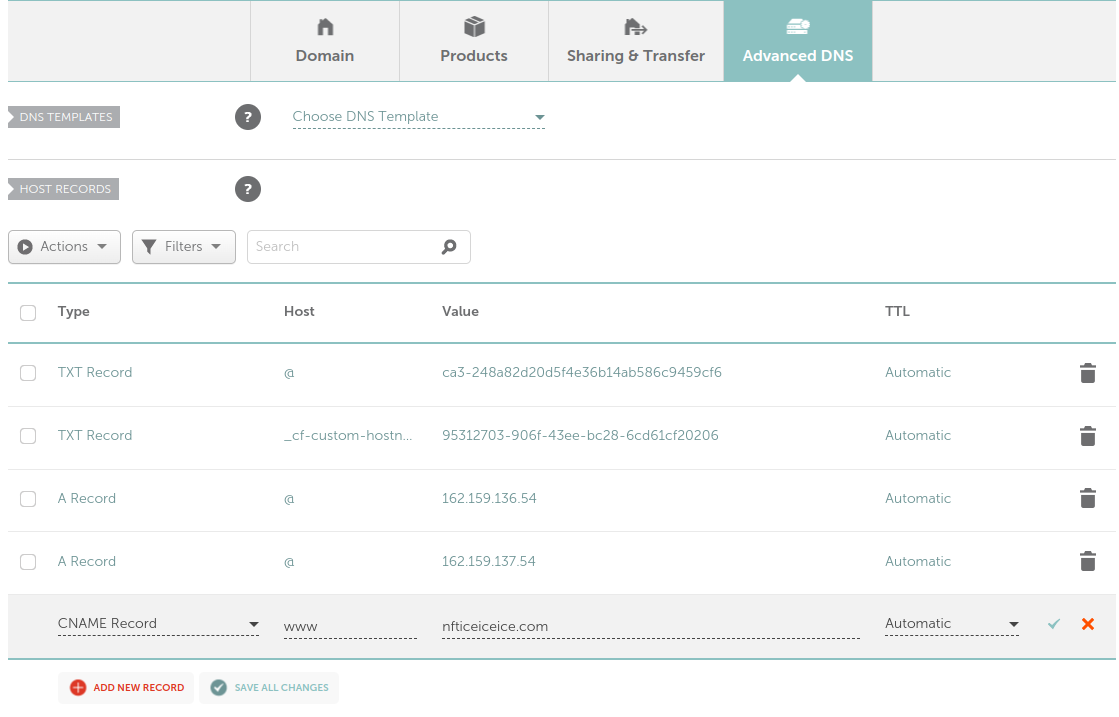
– Source: Namecheap
Switch back to the Cloudways Platform and click Done; you will notice the current status as Domain not live, which means Cloudways is still verifying the DNS records.
The time required to complete Cloudflare integration is dependent on the DNS propagation. We will notify you via email once the Cloudflare Magento integration is successful, and the status will also change to Active.
Once Cloudflare is integrated with your domain, the status will change to Active . Next, you can add additional domains and view your application’s statistics and performance.
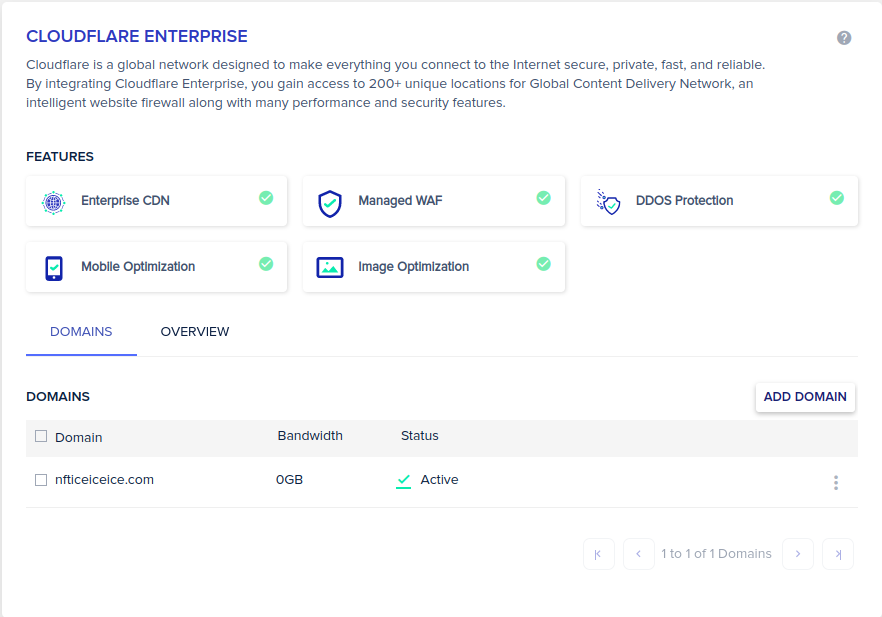
– Source: Cloudways Platform
That’s it! You have successfully integrated Cloudflare CDN on your Magento 2 store.
Summary
Following the steps outlined in this guide, you can easily set up Cloudflare for Magento 2 and start reaping the benefits of this powerful tool. With Cloudflare, you can take advantage of powerful caching, performance, and security features, as well as a global network of servers that can help speed up your website and protect it from attacks.
Customer Review at ![]()
“Great speed, features, knowledgebase, dashboard, UX and fast, expert support. Very happy!”
Stefan [Management Consultant]
Jyotishna Kumari
Jyotishina is the Magento Community Expert at Cloudways and has 4 years of experience in web development. She has worked on e-commerce sites since the turn of the millennium and was working with Magento before version 1 was released. She loves to travel and explore new ideas whenever she finds time. Get in touch with her at [email protected]