Covering around 29 percent of the entire ecommerce market, WooCommerce is the most popular ecommerce platform there is, with plenty of plugins and extensions to further its functionality. In contrast, BigCommerce covers only 3 percent of the ecommerce market.
Many ecommerce store owners, therefore, look to migrate from BigCommerce to WooCommerce, to avail of the latter’s potentialities. This migration process can be intimidating. One wrong move when re-platforming your store can damage the backbone of your business, setting it up for a significant loss.
However, performing a timely and correct migration can also open up new opportunities, keep your business relevant, and meet the ever-evolving needs of your customers. This guide will tell you how to easily migrate from BigCommerce to WooCommerce, without experiencing any downtime or breaks in the live site.
Three Data Migration Options at Your Disposal
Since migration is a big game and involves enormous risks, it is essential to evaluate your data migration options and select those that suit you.
Here, I won’t advocate for any specific data migration option. Instead, I’ll explore each with its pros and cons, and you can select the one that seems right for you.
Manual Migration
As the name implies, manual migration essentially requires you to dig deeper into the database of your current ecommerce store and then manually transport it to the new store.
| Pros | Cons |
| It gives you unrestricted control privileges. | Needs technical expertise. |
| It gives you a fair understanding of both platforms | Time-intensive |
| Cost-friendly | Highly error-prone |
Assisted Migration
Here you just hand over the migration process to a professional agency or freelancer.
| Pros | Cons |
| It gives you unrestricted control privileges. | Not budget-friendly |
| No technical expertise needed | Time-intensive |
Automated Migration
While manual migration has you play around with the technicalities of your existing and new ecommerce platform, automated migration does everything for you.
All you have to do is select a suitable tool and carry on the migration.
| Pros | Cons |
| No technical expertise needed. | Paid tool. |
| Quick migration. | Less control over what is to be migrated |
| Access to customer support |
How to Migrate From BigCommerce to WooCommerce
Now let’s move to the actual migration process.
For the sake of this tutorial, I am assuming that you already have a functional BigCommerce store that you need to migrate to WooCommerce.
1) Backup your existing store
Never miss out on backing up your existing store, even if you’ve complete faith in the automated tools or agencies handling the migration for you.
Backing up your store can save you from any potential risks and problems after migration. Better safe than sorry.
I. Backup your product and product images
- Go to your BigCommerce Dashboard
- Select Products > Export
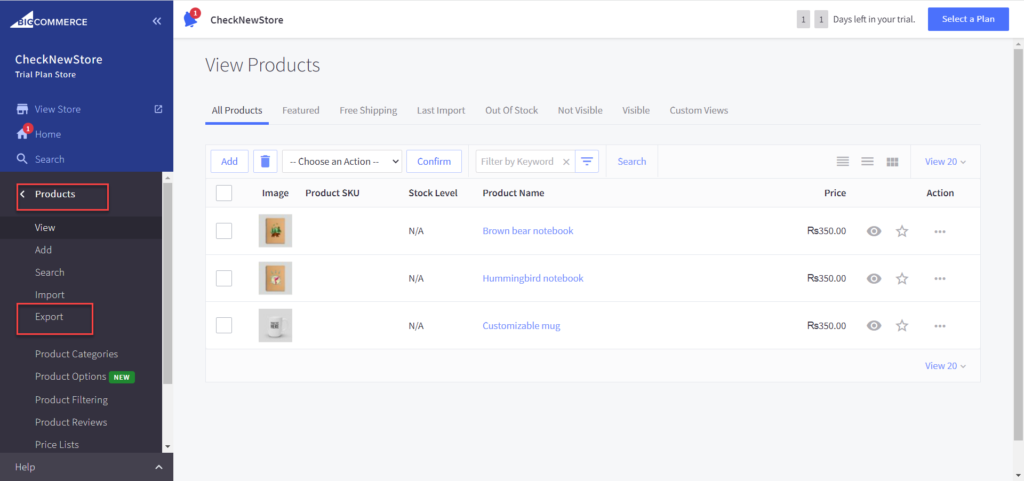
- Now you’ll be redirected to the Export Screen
- Choose Bulk Edit
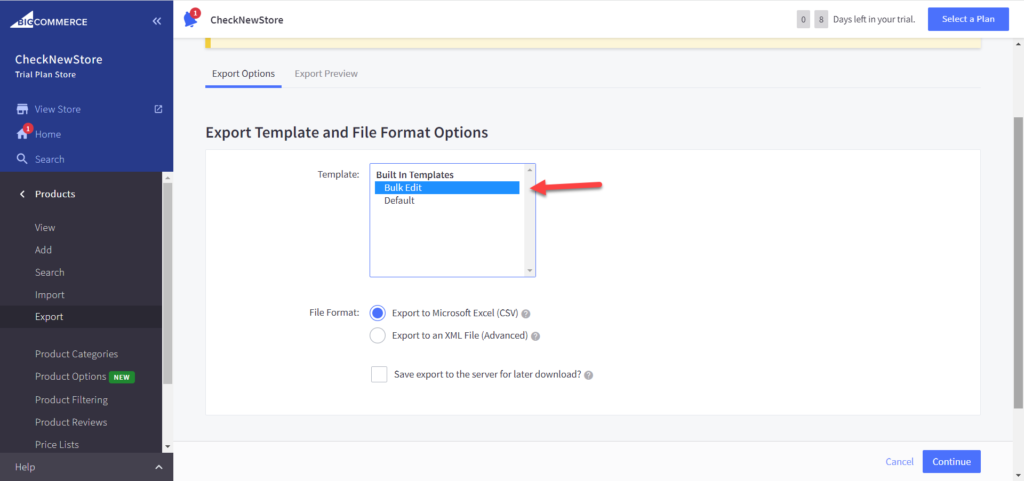
- The popup below will open up on your screen
- Select ‘Export my Products to a CSV file’
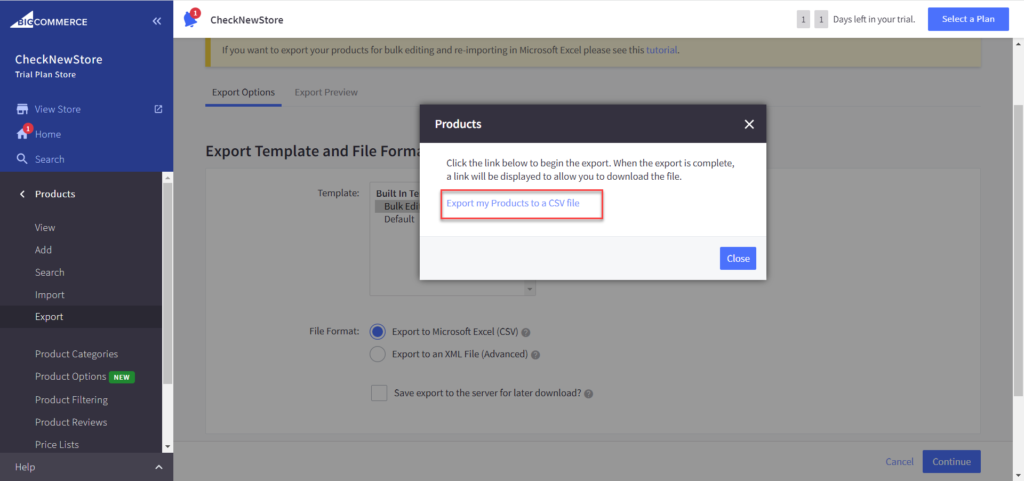
- Your Export file will now be ready in downloadable form
- Click ‘Download my Product File.’
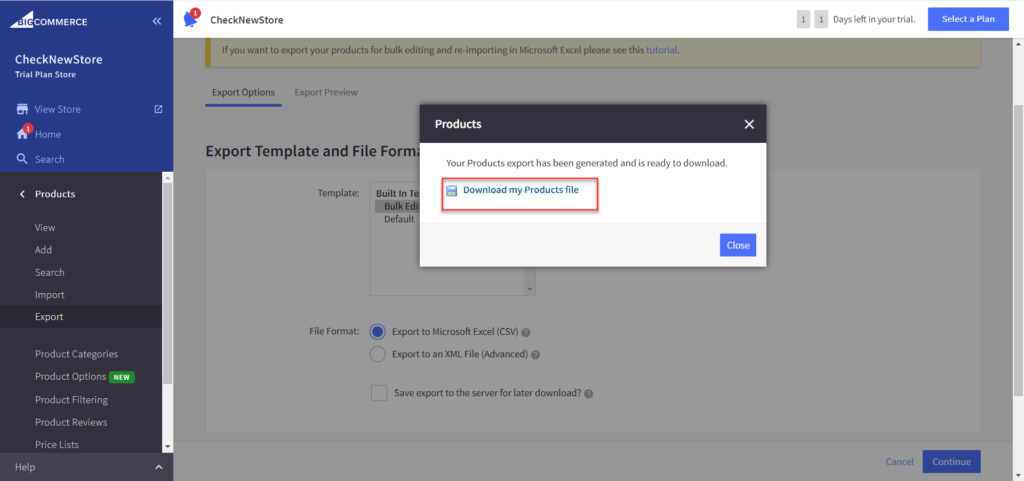
- You’ve successfully created the backup for your product and product images.
II. Backup customer data
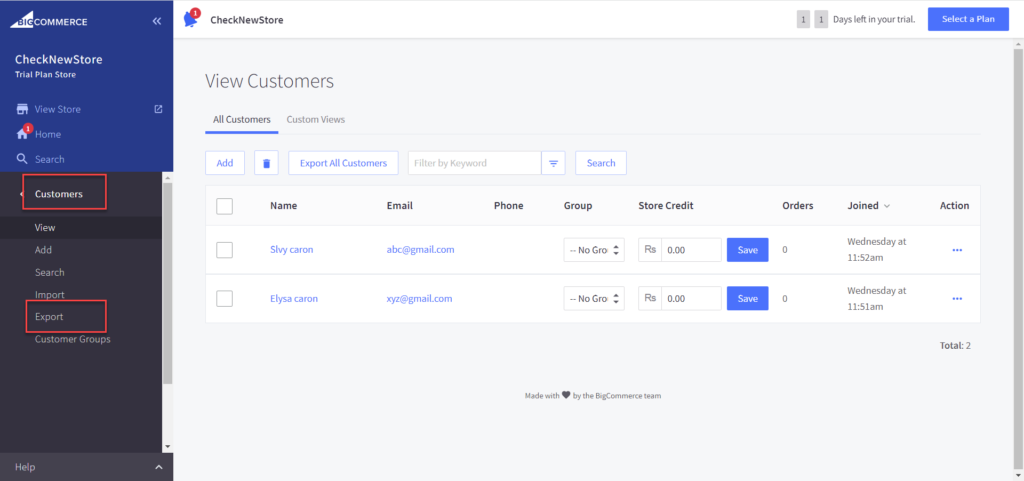
- Repeat the same steps that you did to back up product and product images.
III. Backup order data
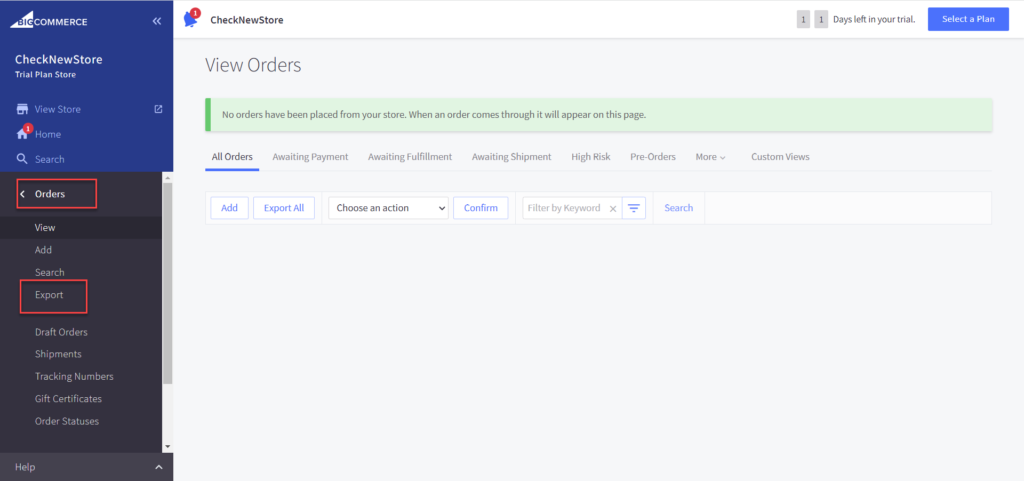
- Repeat the same steps that you did to back up product and product images.
2) Choose a WordPress-friendly Hosting Provider
Make sure to select a suitable web hosting provider compatible with WordPress and WooCommerce.
WordPress is already a big name, and so has numerous compatible hosting providers.
However, I recommend using Cloudways, which provides dedicated WooCommerce hosting for 10x speed and ironclad security.
Some prominent features of Cloudways:
- SSD storage that improves your store’s performance and speed
- Built-in performance-boosting caching (Object Cache Pro) to speed up stores while reducing database load.
- Cloudflare Enterprise add-on to optimize content delivery and protect against DDoS attacks
- Let’s Encrypt free SSL certificates
- Dedicated firewalls that protect your server against attacks
- 24/7 live chat support to help you run your WooCommerce store without any hiccups.
- 1-Click cloning option to make copies of your WooCommerce store
- Free staging URLs
3) Set up a new WooCommerce store
Now we proceed to set up your new WooCommerce store. This will serve as your destination site for all your migrated data from BigCommerce.
To set up a new WooCommerce store, I will use the Cloudways managed hosting platform that allows you to easily deploy any PHP-based application in just one click.
Migrate to Managed WooCommerce Hosting to Boost Speed
Create an exceptional online experience for your customers with your new store.
Since I already have a Cloudways account, I will directly log in. You need to sign up for a FREE 3-day trial if you don’t.
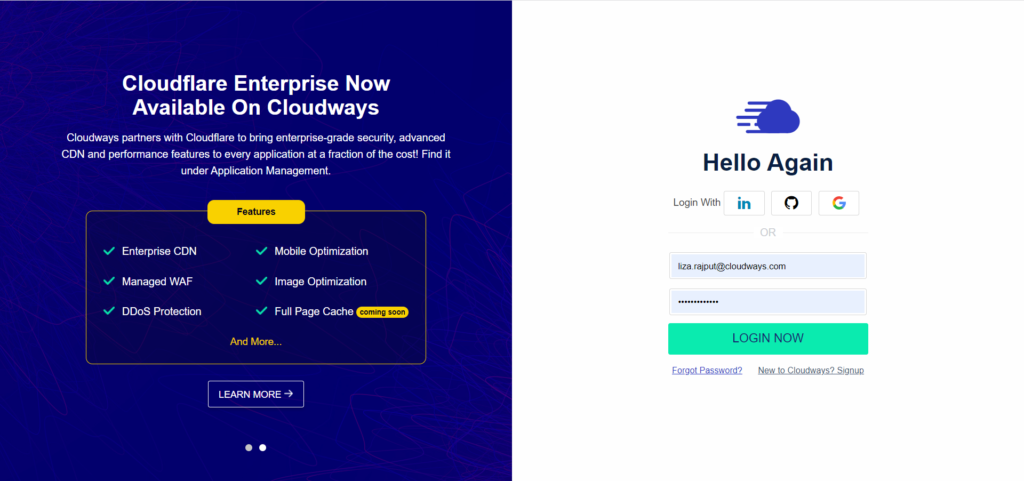
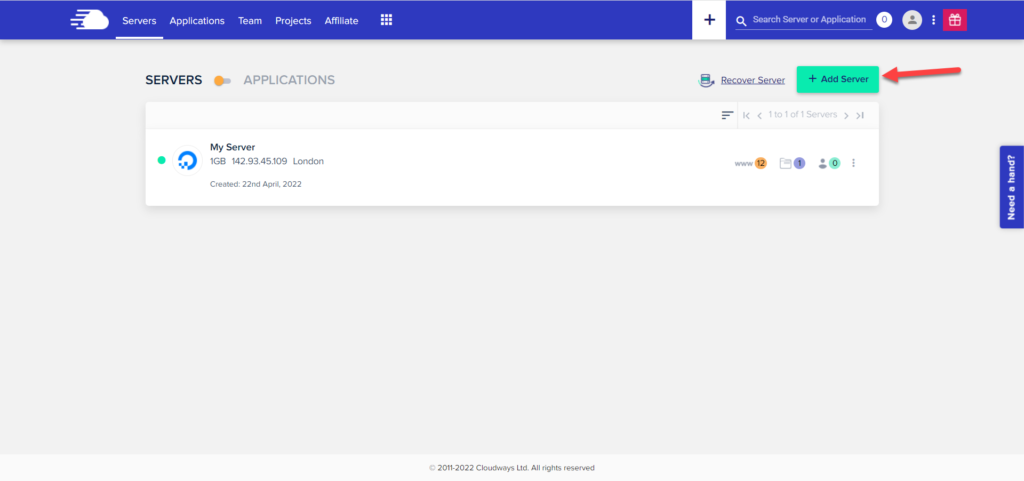
- Now, select the ‘Add Server’ option to launch your server
- Then you’ll be redirected to the page where you can fill in your application and server details.
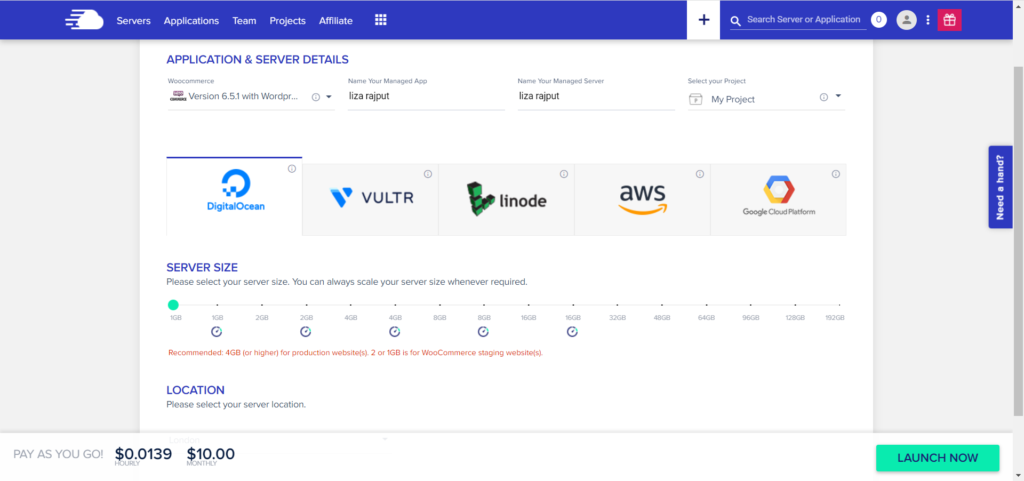
- Fill in the details and click ‘Launch Now’
- Note: In the application details, select ‘WooCommerce’ to launch the application
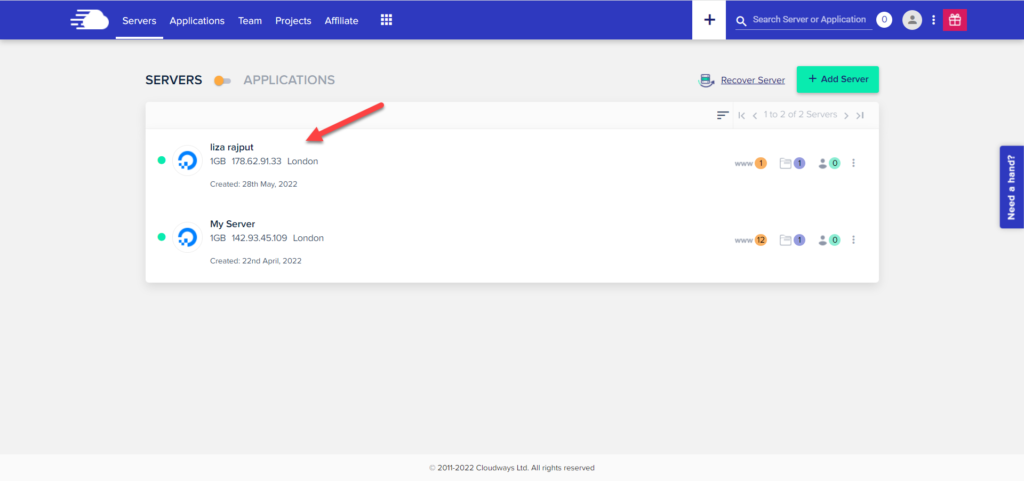
- Your server is ready. Click on ‘www’ to get access details of your newly launched WooCommerce application
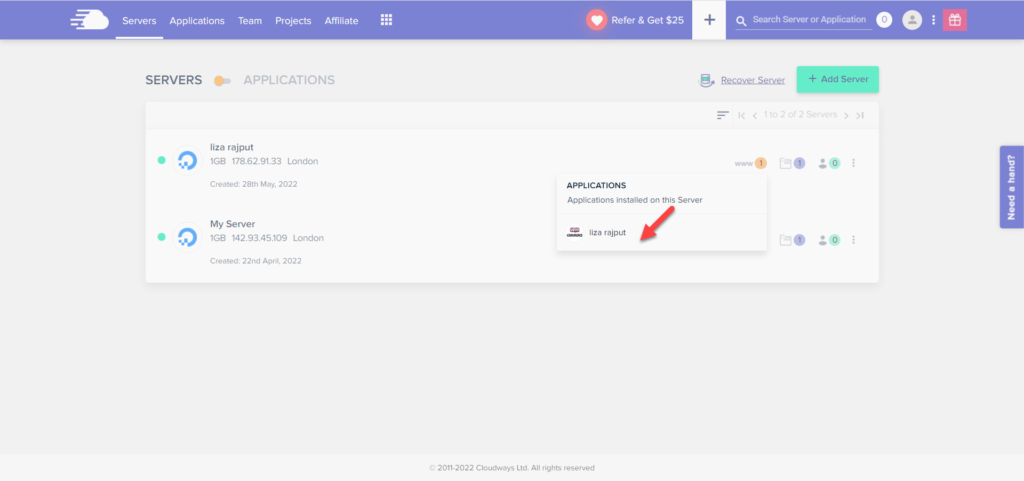
- On the Access Details page, click on the URL in the admin panel.
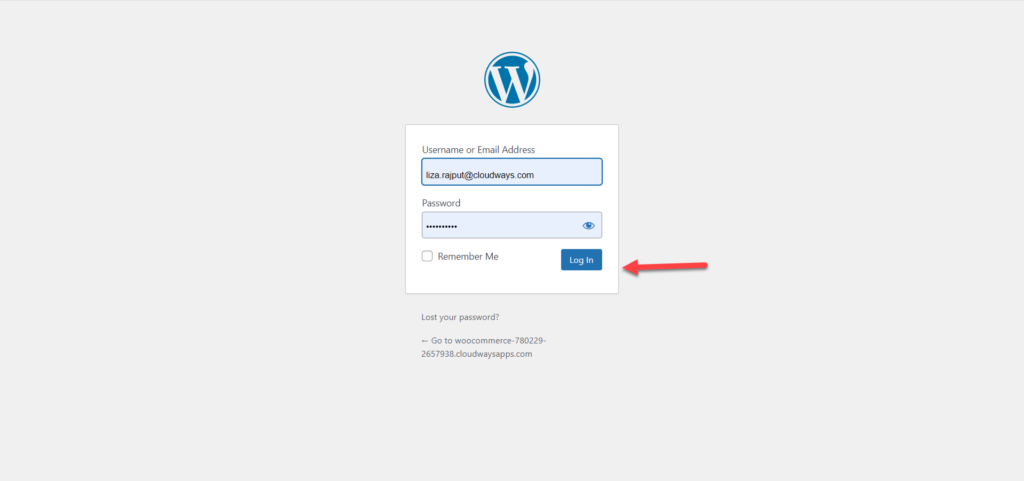
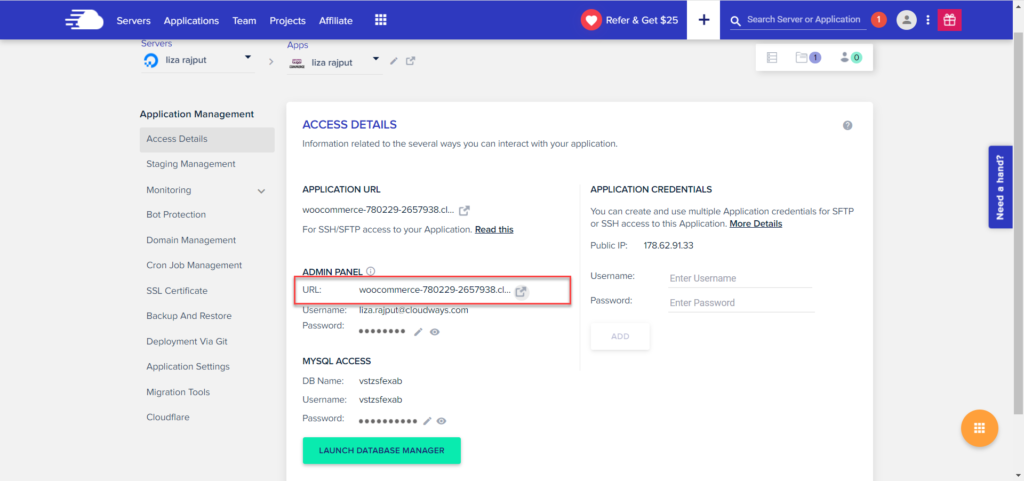 Now you’ll be redirected to the login page. The username and password are mentioned in the admin panel section of the Access Details page.
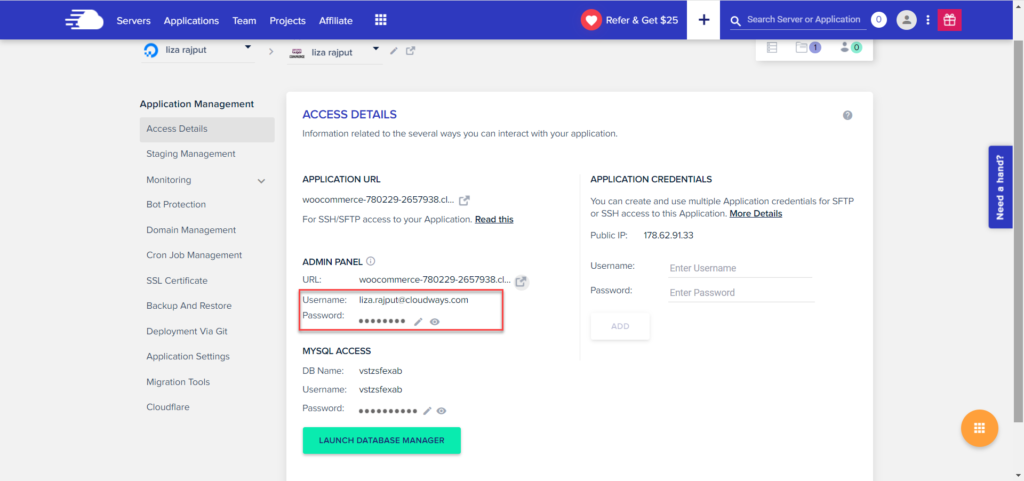
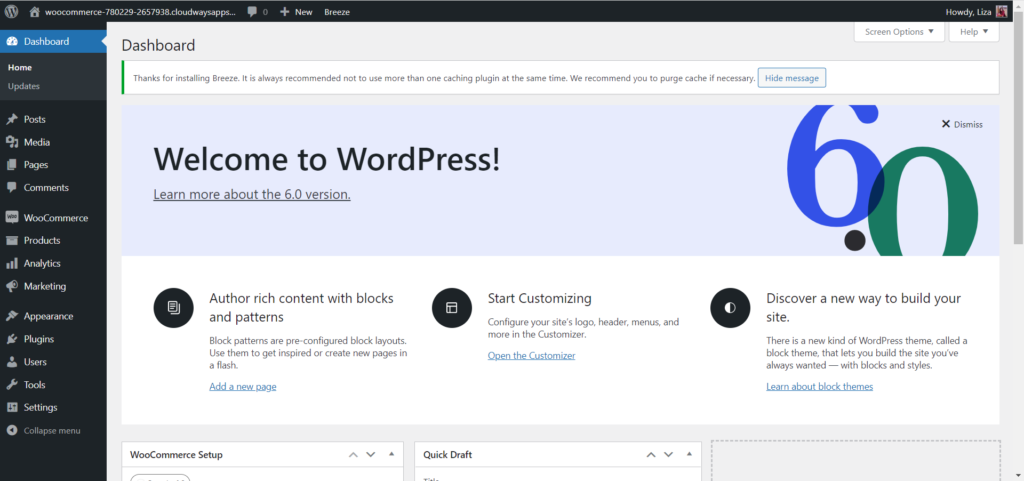
- Log in to view the admin dashboard of your WooCommerce Store
Congratulations, you’ve set up your new WooCommerce store.
4) Select your Migration Method
With a brand new WooCommerce store ready, you need to select the most-suited migration method to migrate your products from BigCommerce to WooCommerce.
This tutorial will show you how to perform the migration from both automated and manual methods. You can then decide what suits you the most.
Method #1: Automated Migration through LitExtension
Automated migration is the easiest way to migrate your products to your desired new store. There are various tools for this, like LitExtension, Cart2Cart, and NextCart.
All the tools work nearly the same way. For this tutorial, I’ll be using LitExtension.
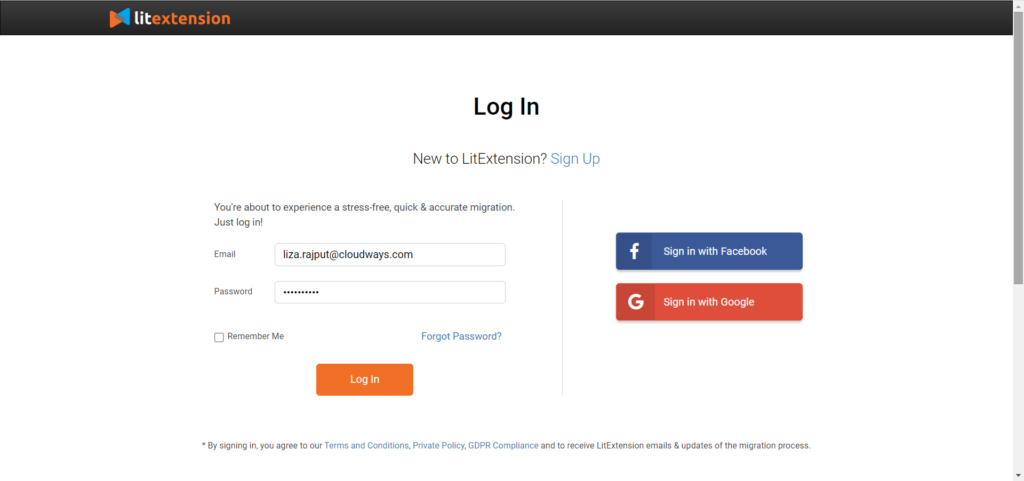
I. Log in or register to your Lit Extension account
Log in or register to your LitExtension account. You can also connect through Facebook or Google accounts
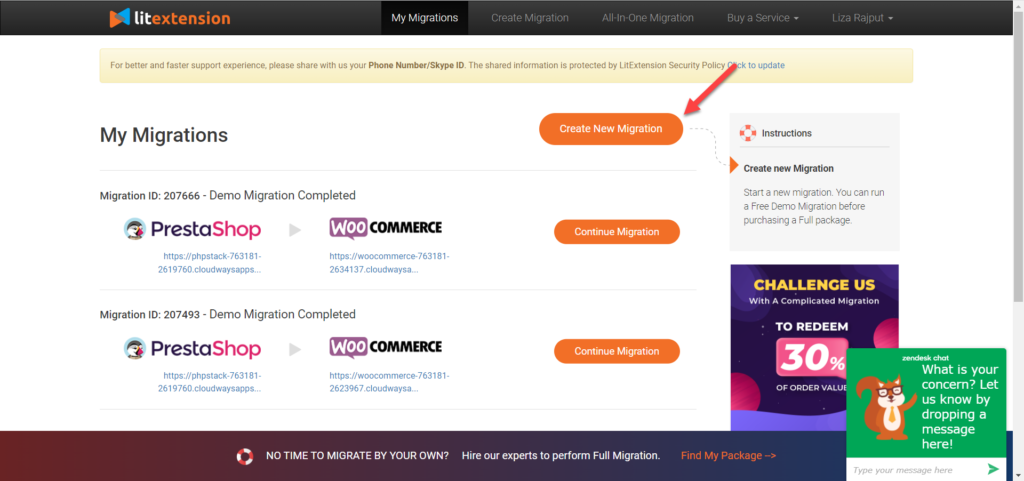
- You’ll be redirected to the My Migration Page. Click on the ‘New Migration‘ icon to get started
II. Source set-up
For the BigCommerce to WooCommerce migration, you need to add BigCommerce API details to set up a source cart
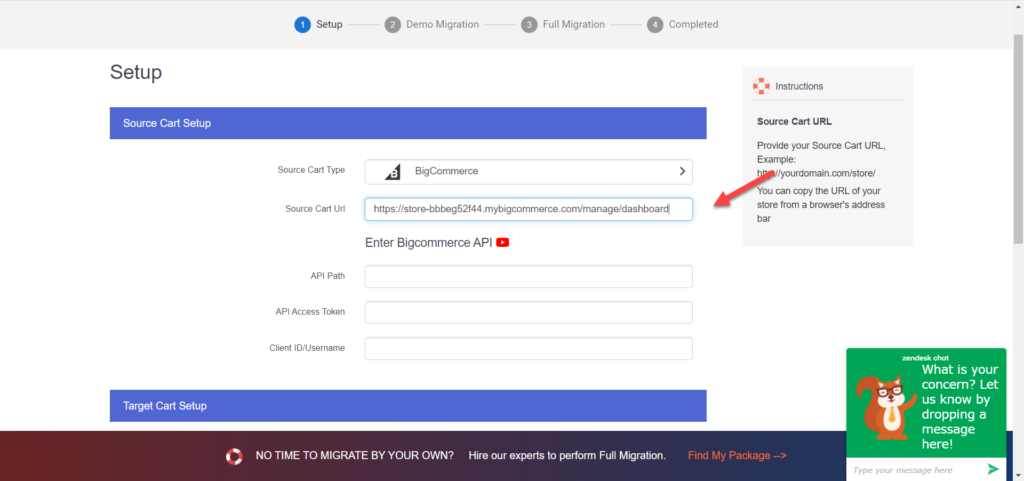
- Fill in your source cart URL by inserting your BigCommerce store’s URL.
- Now you need to add the API path. For that, open your BigCommerce Dashboard and select the Advanced Settings option
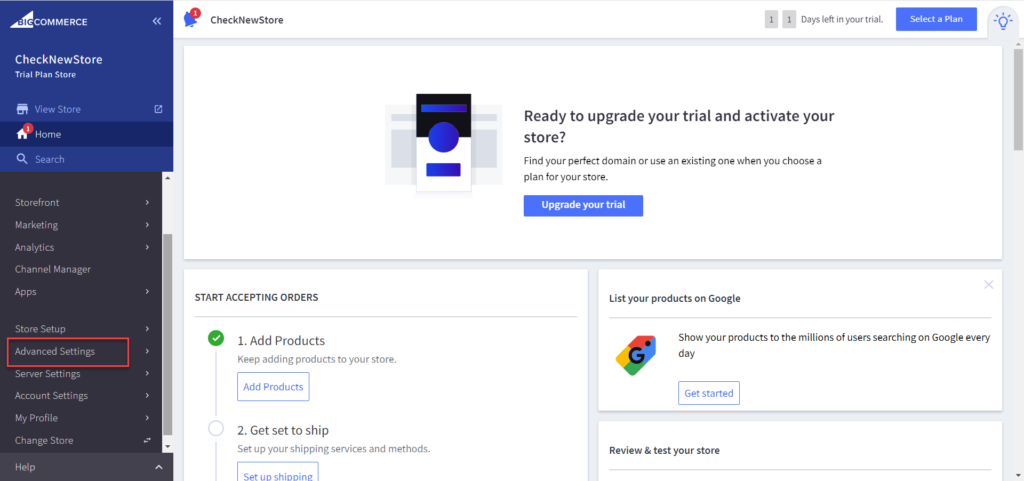
- Now click on ‘API Accounts‘
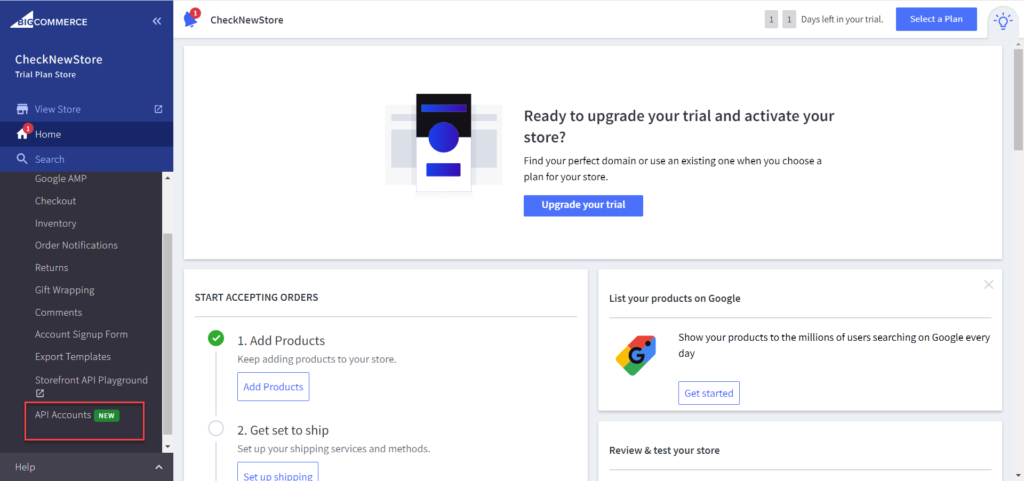
- Select Create API Account
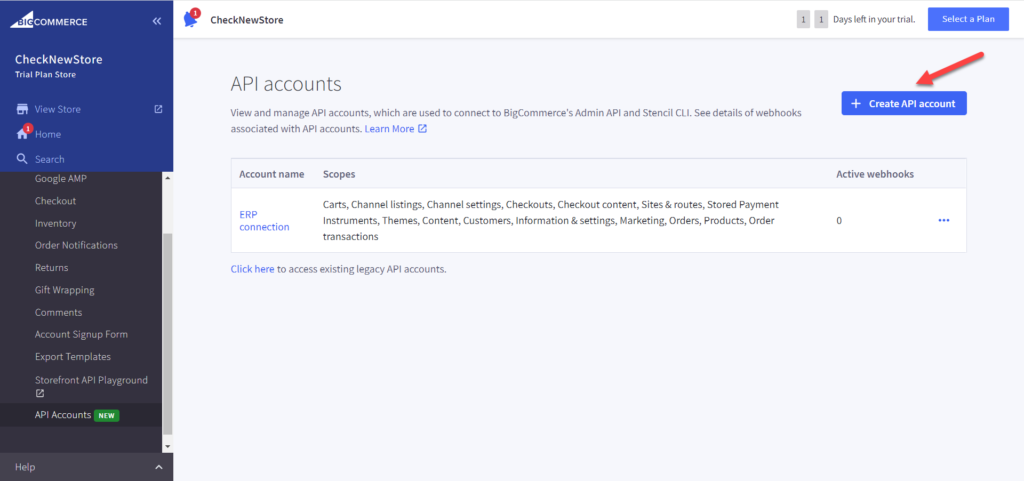
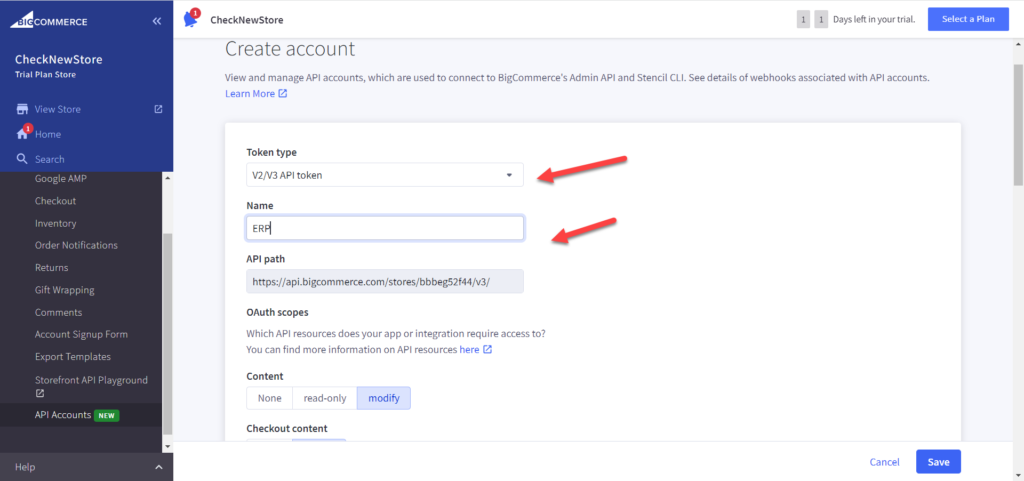
- You’ll be redirected to the ‘Create Account page‘, where you need to fill in the details
- Select V2/V3 API Token from the drop-down menu in the token type section
- Give it a suitable name
- Now change the status to Modify and Save
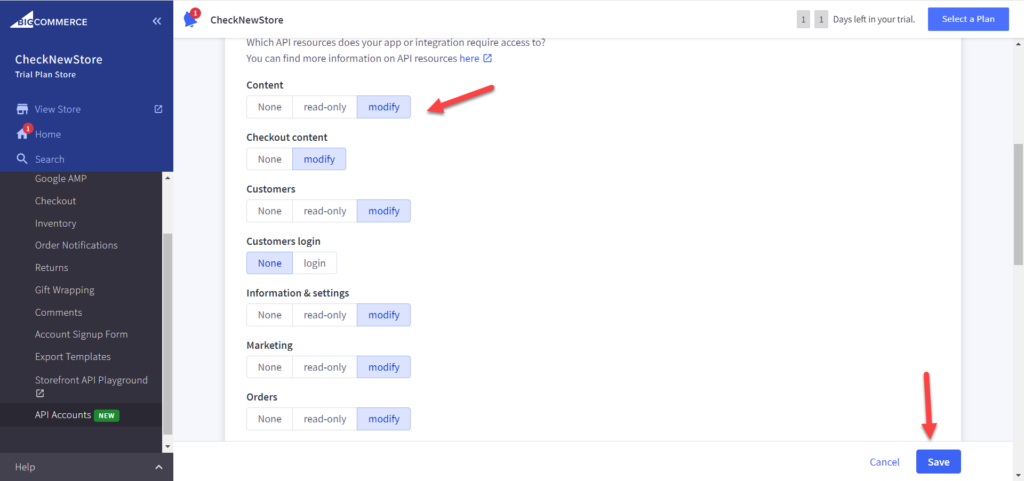
- The file with the credentials will be downloaded to your PC.
III. Target cart setup
- Fill in the details of your Target Cart type and Target Cart URL
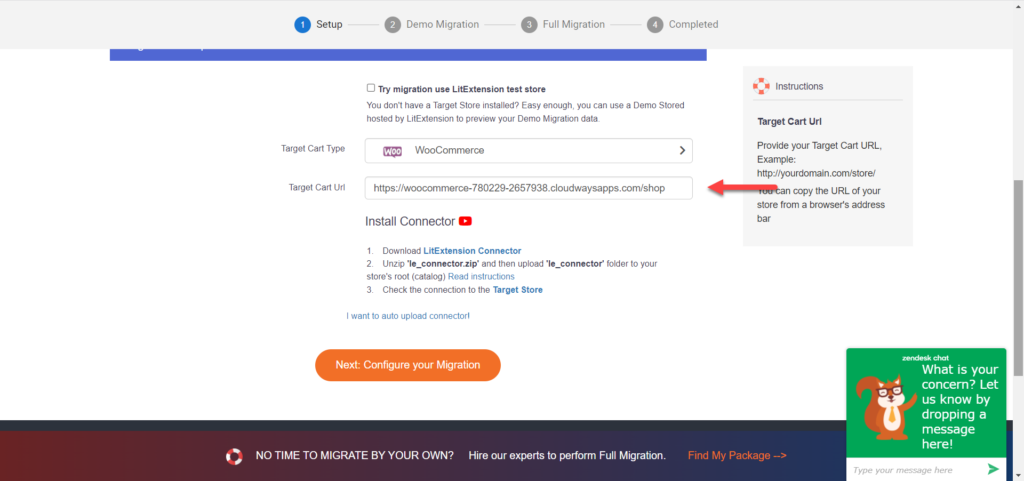
- Download the LitExtension Connector. Extract the zip file and upload it into your target store’s root folder.
- I’ll use the FileZilla FTP Client for the said purpose. You can use any FTP client that suits your needs.
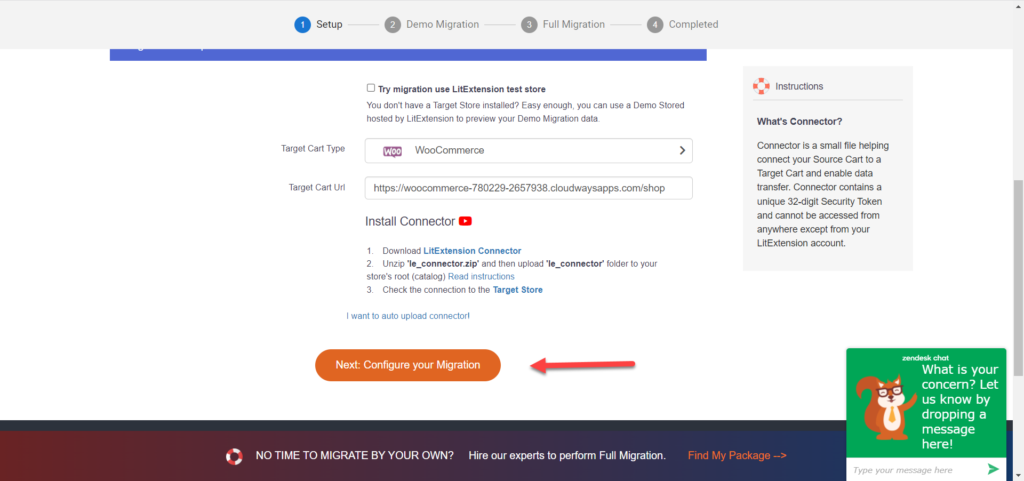
- Click ‘Next‘ to configure your migration
IV. Configure your migration settings
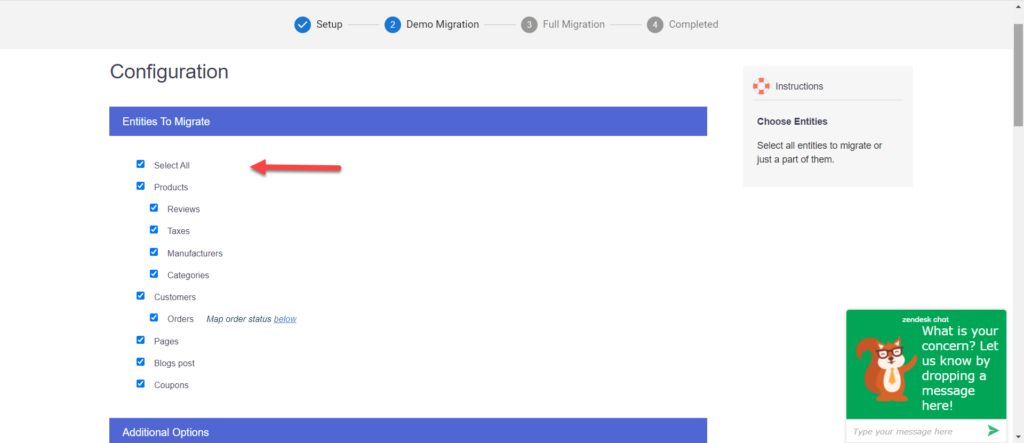
- At this stage, you’ll need to select entities to migrate to your new store. You can choose a few or all. I’ll click on the ‘Select All‘ option
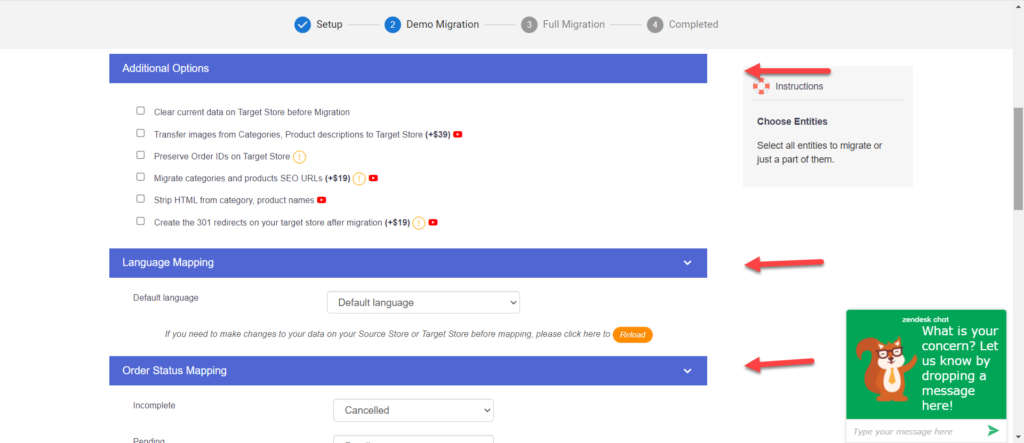
- You can also expand your migration possibilities with LitExtension. Simultaneously, you can also utilize language and order status mapping, which will show up in your new store.
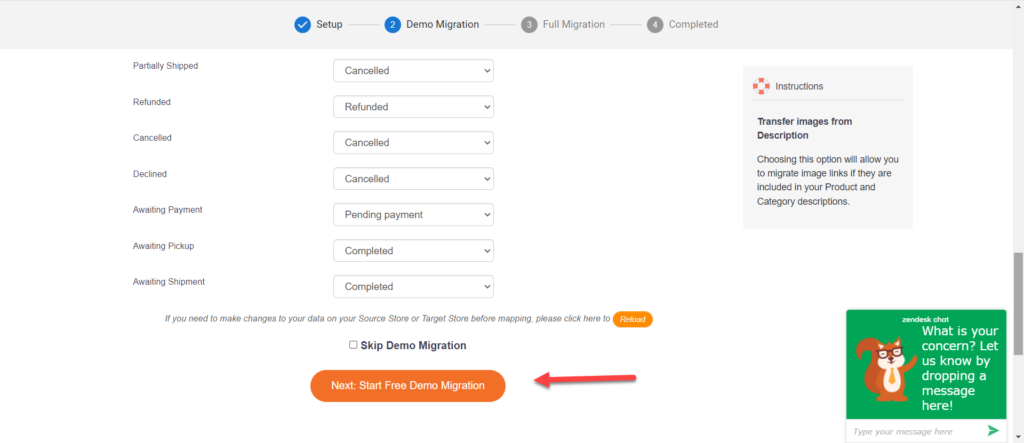
V. Start migration
Now, you can start your migration. You’ll also be given the ‘Demo Migration‘ option, which you can skip.
However, I recommend you utilize this option before carrying out the entire migration so you can see beforehand what entities will be migrated to your new store.
- After Demo Migration, you’ll be redirected to the page where you can check the entities to be migrated.
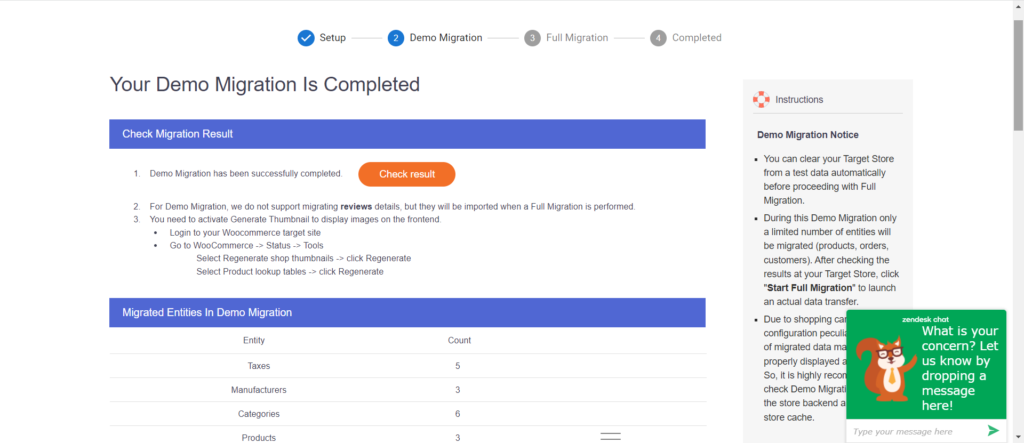
- You can now click the ‘Full Migration‘ icon to get the migration completed in real-time.
Method #2: Manual Migration
Manual migration has a reputation for being the toughest. Of course, some of it is well-deserved. But it really all depends on your technical expertise.
If you feel confident in your technical know-how, I recommend giving it a shot. It’s great for customizing your migration to the fullest.
Or you can hire professional help and coordinate with them to carry out the migration.
I. Extract the CSV file of the products from the BigCommerce store
The first step to conducting manual migration is to extract the CSV file. You have to repeat the same process that you did while creating the backup.
You already downloaded the CSV files of products, customers, and orders when you made the backup.
If you have made a backup already, you can miss this step.
II. Download plugins
Now that you have downloaded the CSV file, go to your WooCommerce store.
- Click on the URL in the admin panel.

- You’ll be redirected to the Login Page. Fill in the Username and Password fields in the admin panel and log in.

- Now you’ve entered the WooCommerce Dashboard.
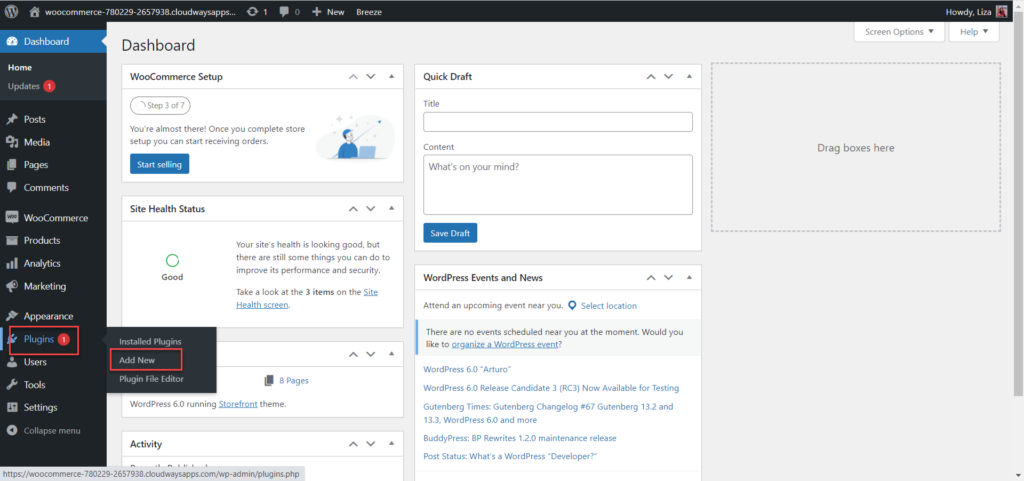
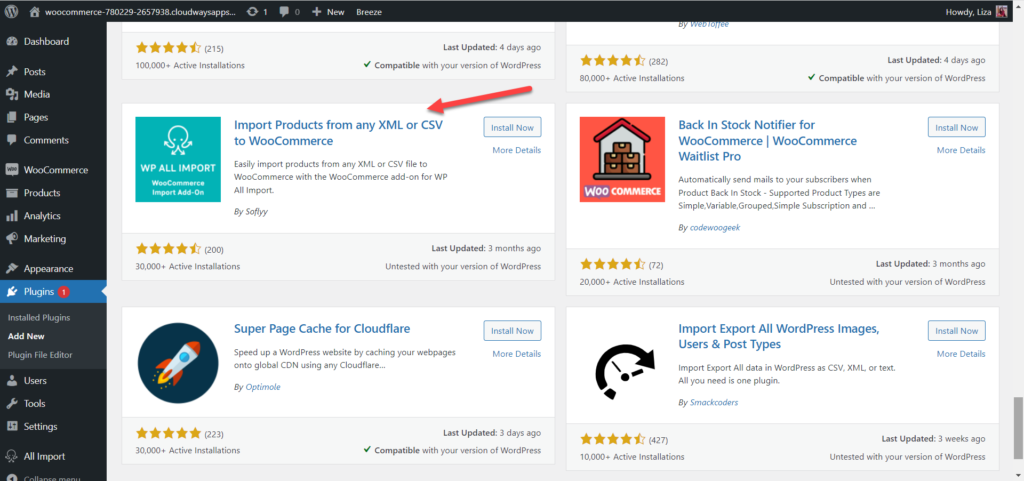
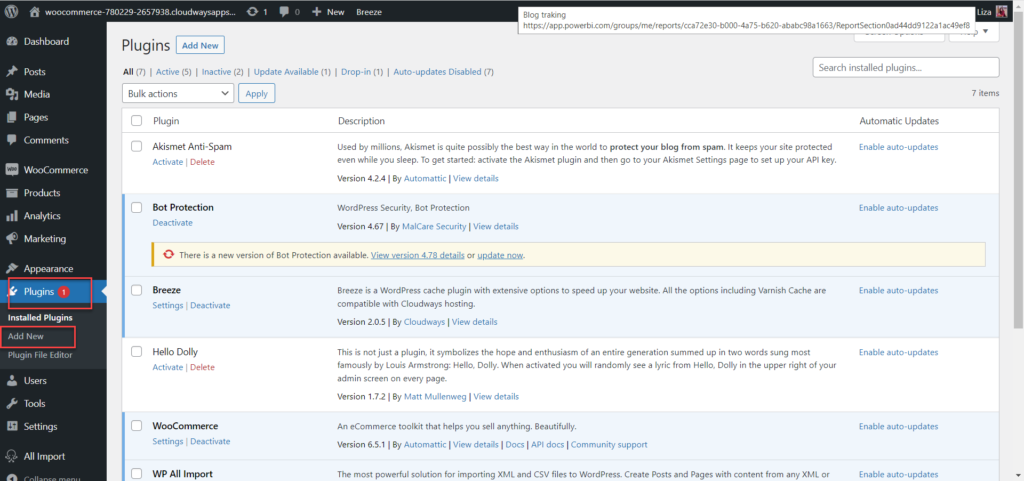
- Go to Plugins > Add New
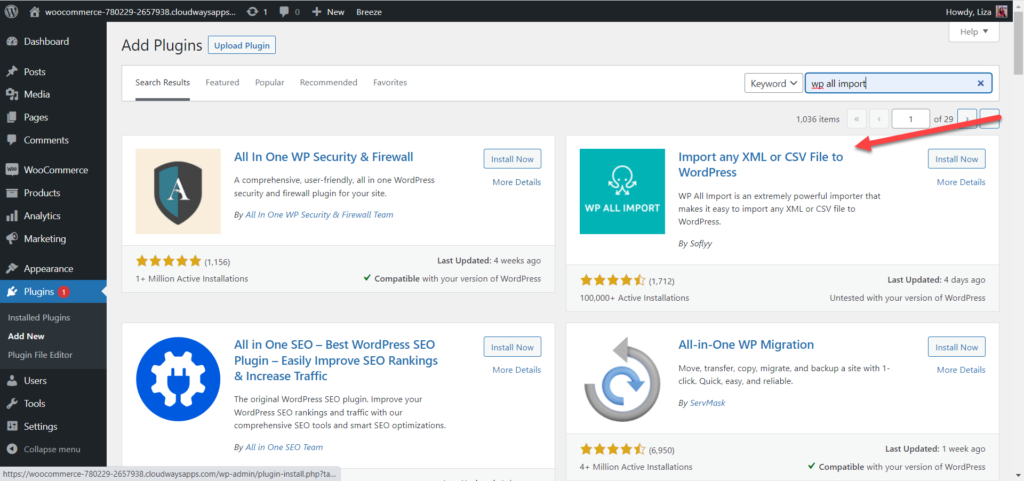
- Install and activate the WP All Import Plugin and WP All Import WooCommerce Add On plugin
III. Import the CSV file
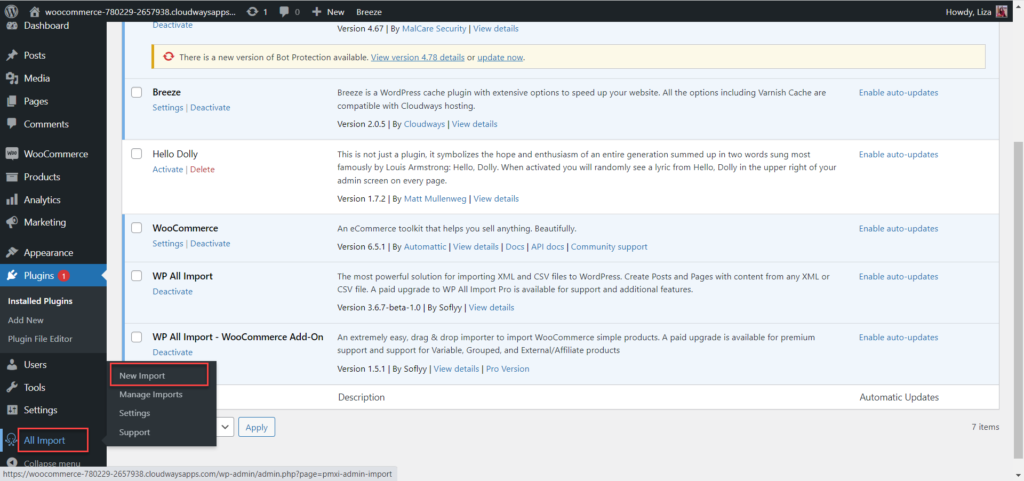
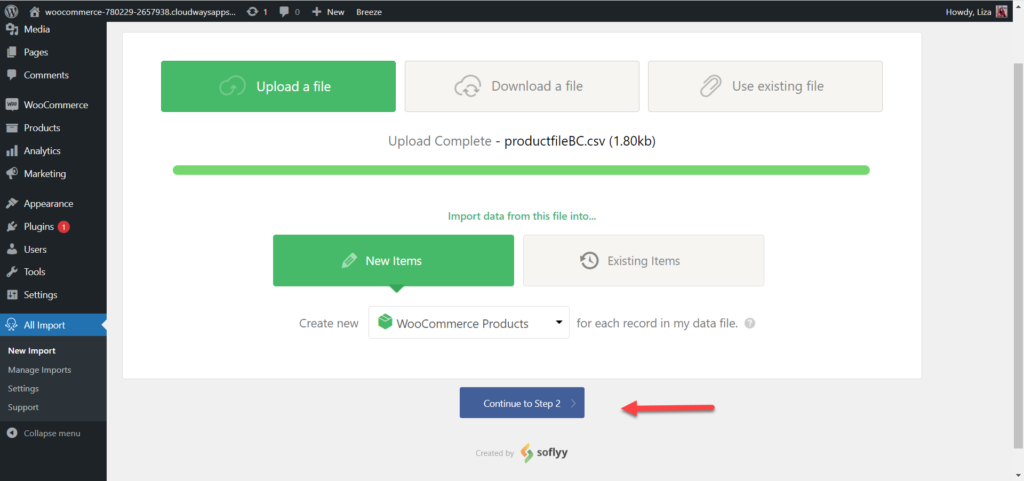
- Go to ‘All Import‘ > New Import
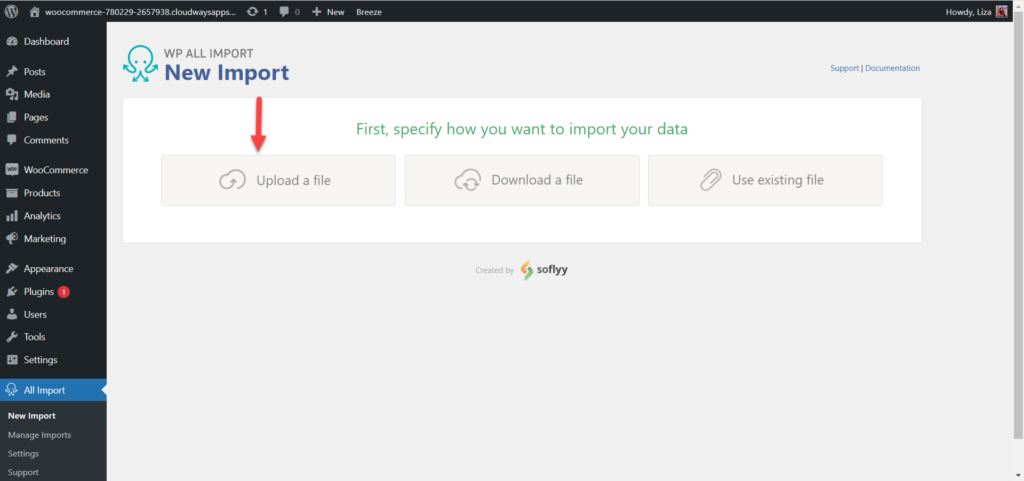
- You will enter the Import page, where you’ll upload your product CSV file.
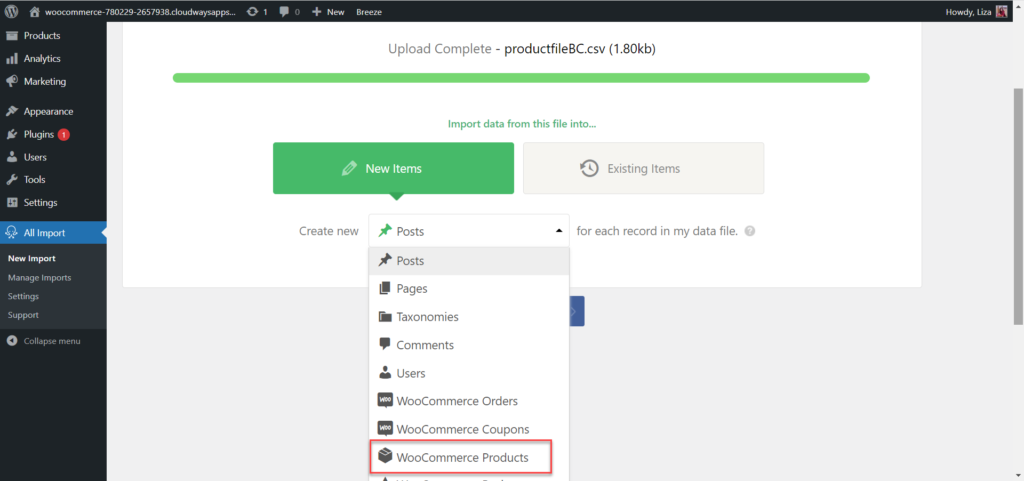
- Once you’ve uploaded your file, select ‘WooCommerce Products‘ from the drop-down menu
IV. Perform Mapping
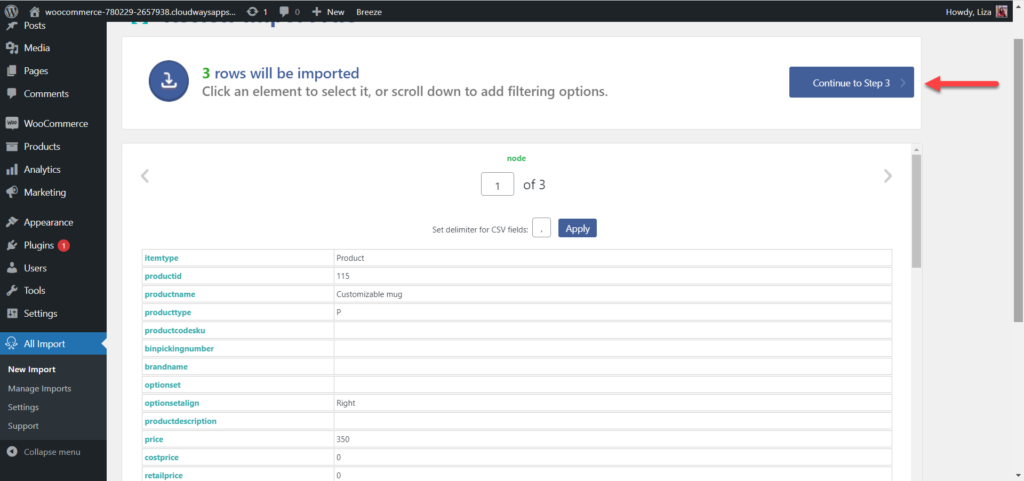
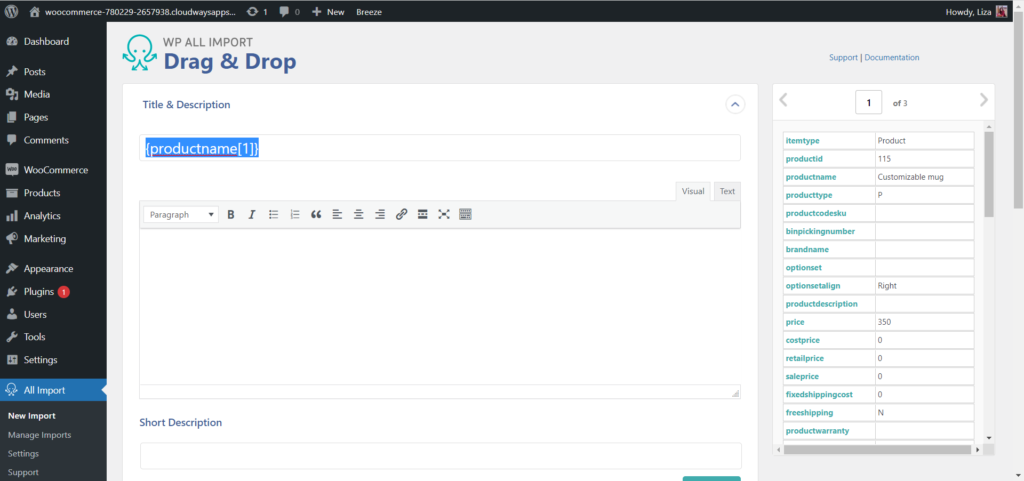
- Drag and drop the fields to the relevant columns manually. Remember, this is a critical step and requires extra caution.
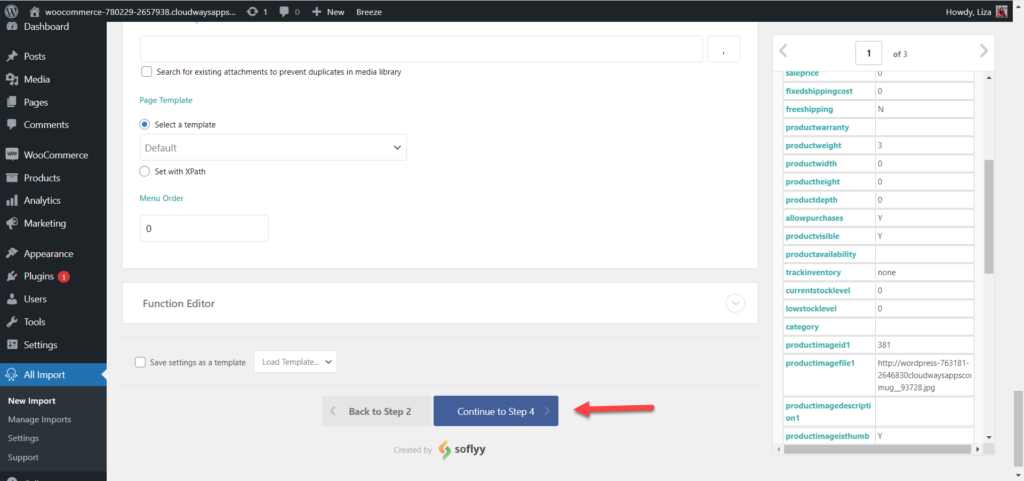
- Once done, continue to step 4
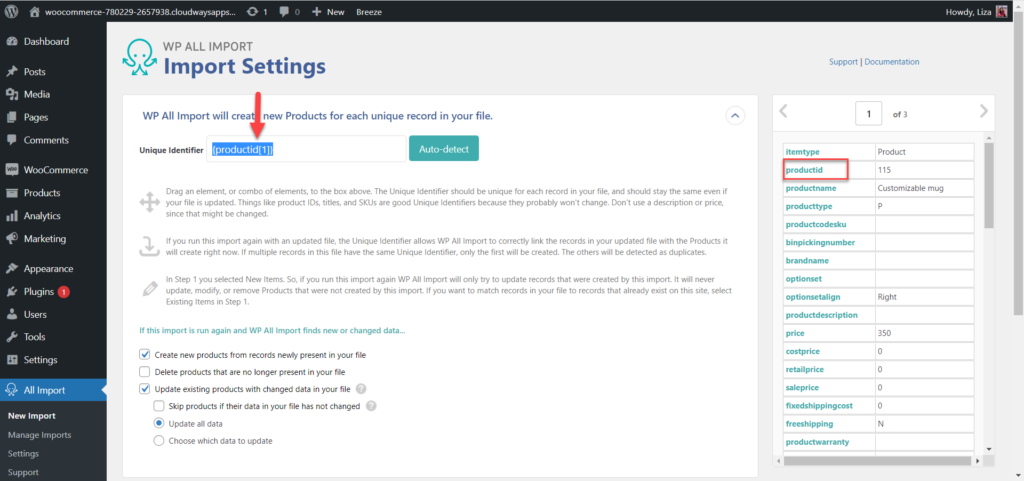
- In the Unique Identifier field, drag and drop your product ID
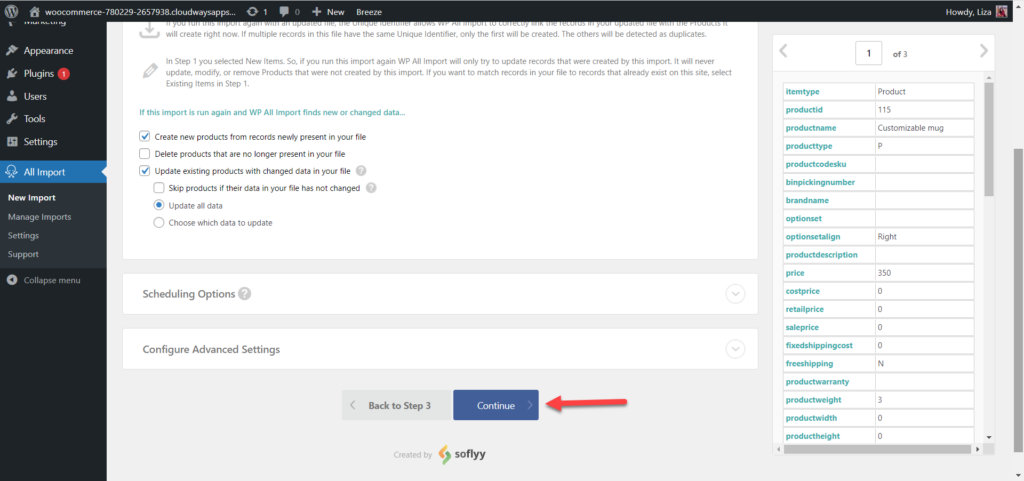
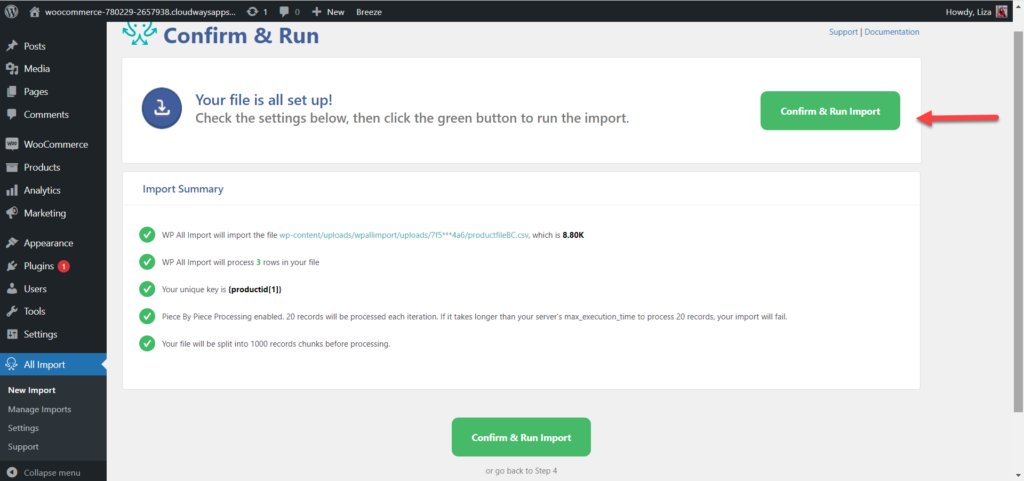
- Now click ‘Confirm & Run Import‘
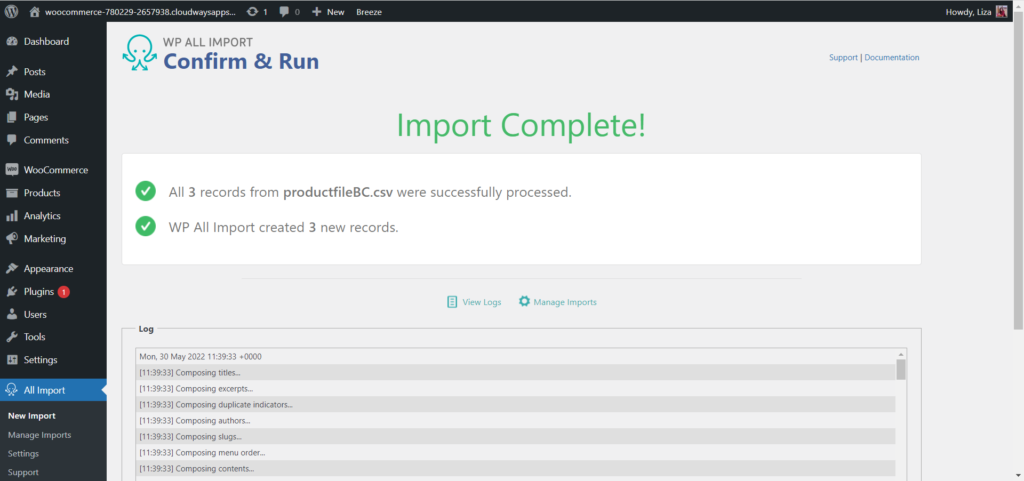
Congratulations, you have successfully migrated your store!
Verify Results after Migration
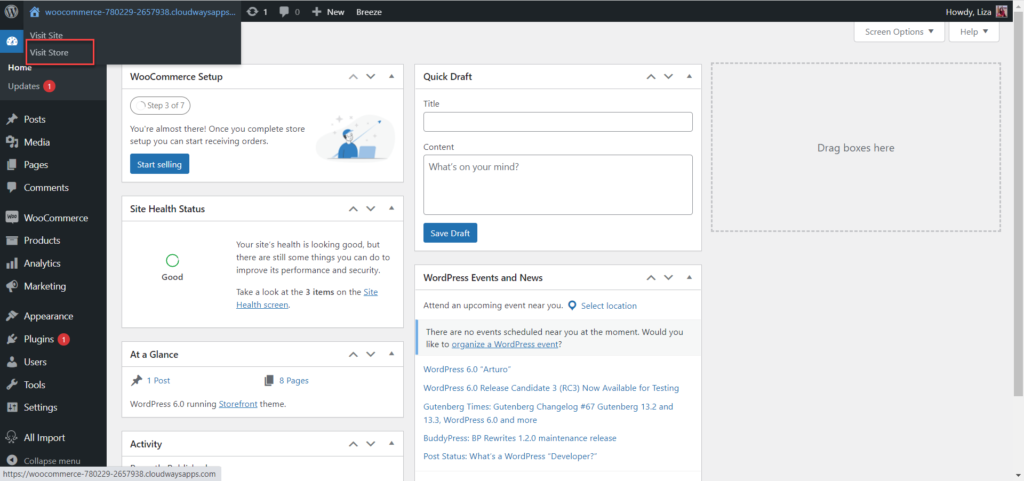
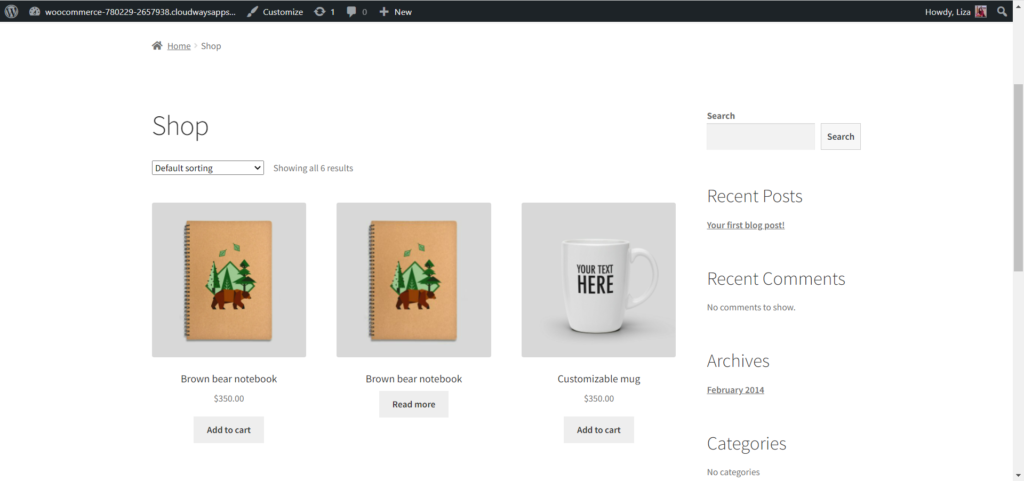
The next step is to verify the migration. Go to your WooCommerce Dashboard and select ‘Visit store‘
- If you can see the items in your store, your migration is completed.
Customize Your Store with WooCommerce Themes and Extensions
One downside of migration is that it doesn’t allow you to replicate your store design. But with WooCommerce, you don’t have to worry about your store’s visual outlook and design.
WordPress is known for its versatile themes, which means that it allows you to test your aesthetic capacity and create a visually appealing store.
And when we talk about WordPress themes, we cannot miss Astra, the most downloaded WP theme there is.
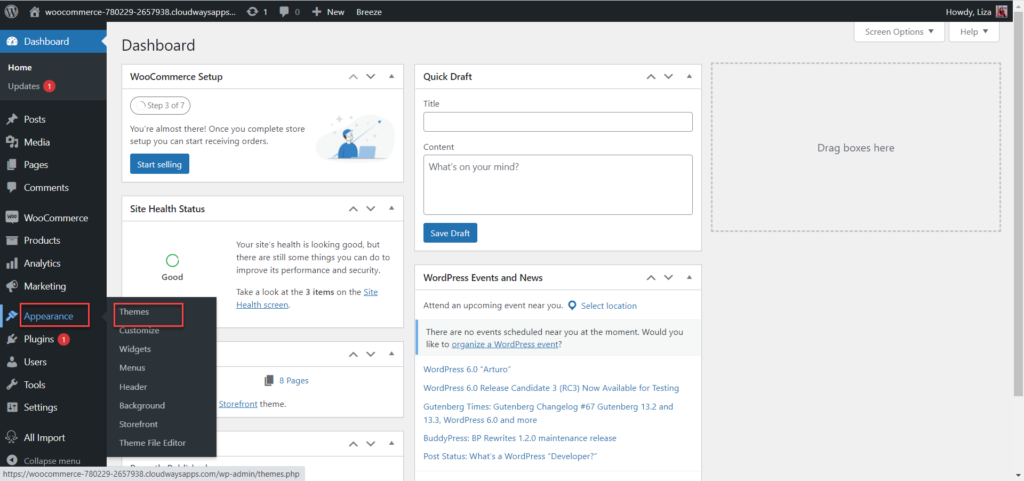
- To install the Astra theme, go to your WooCommerce Dashboard > Appearance > Themes
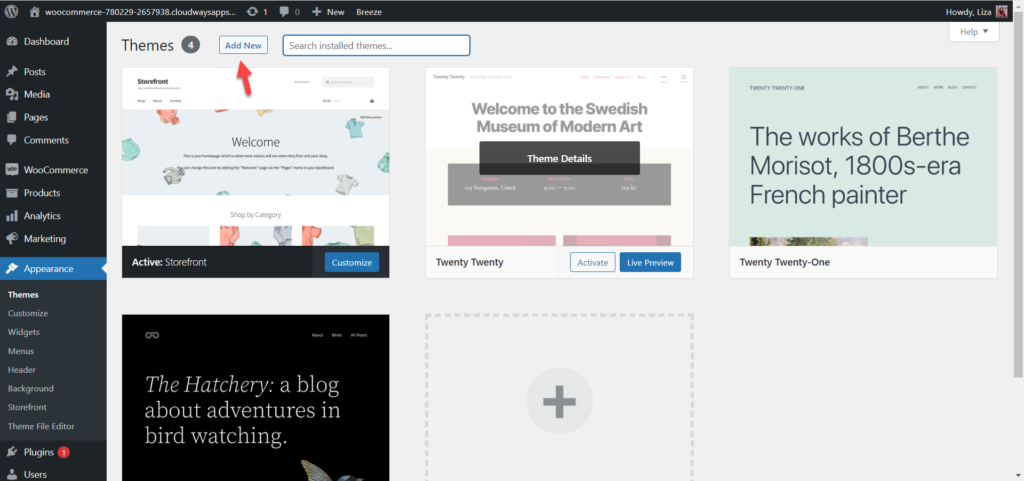
- Search for ‘Astra‘ and install
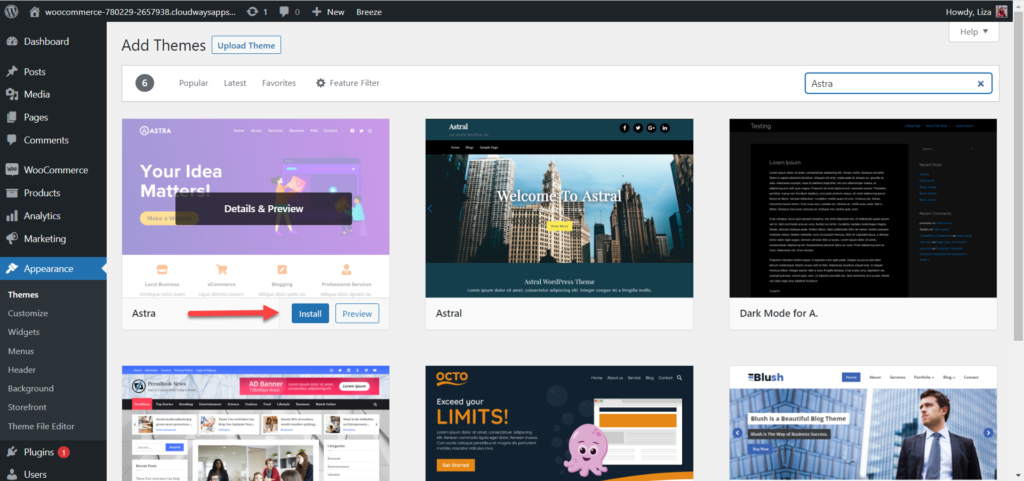
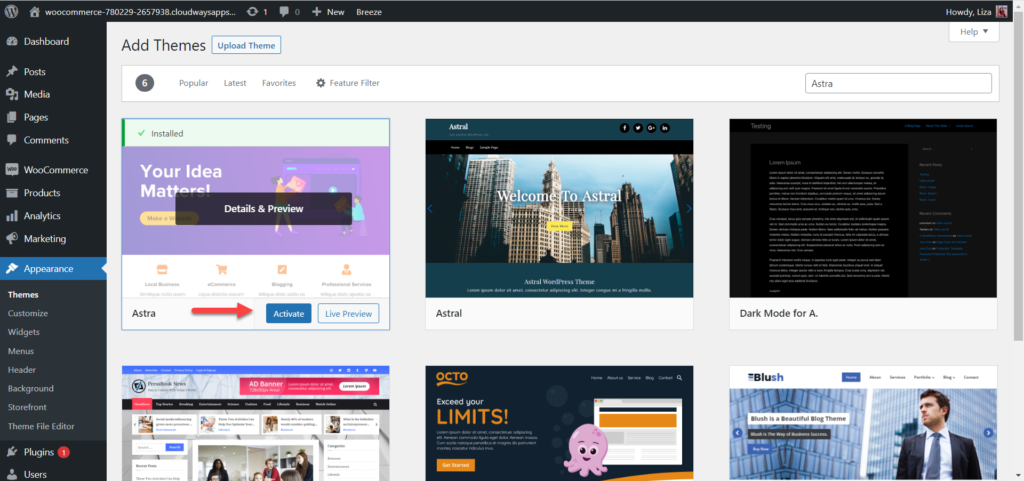
- Once it is installed, press Activate
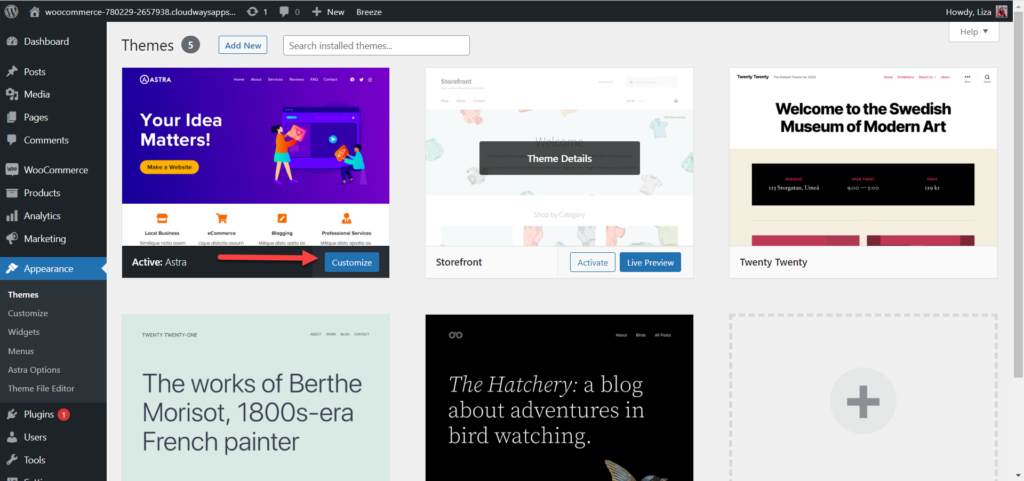
- Click Customize if you wish to start customizing. You can do that later too.
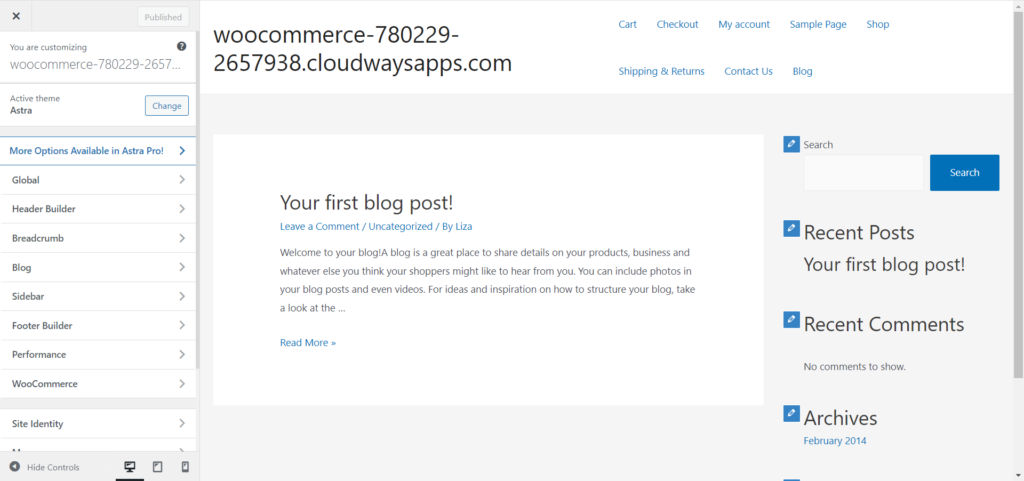
- If you click on Customize, you’ll enter the following screen and you can start your customization process.
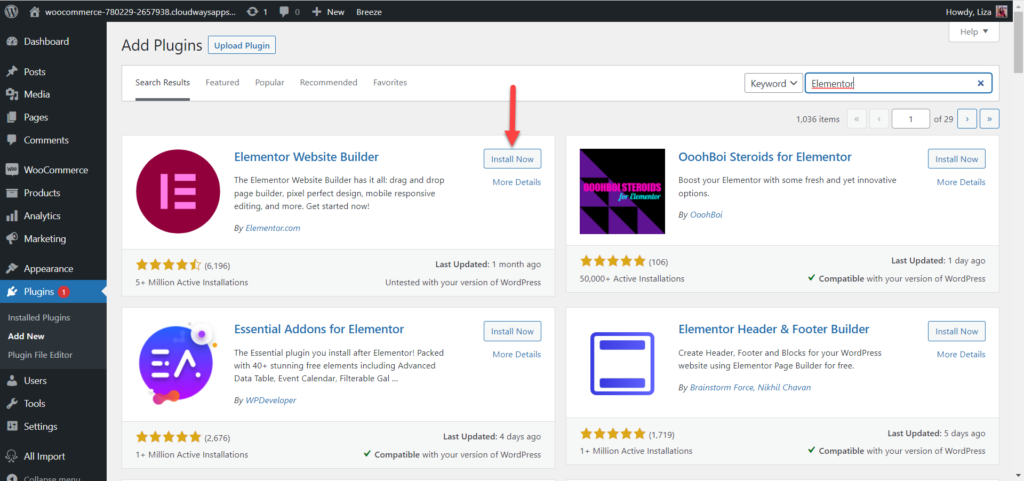
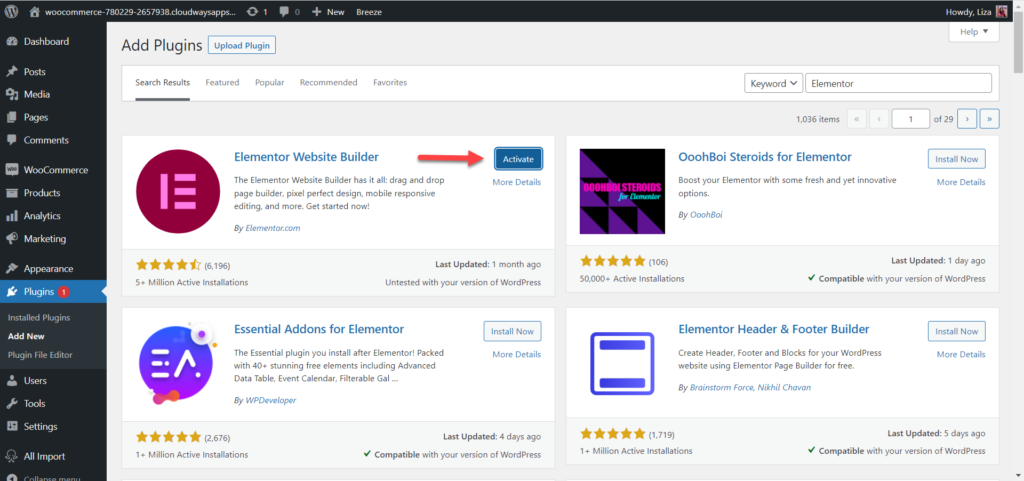
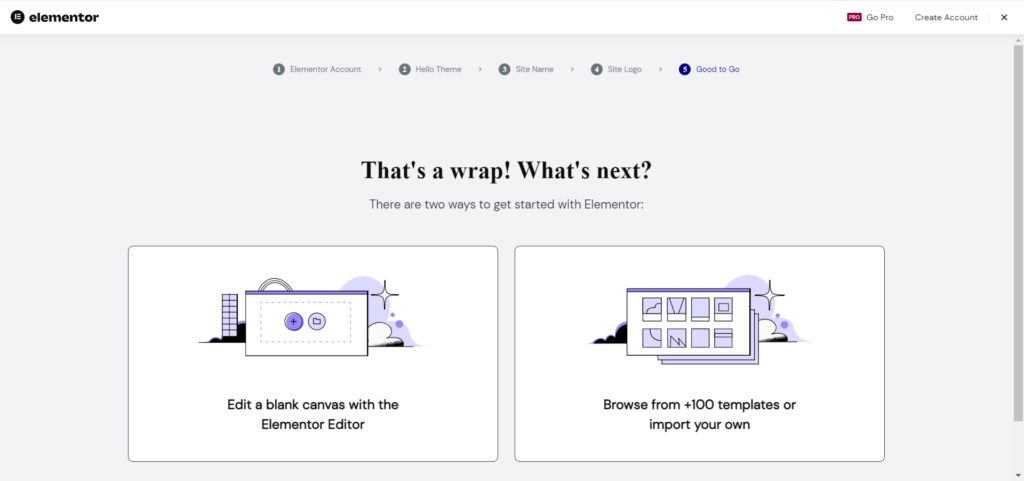
You can also use the Elementor page builder to create attractive pages.
- Install Elementor Website Builder
Summary
This is a simplified guide to migrating from BigCommerce to WooCommerce. Too many people, understandably, dread the process. But by following the right steps, you can mitigate the risks involved and make the right decision for your business.
Select your data migration option carefully; it’s a real game-changer in your migration process.
Customer Review at 
“Great performance for the price, and plenty of control”
Sean P [SMB Owner]
Liza Rajput
Liza Rajput is a Technical Content Producer at Cloudways. Being a software engineer, she loves to play with data and its processes and wishes to grow and excel in Data Science and Big Data Engineering. She has also been an avid reader and exceptional writer, with sufficient experience in technical, research-based, and creative writing.
