Managing an online business can be a hassle for store owners because loads of day-to-day tasks can drain your energy and are not worth your time. Whether you’re a small-scale business owner or a large scale, manual handling of processes sucks!
But guess what?
I have sorted this issue for you.
In this blog, I will introduce you to Zapier and help you integrate your Woocommerce store with Zapier to automate the workflows and streamline your store operations effortlessly.
Zapier: An Overview

Zapier lets you automate processes. With this tool, you don’t have to create manual integrations. It is one of the many useful WooCommerce plugins. All you need to do is to specify the connections and follow the steps, and you’re done creating the recipes.
Zapier also provides predefined recipes that are widely used. You can configure those simply in just a few clicks.
Why Should You Integrate WooCommerce with Zapier?
As a store owner, you have a huge responsibility to carry out the operations and ensure the smooth functioning of the store. This means that you’ll have to invest time and resources to do that for you.
The good news is that Zapier can save you from the hassle of manually doing tasks. You can automate the processes with Zapier and let it do the dirty work.
Here are a few use cases of Zapier:
- Link product page to social media: Whenever you upload a new product, a post is generated on social channels.
- Link email to products: Customers are notified through email when a product is low on stock or out of stock.
- Link orders with Google Sheets: Whenever a new order is created, it is automatically updated in the Google sheet.
There are many predefined recipes or zaps that you can use to automate the process and save loads of time and energy.
Want to automate your Workflow on your WooCommerce store?
Use the WooCommerce Zapier plugin and try Cloudways managed hosting for a hassle-free experience.
Requirements for WooCommerce Zapier Integration
Before integrating Zapier with WooCommerce, you must fulfill the requirements below. Cloudways WooCommerce hosting supports Zapier integration and makes the process hassle-free.
| Items | Requirements |
| PHP | Version 7.0 or higher (We recommend using PHP 7.4 or greater ) |
| WordPress | Version 4.9 or higher (We recommend using WordPress 5.6 or later ) |
| WooCommerce | Version 3.7 or higher |
| WooCommerce/WordPress Account | Account needs to be an administrator role |
| WordPress Permalinks | Pretty permalinks enabled |
| HTTPS | Site needs to be accessible via https:// |
| WooCommerce REST API | Running and operational |
| WordPress Cron | Running and operational |
| Zapier Account | Free or paid plans |
WooCommerce Zapier Plugin

With over 20,000 active installations, WooCommerce Zapier is a popular automation plugin that connects your WooCommerce store to thousands of cloud apps. This plugin is fully compatible with all Zapier-connected apps and services.
However, it is a premium plugin costing $59 per year.
Features
- It lets you send your WooCommerce order, product, customer, coupon, or subscription data from a zap.
- It automatically creates and updates WooCommerce orders, products, customers, coupons, or subscription data from a zap.
- It speeds up the store processes
- It sets up triggers to automate actions when things change in WooCommerce
- It is secure and sends woocommerce data over an encrypted connection
How to Install WooCommerce Zapier Plugin
Now, I will tell you how to install and activate the WooCommerce Zapier plugin.
Step 1: Purchase the WooCommerce Zapier Plugin
First, you have to purchase the WooCommerce Zapier Plugin. For this,
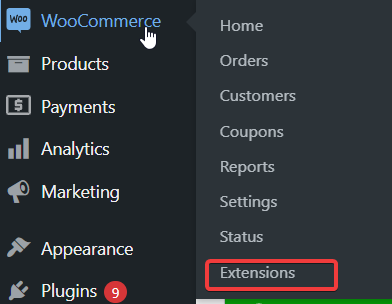
- Go to your WooCommerce Dashboard → Extensions
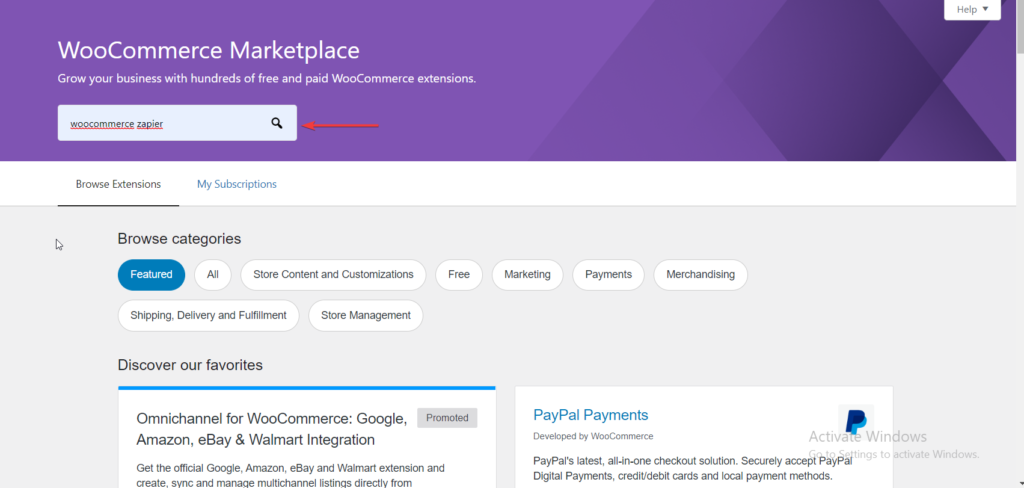
- Search for Woocommerce Zapier
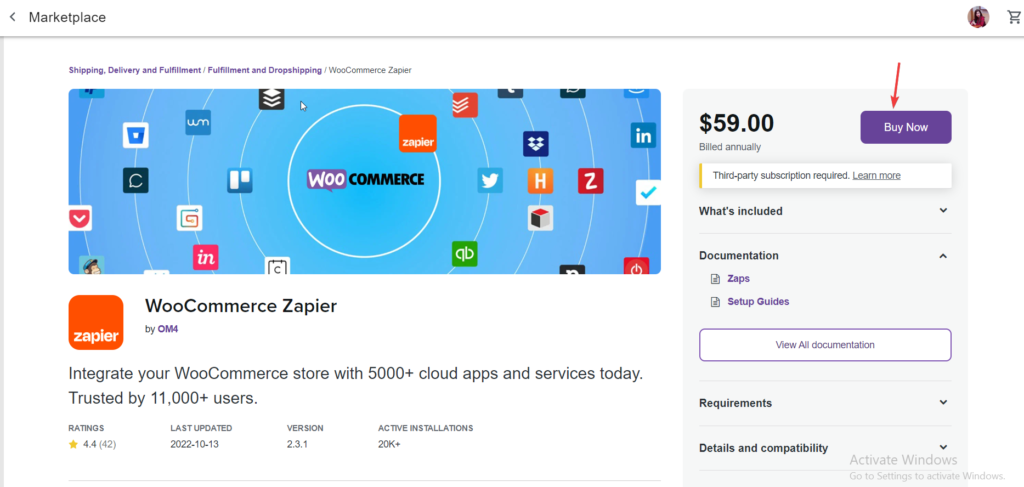
- Once you purchase the order, you’ll be prompted to download the plugin
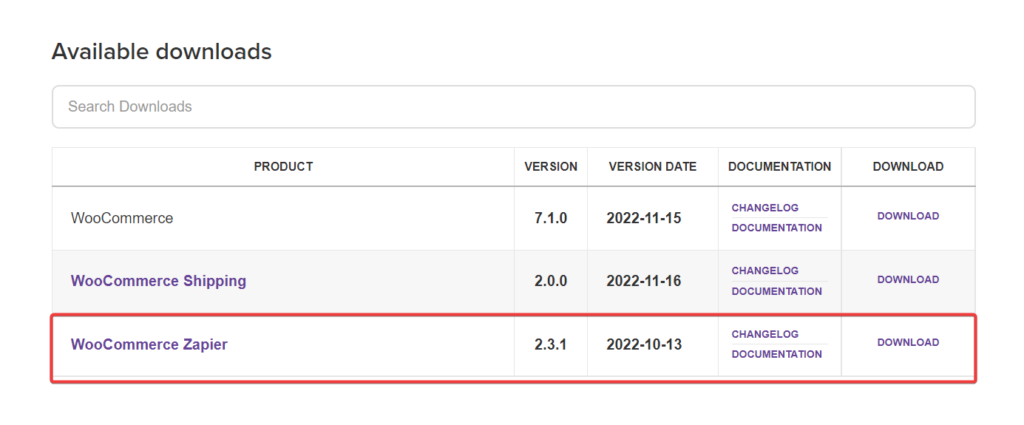
- Download the zip file on your PC.
Step 2: Upload the Plugin
Now, you need to upload the plugin to your WooCommerce store. For this;
- Go back to your WooCommerce Dashboard → Plugins → Add New
- Select Upload Plugin
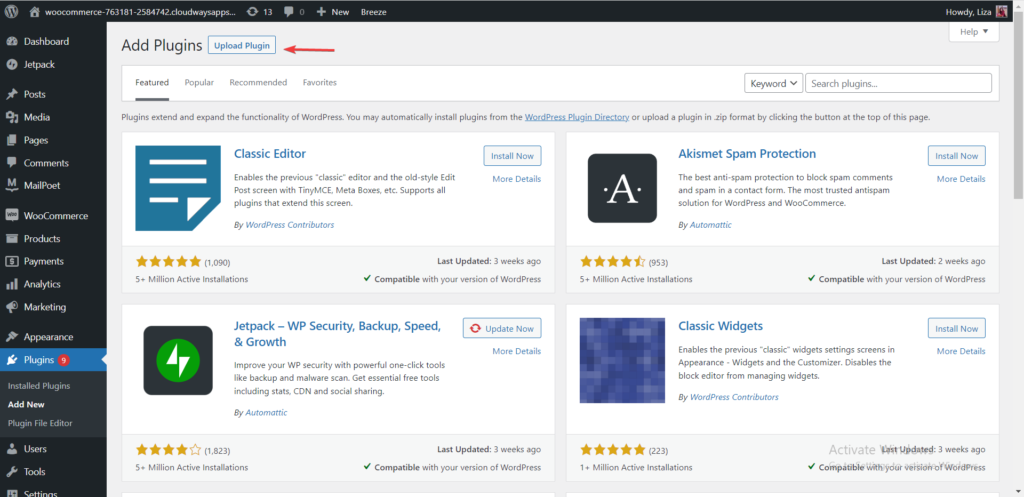
- Install and Activate the plugin

Step 3: Check Results
To verify the successful installation of the plugin,
- Go to your WooCommerce Dashboard → Status → Active Plugins

If you can see WooCommerce Zapier in your list of active plugins, then you’re done.
How to Integrate WooCommerce with Zapier
Now it’s time to integrate your WooCommerce with Zapier. Follow the below steps to perform the integration seamlessly.
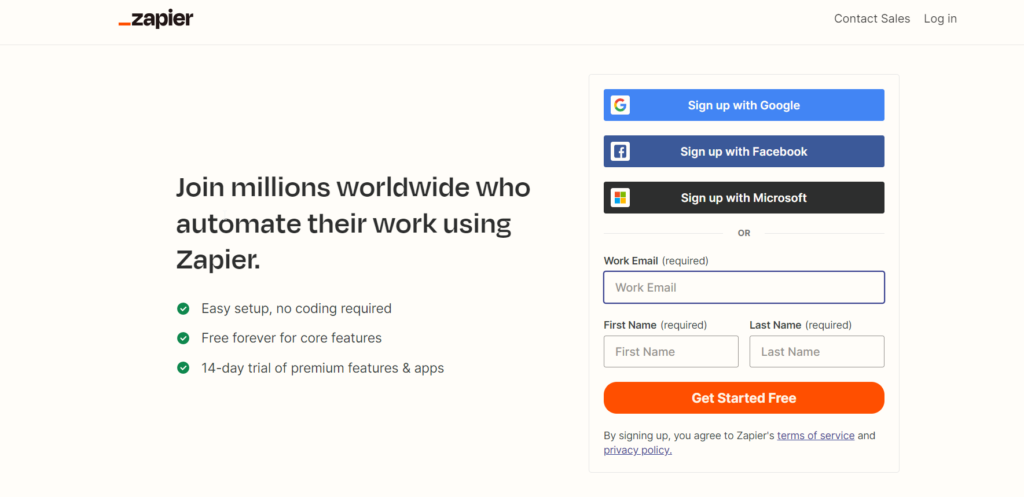
Step 1: Create your Zapier Account
Once you’ve successfully installed and activated the Zapier plugin, you need to create a Zapier account.
Step 2: Create a Zap
Now you’re all set to create a Zap. Zap is an automated workflow that connects your apps and services together. It follows the command, “when this happens, do that.”
Making a Zap saves you from the manual hassles of connecting different applications and events.
Zapier Dashboard is user-friendly, and you can easily connect one app with another. It also provides pre-built zap templates that you can utilize.
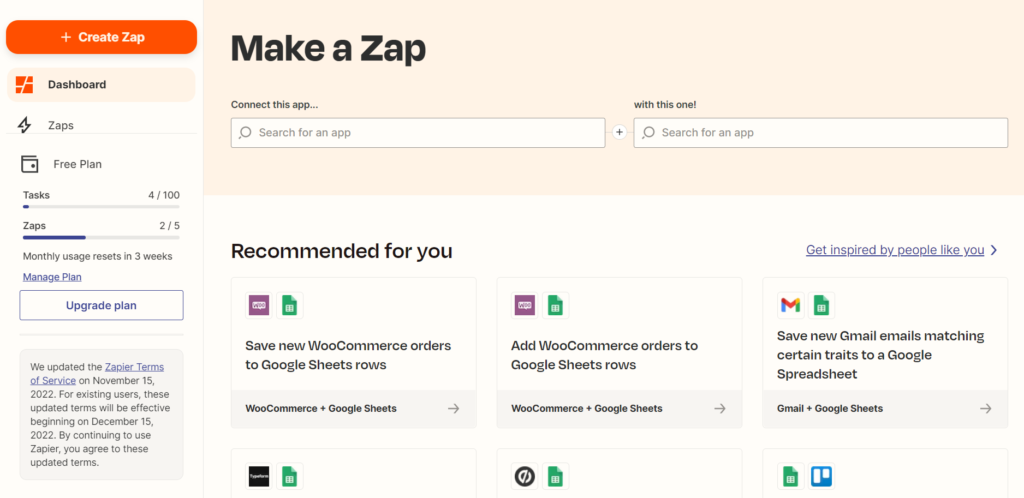
You can use any template. For this tutorial, I will use the zap “Add WooCommerce Orders to Google Sheets Rows”
- Click on the Try it button
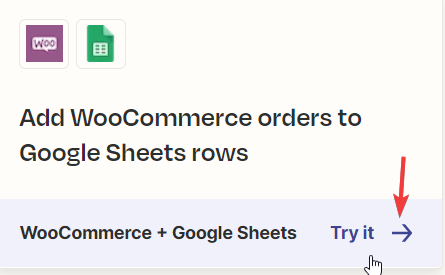
- Now you’ll be redirected to the following screen. Click on Get Started to move further
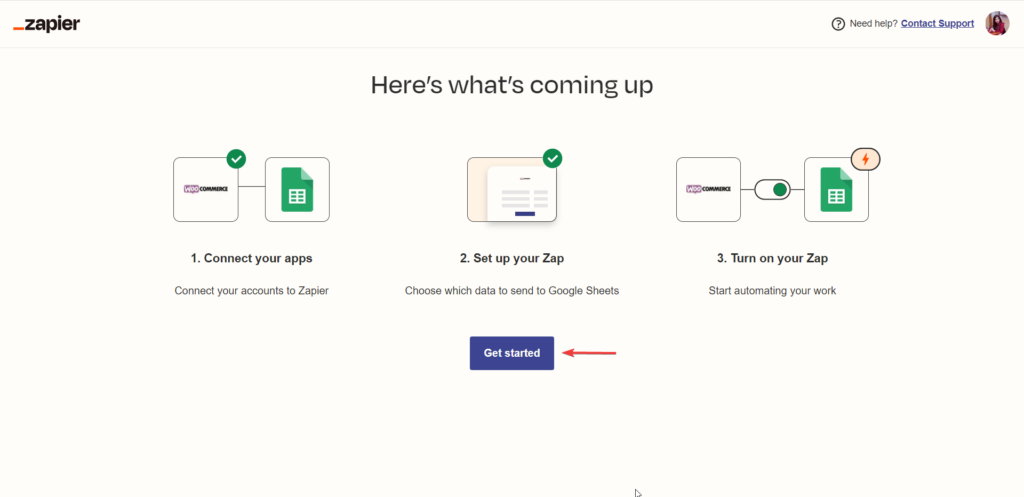
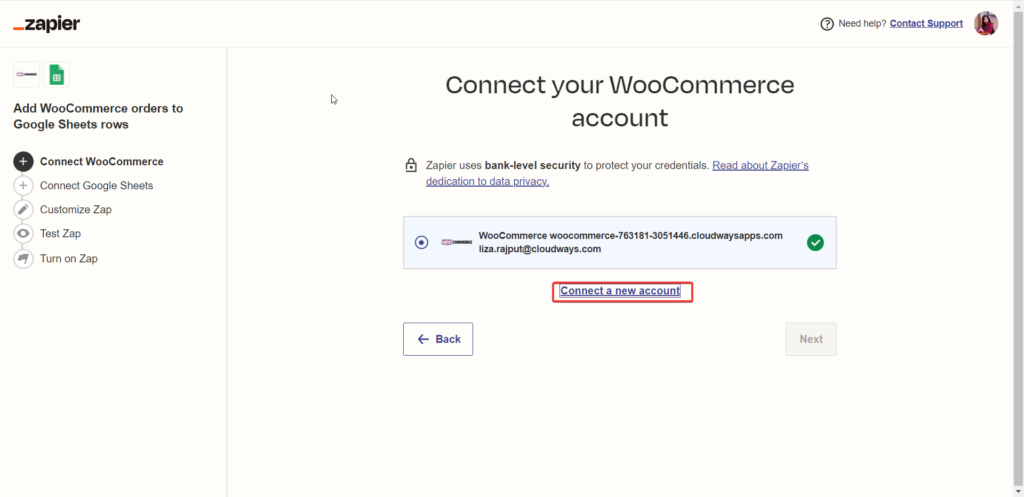
Step 3: Connect your WooCommerce Account
- As soon as you click Get started, a new window will appear that will prompt you to connect a new account. You just need to click on that.
- Fill in your store details
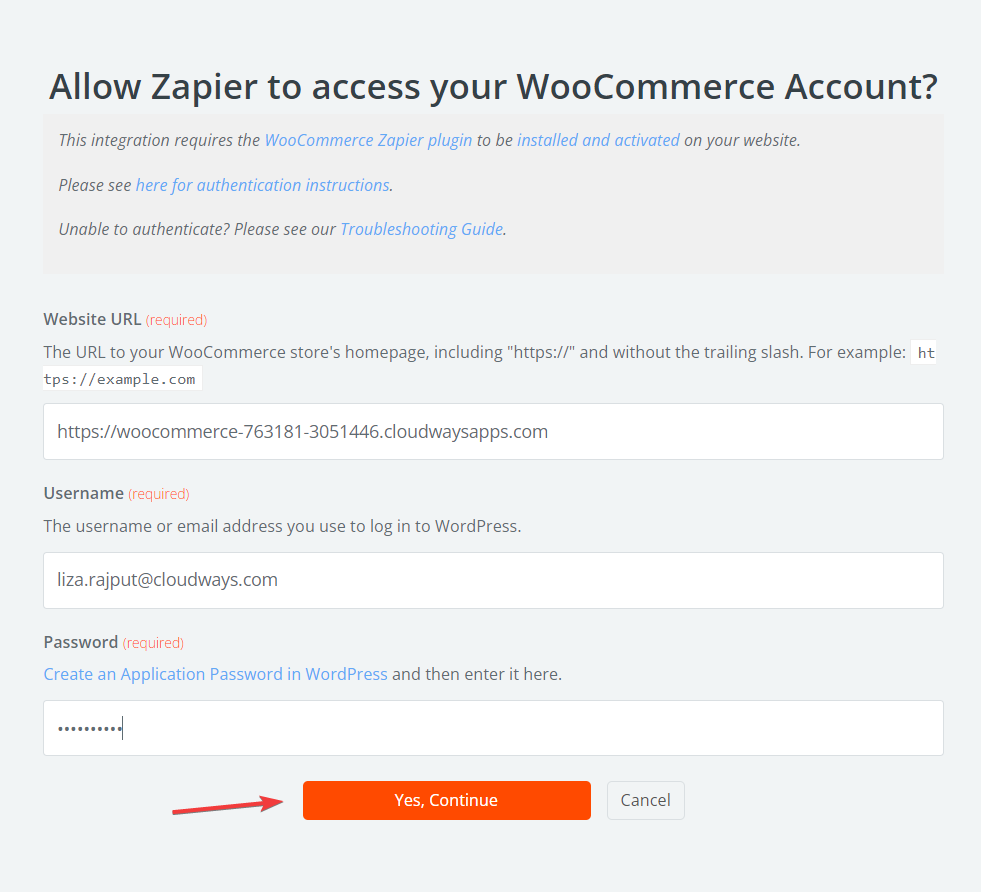
- Click on Yes, Continue. Your store will be connected to your Zapier account.
- Select the store you want to connect with the Zapier
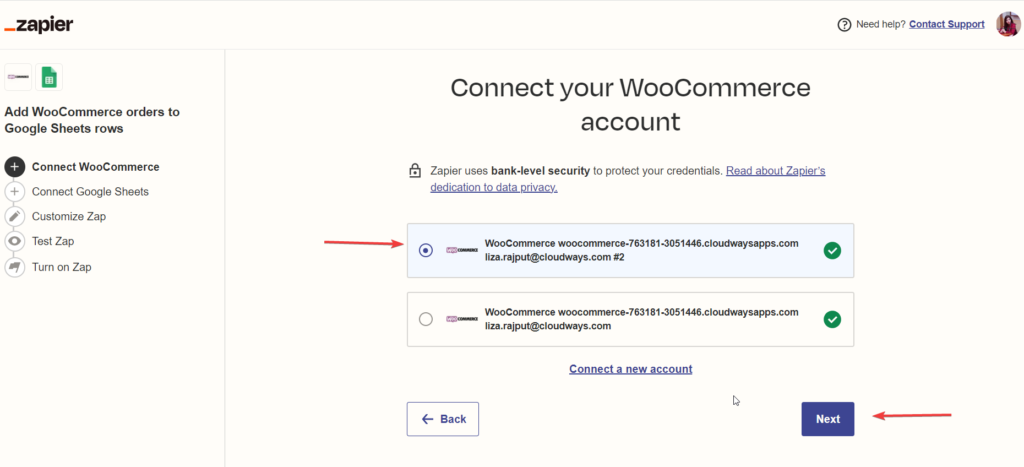
Step 4: Set the Trigger Rule
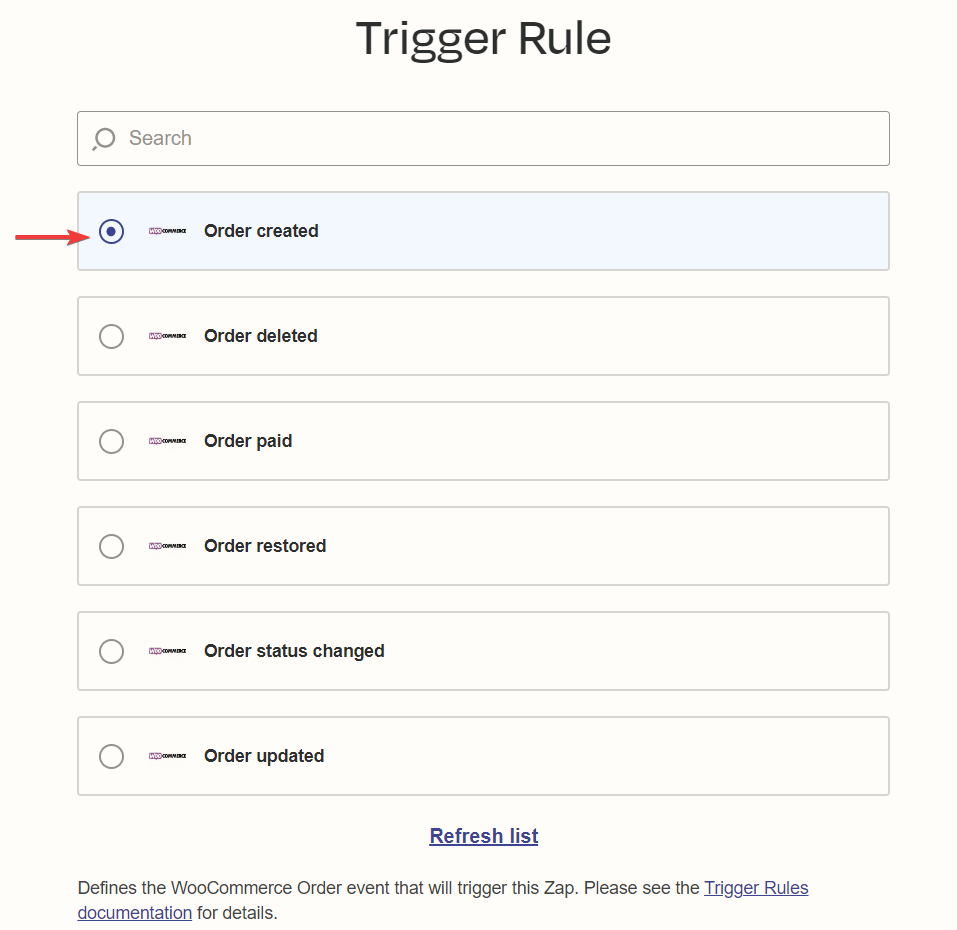
Now you need to create the trigger event. In this tutorial, my trigger event will be “Whenever a new order is placed, it will be updated in the google sheets”.
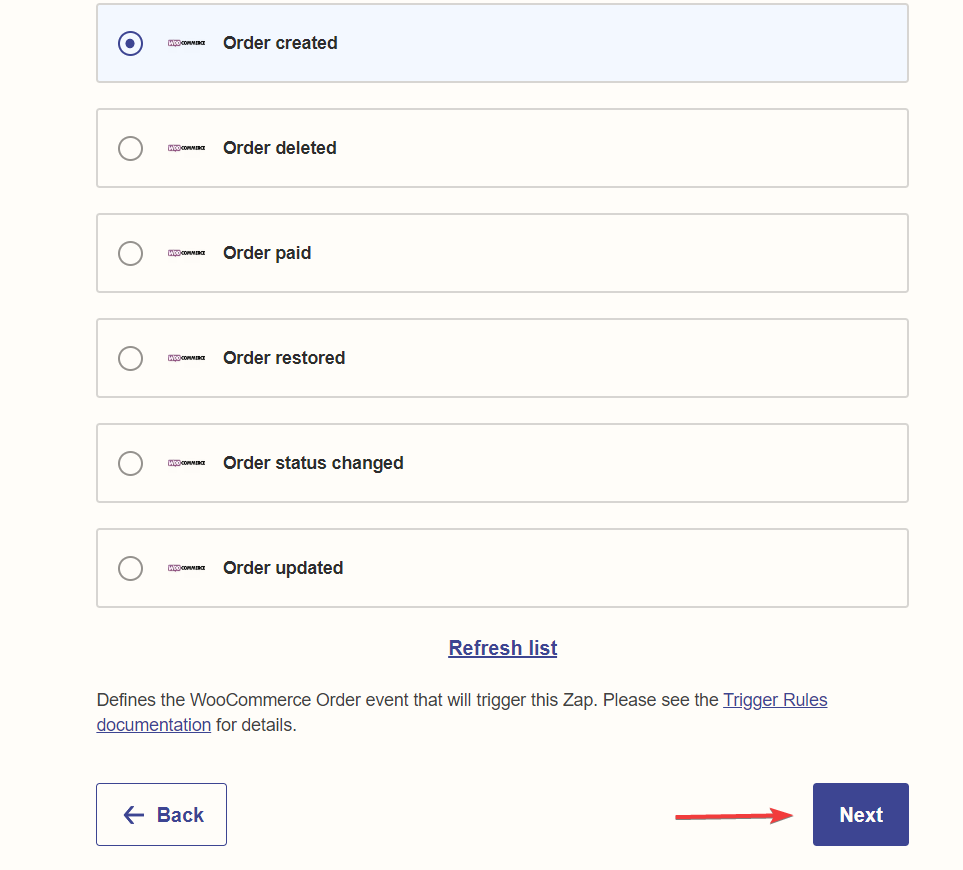
- For this, I will select “Order created” as a trigger event.
Step 5: Connect to Google Sheets
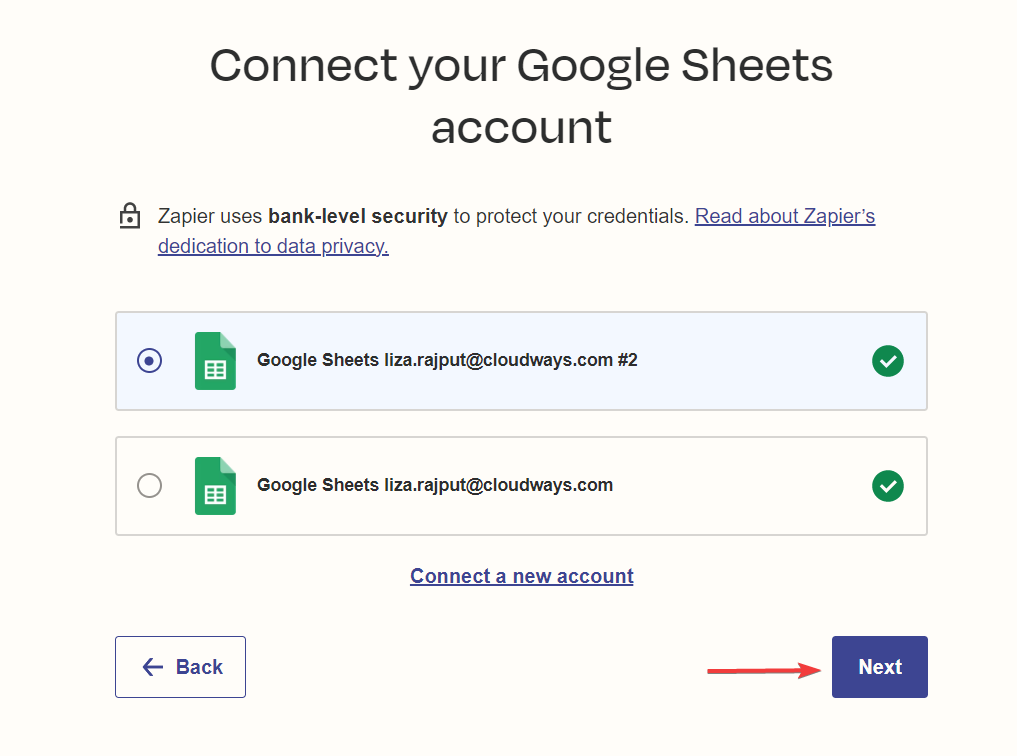
- When you click next, you’ll be prompted to connect your Google Sheets Account
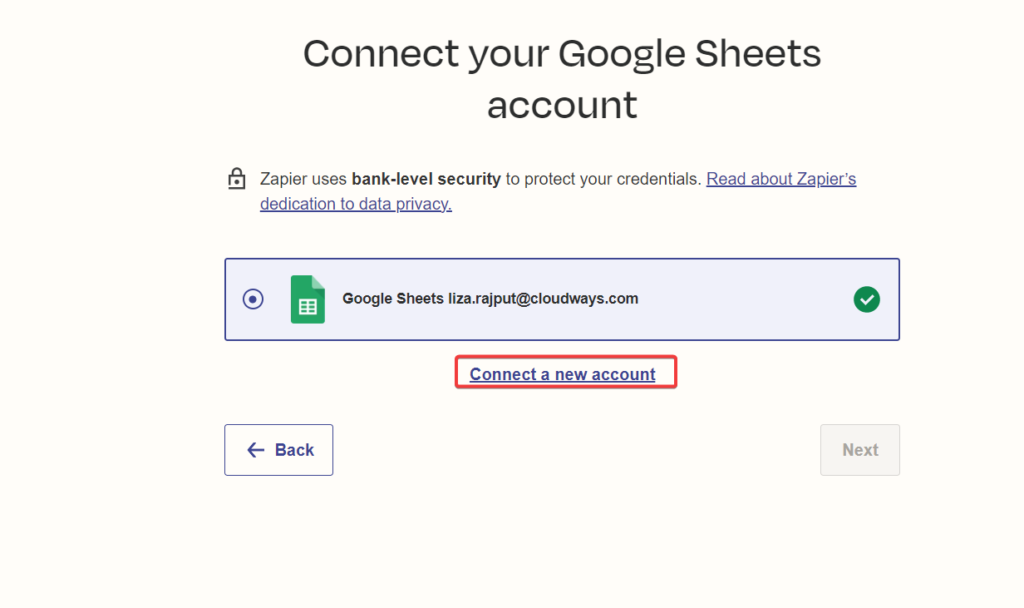
- Add the account and click Next
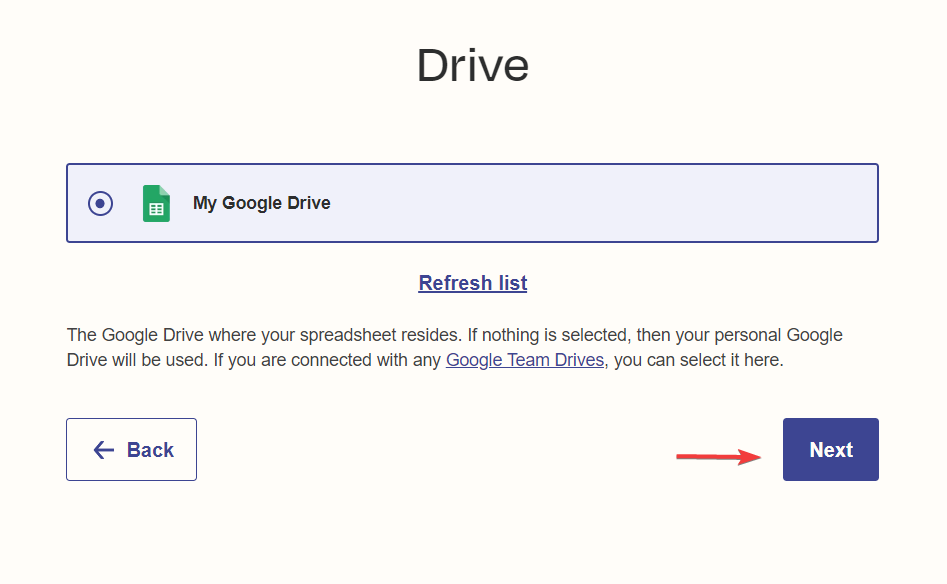
- Now select the Drive and click next
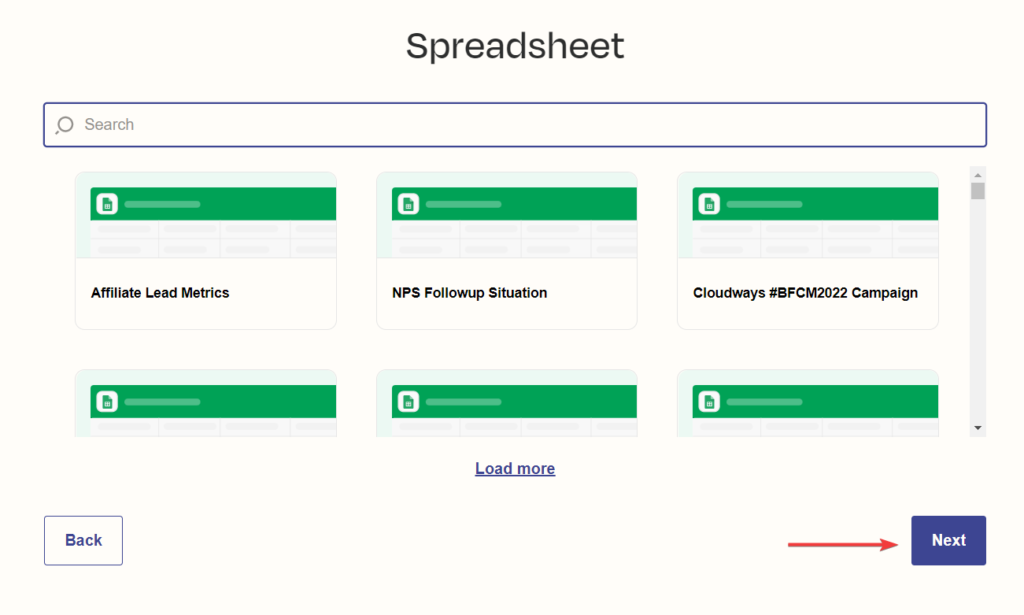
- Select the Google sheet where you want to list your orders and click Next
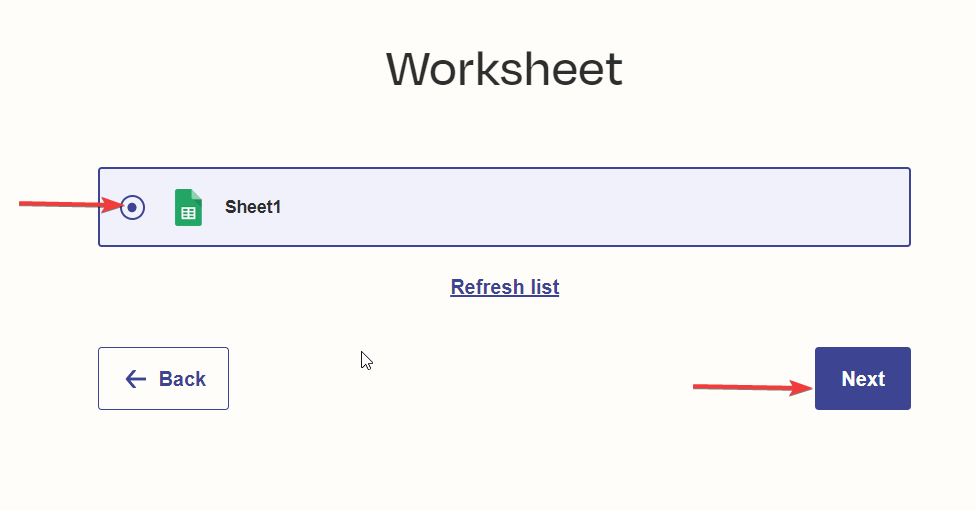
- Select the sheet and click Next
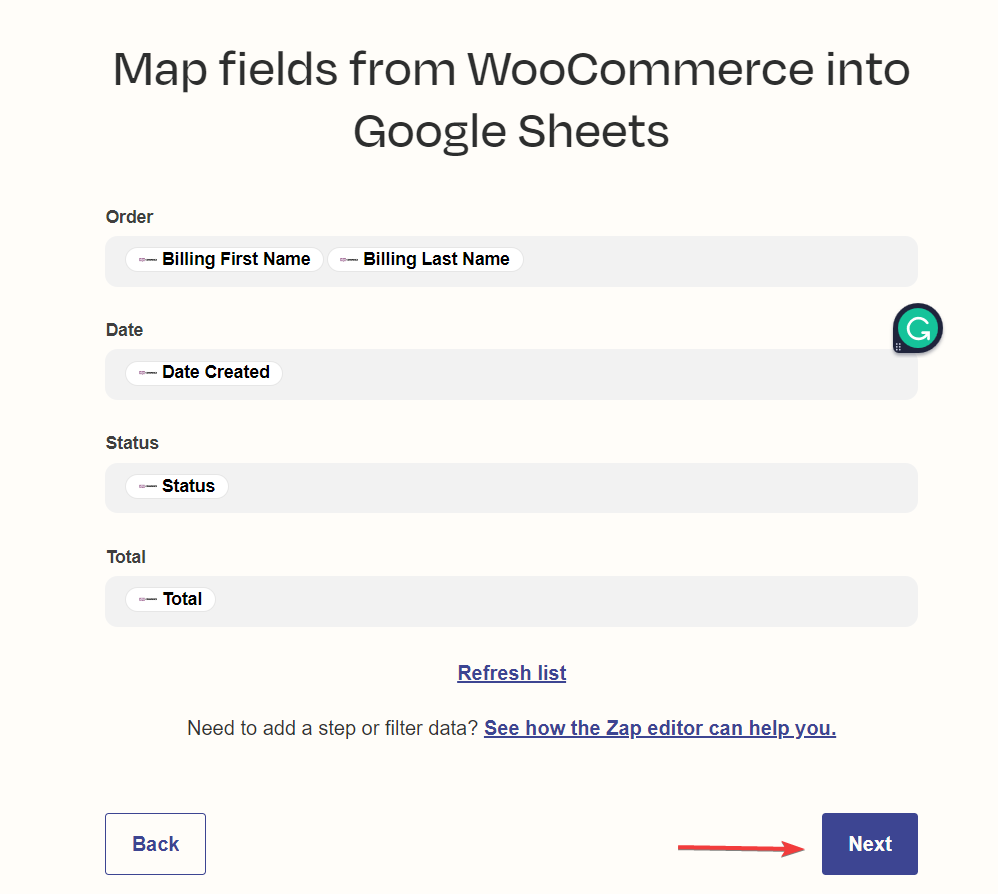
Step 6: Customize Zap
- Now you need to map fields from WooCommerce into Google Sheets
Step 7: Test Zap
- Now you need to test the Zap
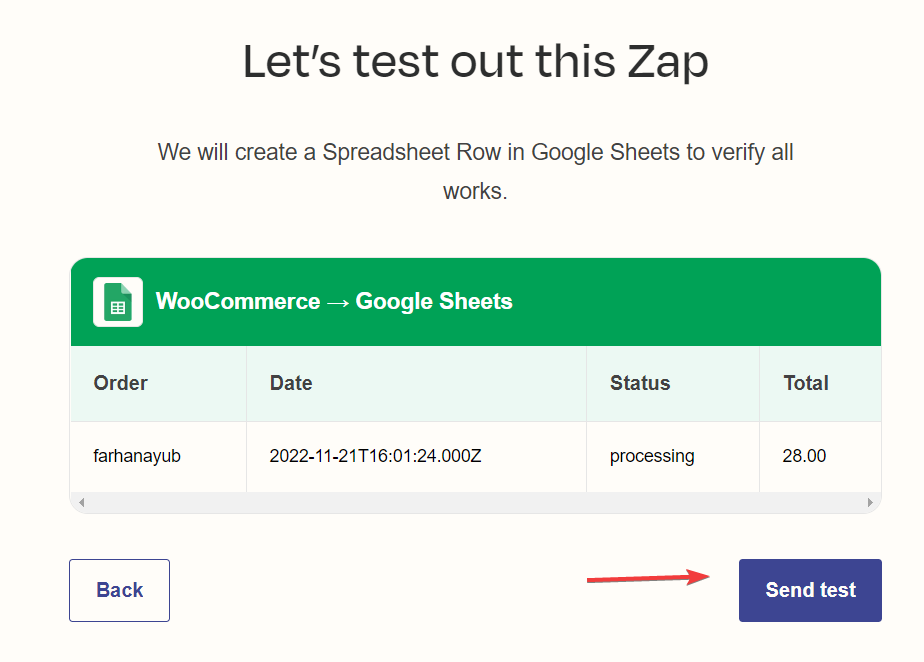
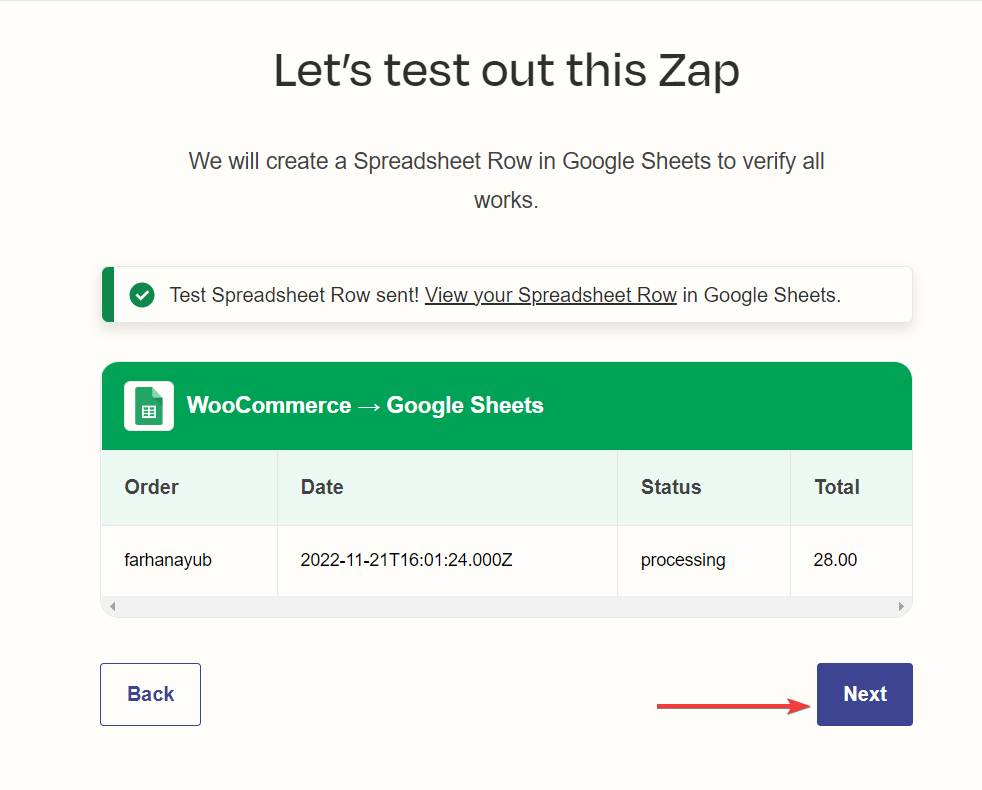
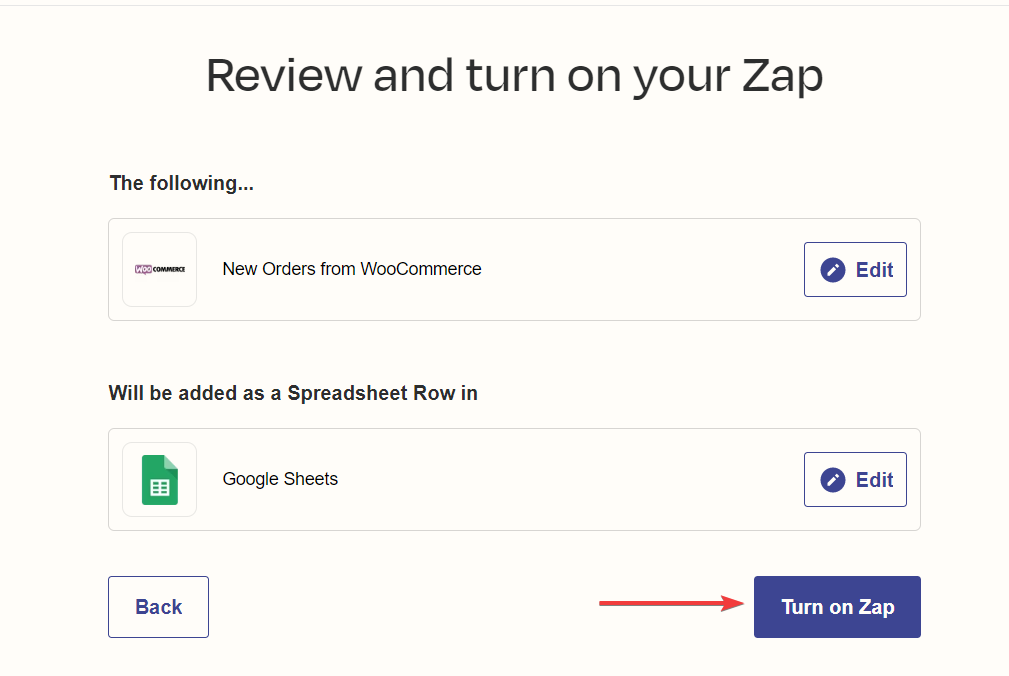
Step 8: Review and Turn on Zap
- Now you need to review the files and click on turn on Zap
- Click on View your google sheet to ensure that WooCommerce orders are listed on the selected Google Sheet
- Here’s how the Google sheet looks like
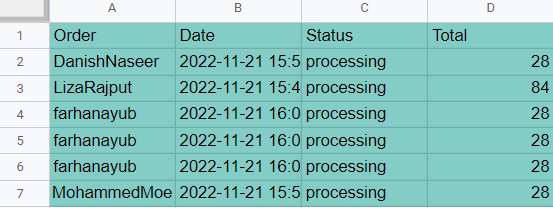
Tadaa! You’ve successfully integrated your WooCommerce orders with Google sheets.
Common Issues With WooCommerce Zapier Integration
Here are some common problems that users face during the WooCommerce Zapier Integration.
1. Using Line Items
Line item is an array that contains a list of multiple values. Users would want to use line items specifically when they are linking WooCommerce orders, products, and customers to google sheets. However, they usually need help with using the line items in Zapier.
But this can be easily fixed. You just need to ensure that the trigger and action you’re using have line item support on Zapier.
2. Not Getting Notifications of New Orders or Customers
If you are not notified of new orders or customers, your maintenance mode might be on. Ensure to turn this off. This usually blocks the connection between WooCommerce and Zapier.
3. Getting Invalid Webhook URL
Sometimes, when users paste the webhook into WooCommerce, they get the Invalid Webhook URL error. This error indicates that you aren’t using the latest version of the WooCommerce Zapier plugin.
You can fix this error by either upgrading to the latest version of the WooCommerce Zapier plugin or using a different format for your Webhook.
This will allow you to pass the validation check.
4. Orders are not being sent to Zapier
Sometimes, the orders need to be pulled to Zapier. You can fix this by ensuring that both WooCommerce and WooCommerce Zapier plugins are up to date.
If you’re still facing this issue, you must go to https://woocommerce.com/my-account/create-a-ticket/ and submit a ticket so that the WooCommerce support team can assist you.
WooCommerce Zapier Alternatives
Undoubtedly WooCommerce Zapier plugin is great to use and offers a wide range of functionality. But if you want to use the Zapier plugin’s functionality without paying, you can check these alternatives:
Summary
To sum up, WooCommerce Zapier integration saves you from manual drainage and increases the store’s efficiency by automating the process. With the help of this tutorial, you can easily install and activate the WooCommerce Zapier plugin and integrate it with WooCommerce. Also, you will learn to create zaps to automate the processes. You can also integrate other useful plugins to WooCommerce like Hubspot, Stripe, MailChimp, and many more using Cloudways.
If any questions, feel free to reach out.
Customer Review at 
“Great performance for the price, and plenty of control”
Sean P [SMB Owner]
Liza Rajput
Liza Rajput is a Technical Content Producer at Cloudways. Being a software engineer, she loves to play with data and its processes and wishes to grow and excel in Data Science and Big Data Engineering. She has also been an avid reader and exceptional writer, with sufficient experience in technical, research-based, and creative writing.
